Introduction to Zbrush Digital Tutors
Mesh Creation Zspheres
– To start creating geometry with Zspheres, select the Zsphere tool from the Tool palette, draw it on the canvas then enter edit mode (T).
– To create new Zspheres enter draw mode, move the cursor to the deisred position on the model and LMB + Drag to draw a Zsphere at the desired size.
– Use the move mode to drag the new Zsphere to the desired position.
– Link spheres connect Zspheres; they cannot be edited directly but can be converted to Zspheres.
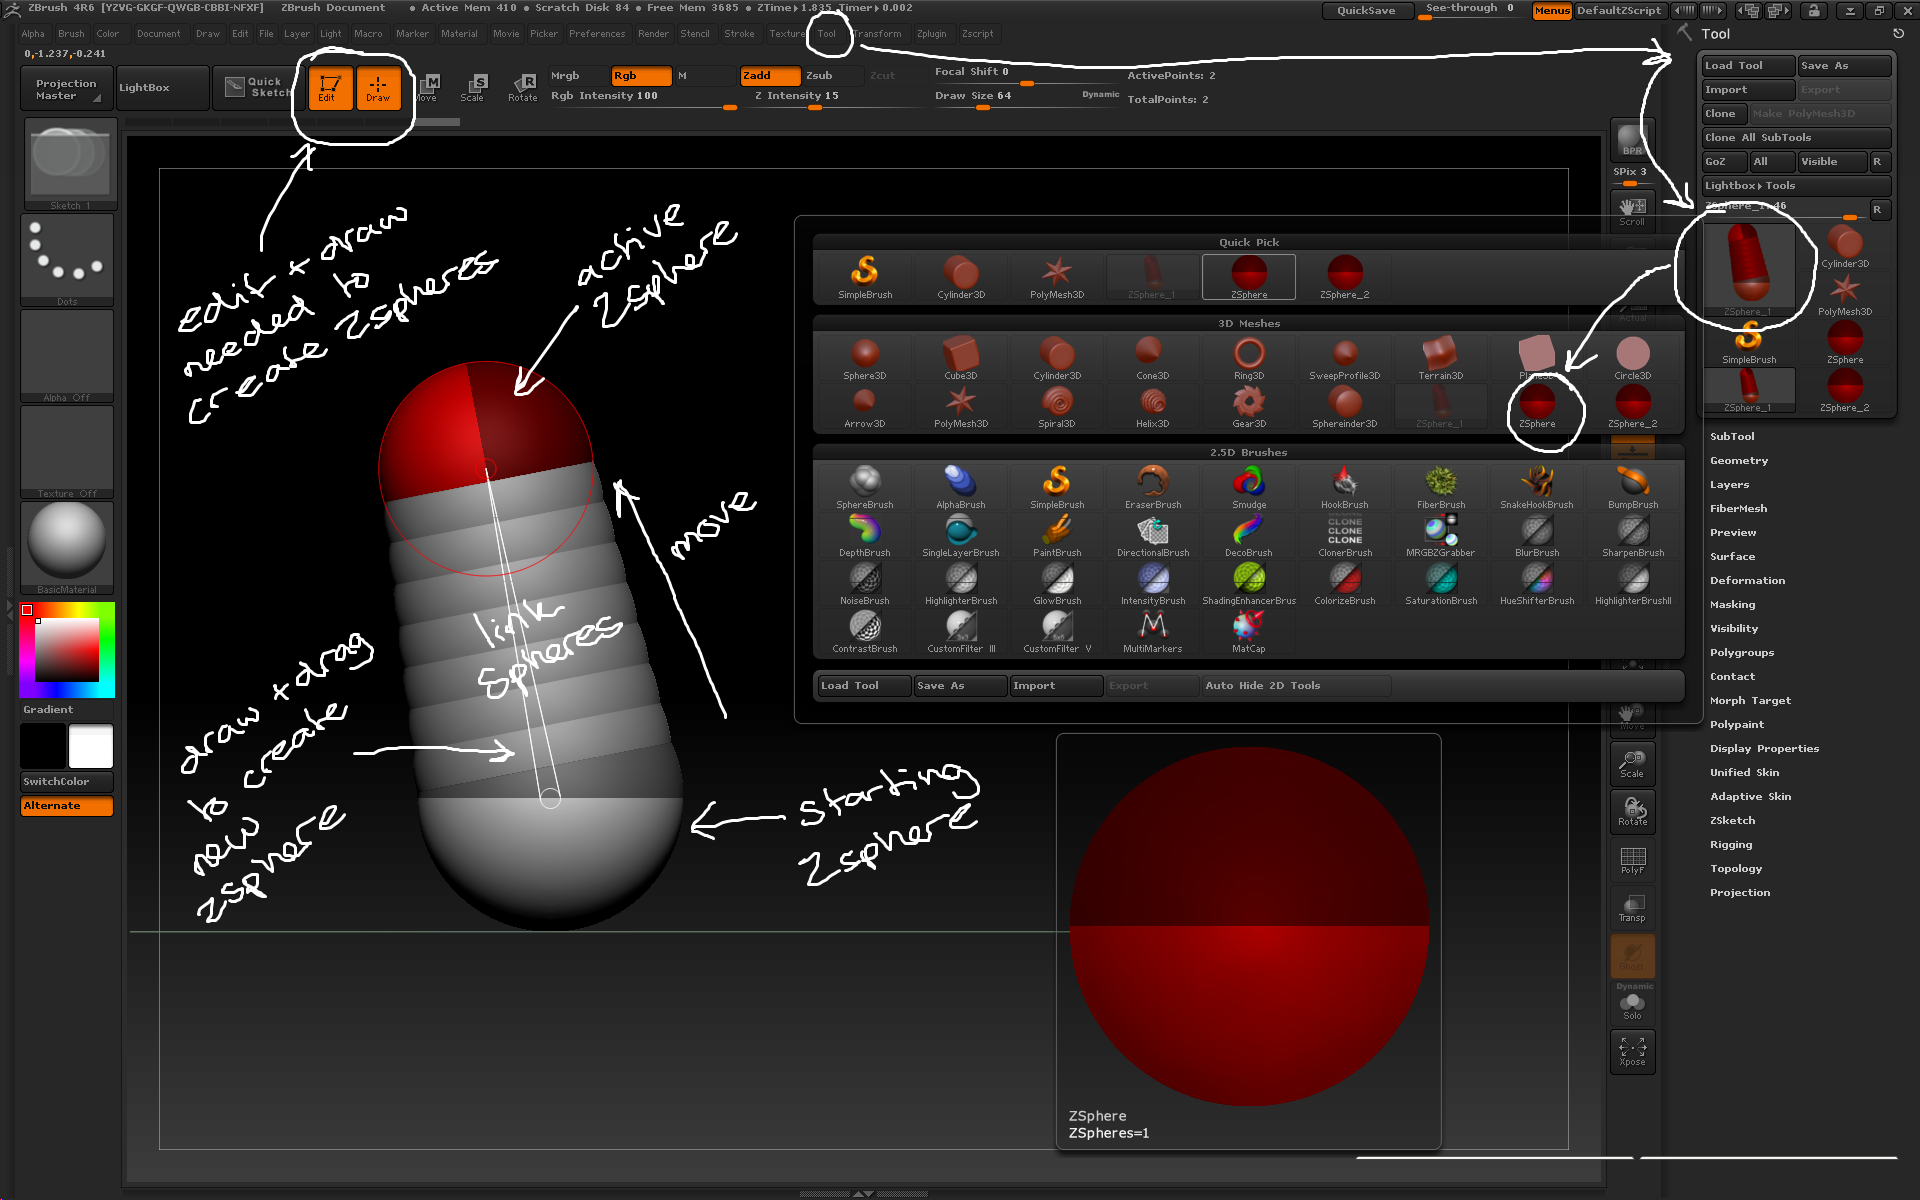
Use the tool palette + draw mode to create Zspheres
– Once created Zspheres can be scaled with the Scale mode.
– Zspheres can be rotated with the rotate mode. By clciking on the Link sphere chain with the rotate mode active you can rotate and entire chain of Zspheres.
– Hold Shift while drawing Zspheres to create a Zsphere the same size as the previous Zsphere.
– Click on a link sphere while in draw mode to create a new Zsphere from a link sphere.
– Hit A while in Zsphere mode to view an adaptive skin, which is a low-poly mesh applied over the Zsphere model.
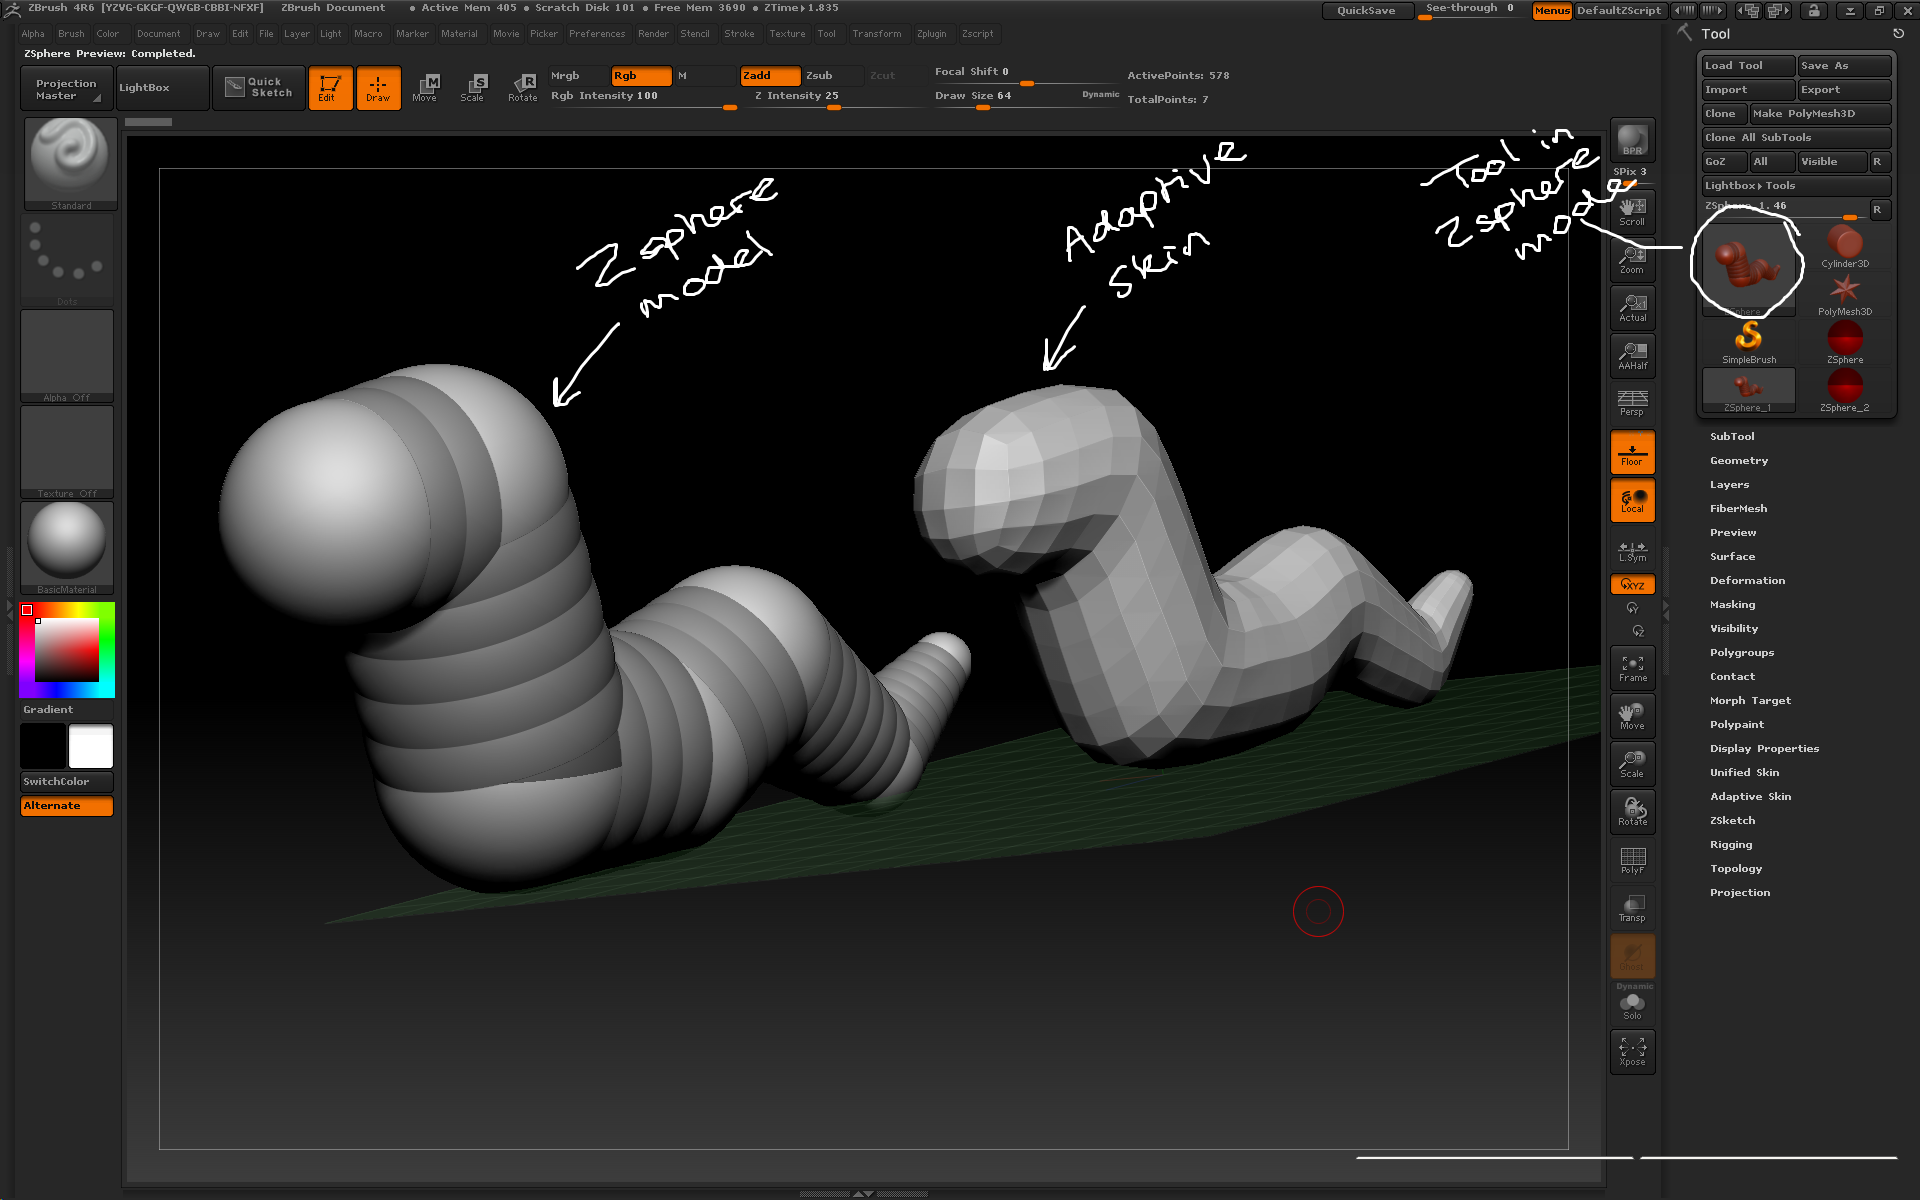
Press A while Zsphere modelling to view an adaptive skin preview of the geometry being created.
– The Tool > Adaptive Skin subpalette contains setting for the adaptive skin. The Density slider determines how many subdivision levels ie how many polygons are in the adaptive skin.
– Tool > Adaptive Skin > G Radial modifies the number of spanes or polygon rings created in the adaptive skin, and has a similar effect to the Density slider.
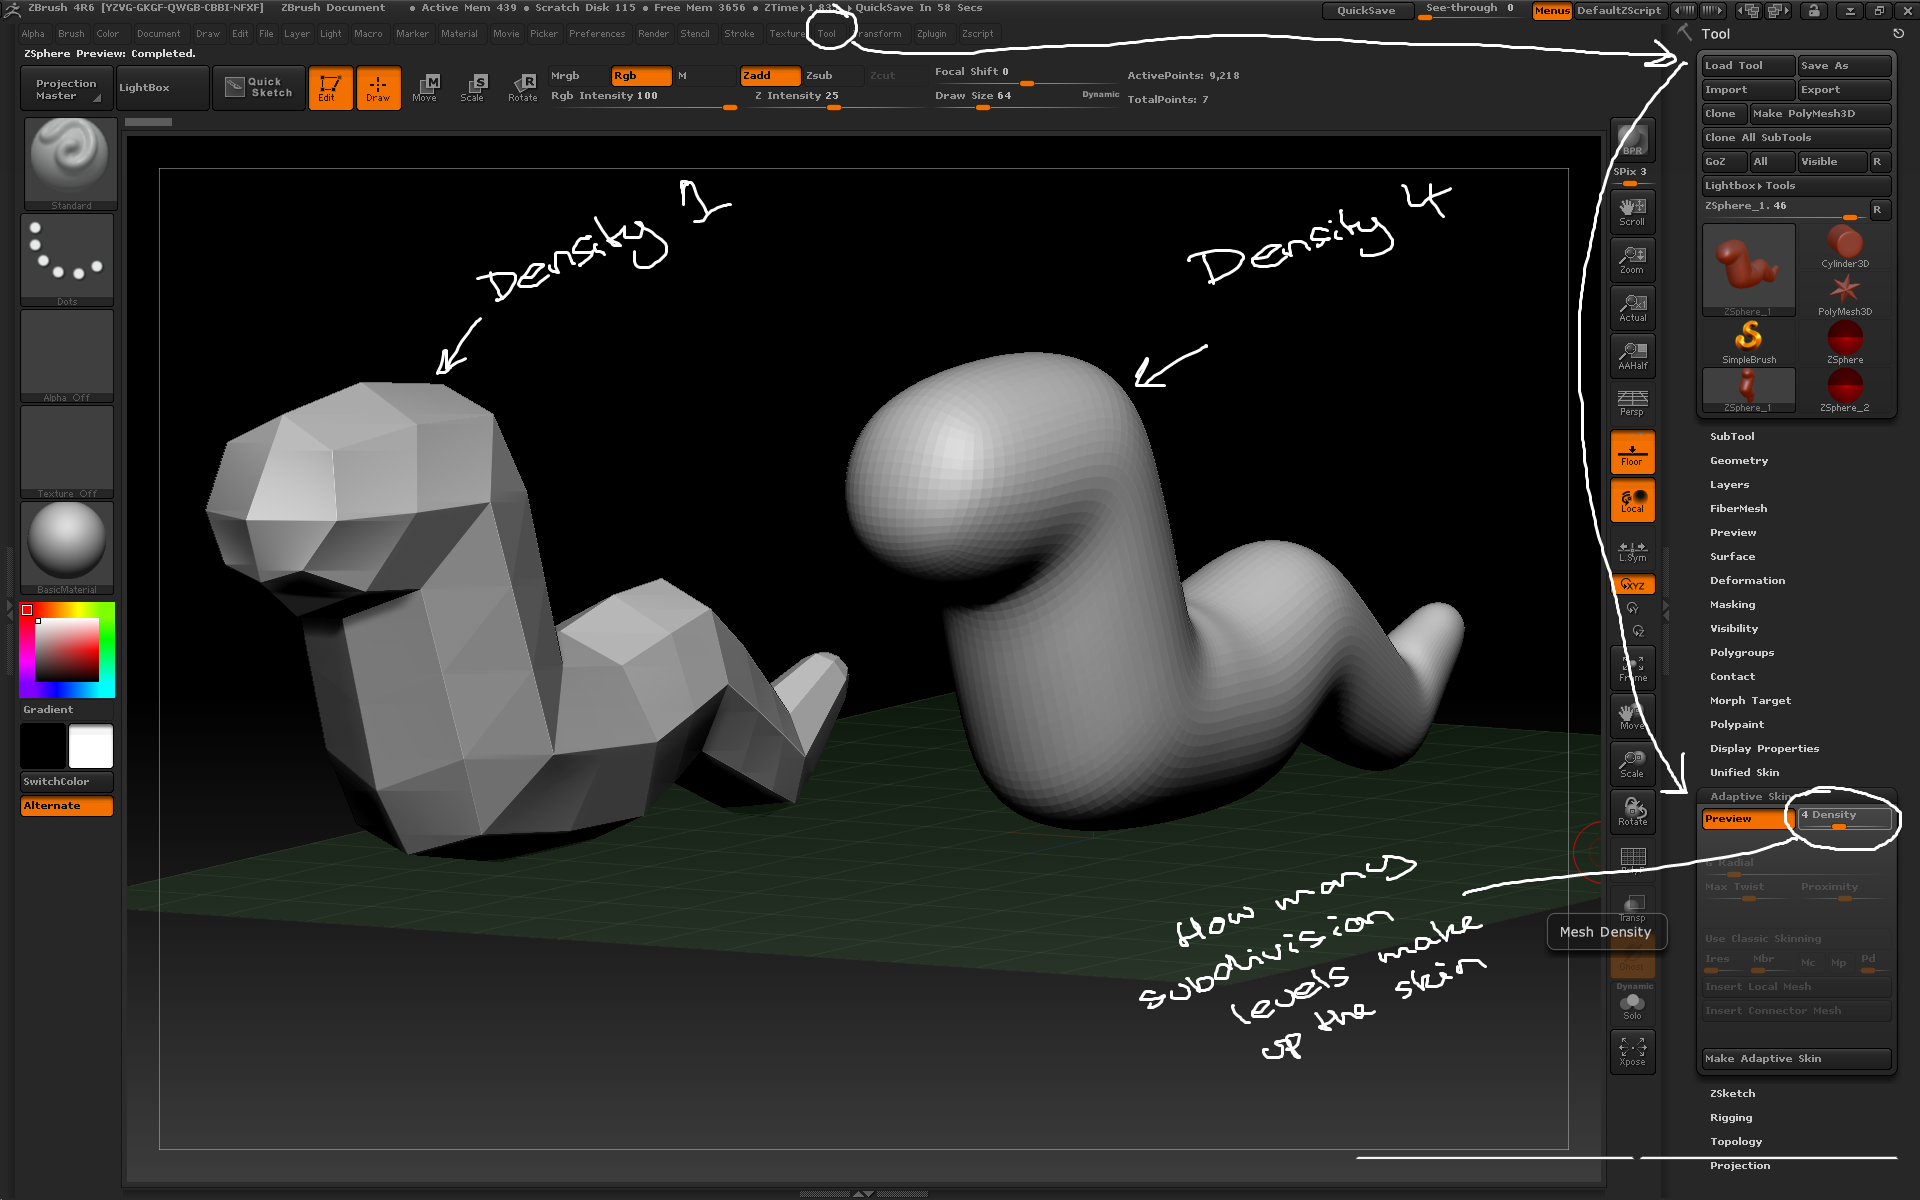
The subdivision level of the adaptive skin can be modified using the density slider.
– Once you’re happy with the Zsphere model press Tool > Adaptive Skin > Make Adaptive Skin to create a polygon mesh from the Zsphere model. The new tool will appear in the tool palette called eg Skin_Zsphere_1. The model can now be sculpted normally.
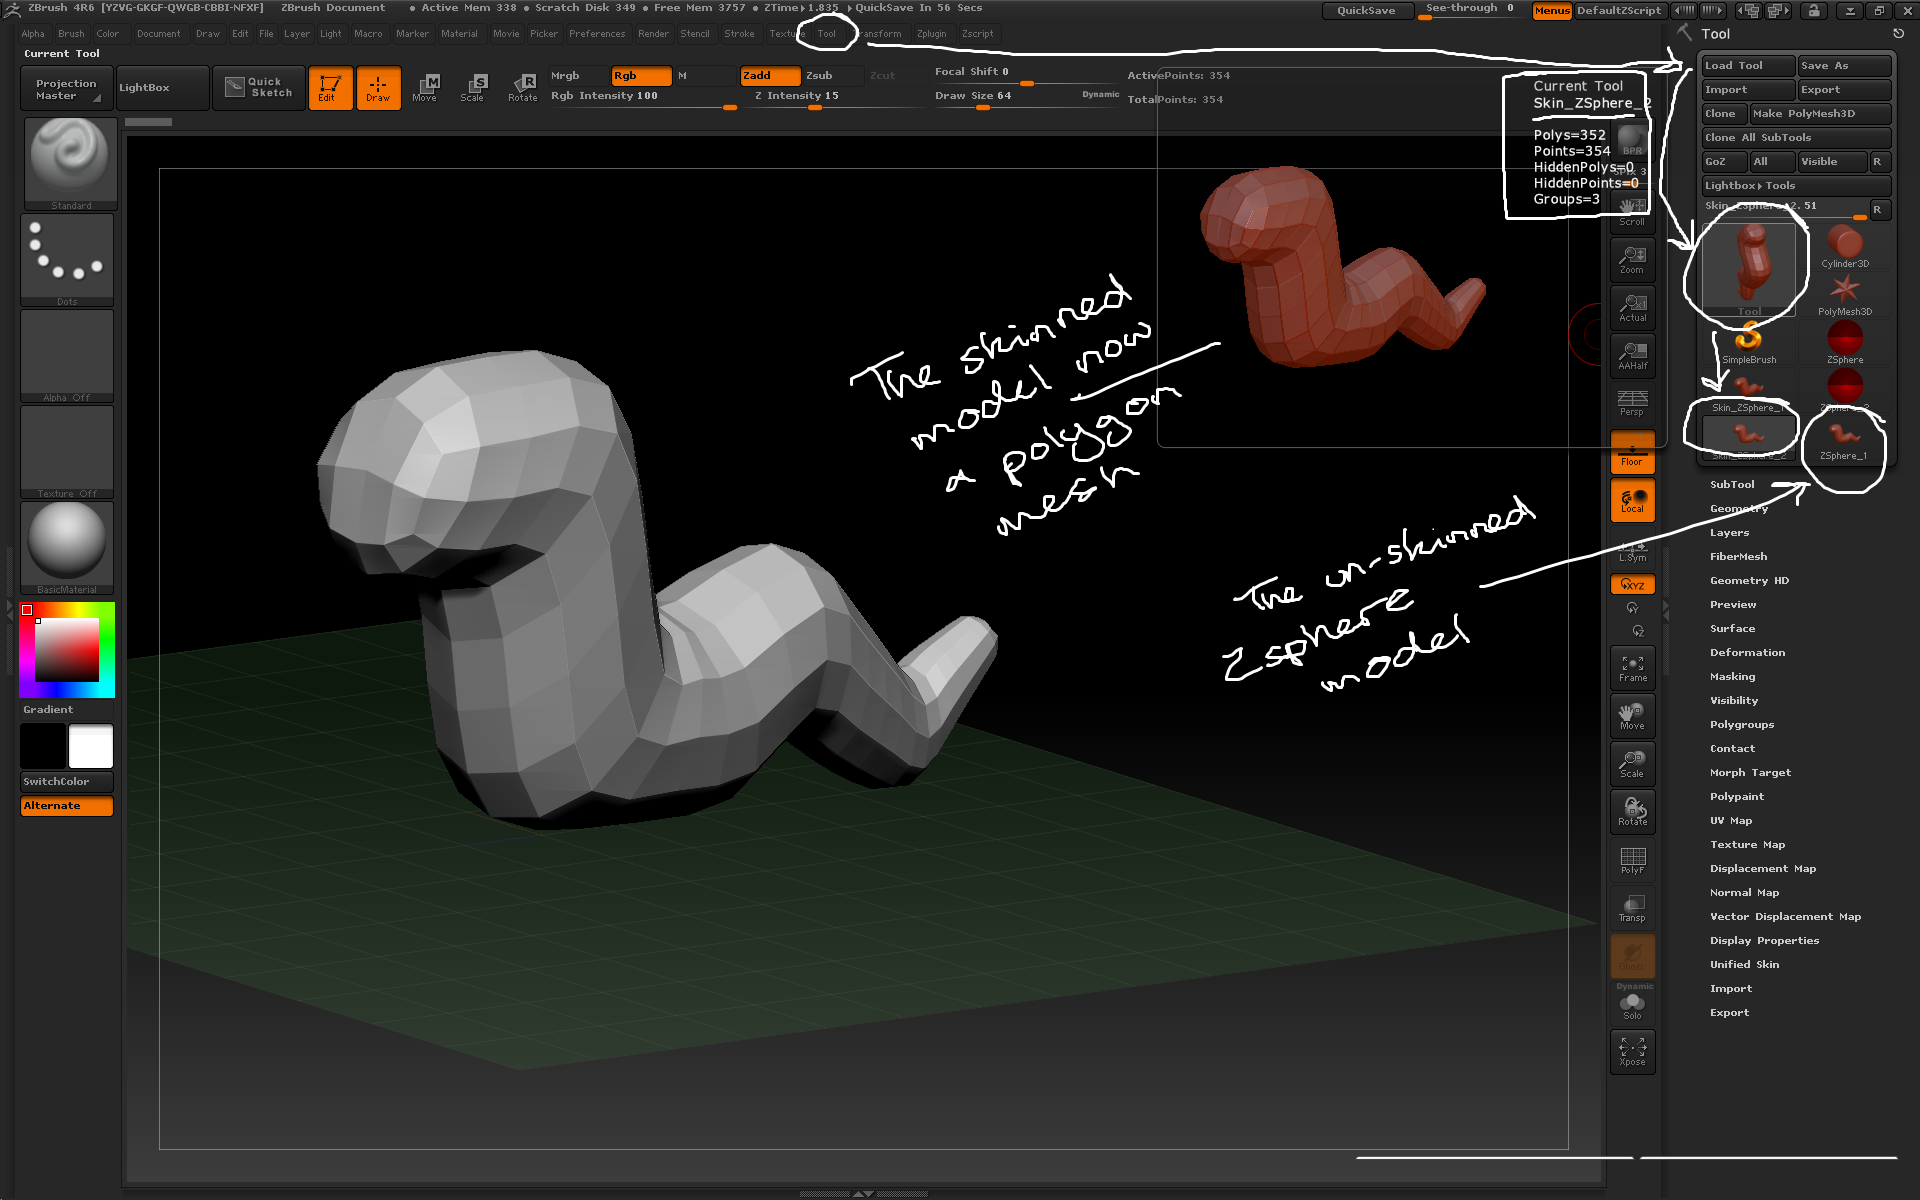
Pressing Make Adaptive SKin creates a polygon mesh form the Zsphere model and adds it to the tool palette.
