Introduction to Zbrush Digital Tutors
Remeshing Geometry
– Zbrush contains tools for creating a new unified mesh from individual parts. Tool > Subtool > Remesh > Remesh all creates a new mesh from everything in the current subtool. Symmetry options can be used to make symmetrical models from asymmetrical subtools.

Subtool > Remesh all can be used to create a single mesh form a group of objects.
– Objects within the subtool can be set as additive or subtractive objects for boolean operations.
– The Res slider under Remesh determines the resolution of the new geometry.
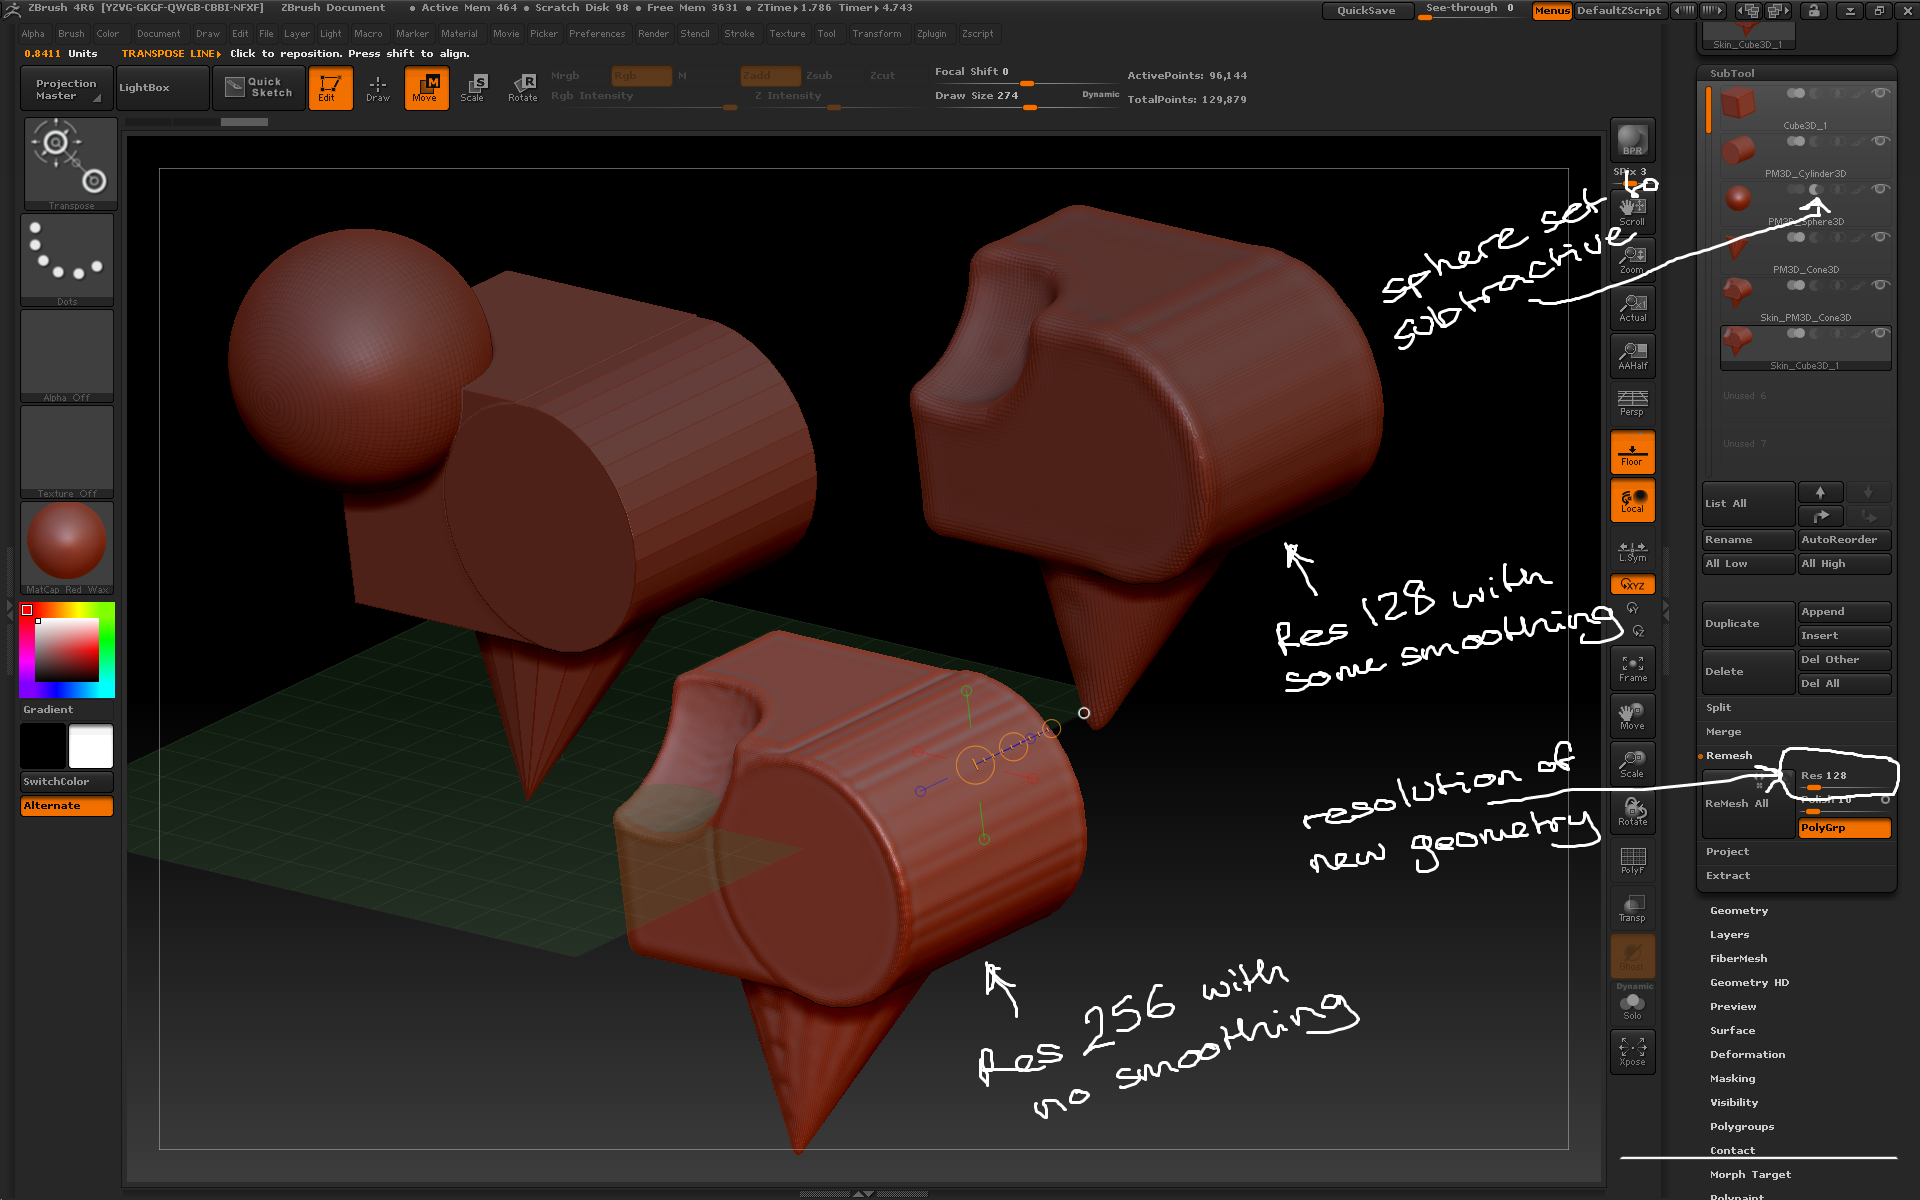
Subtools can be used to add or subtract from the new mesh.
– Tool > Geometry > ZRemesher contains tools for changing the resolution of a mesh or improving the flow of polygons in the geometry, for example making sure the polygon flow on a face follows muscle groups.
– ZRemesher > Target Polygons Count determines how many thousand polygons are in the new mesh. Press ZRemesher to complete the action.
– Use the ZRemesherGuides Brush from the brush palette to lay guidelines for the new mesh. Use the Zremesher > Curve Strength slider to determine how closely the guidelines are followed.
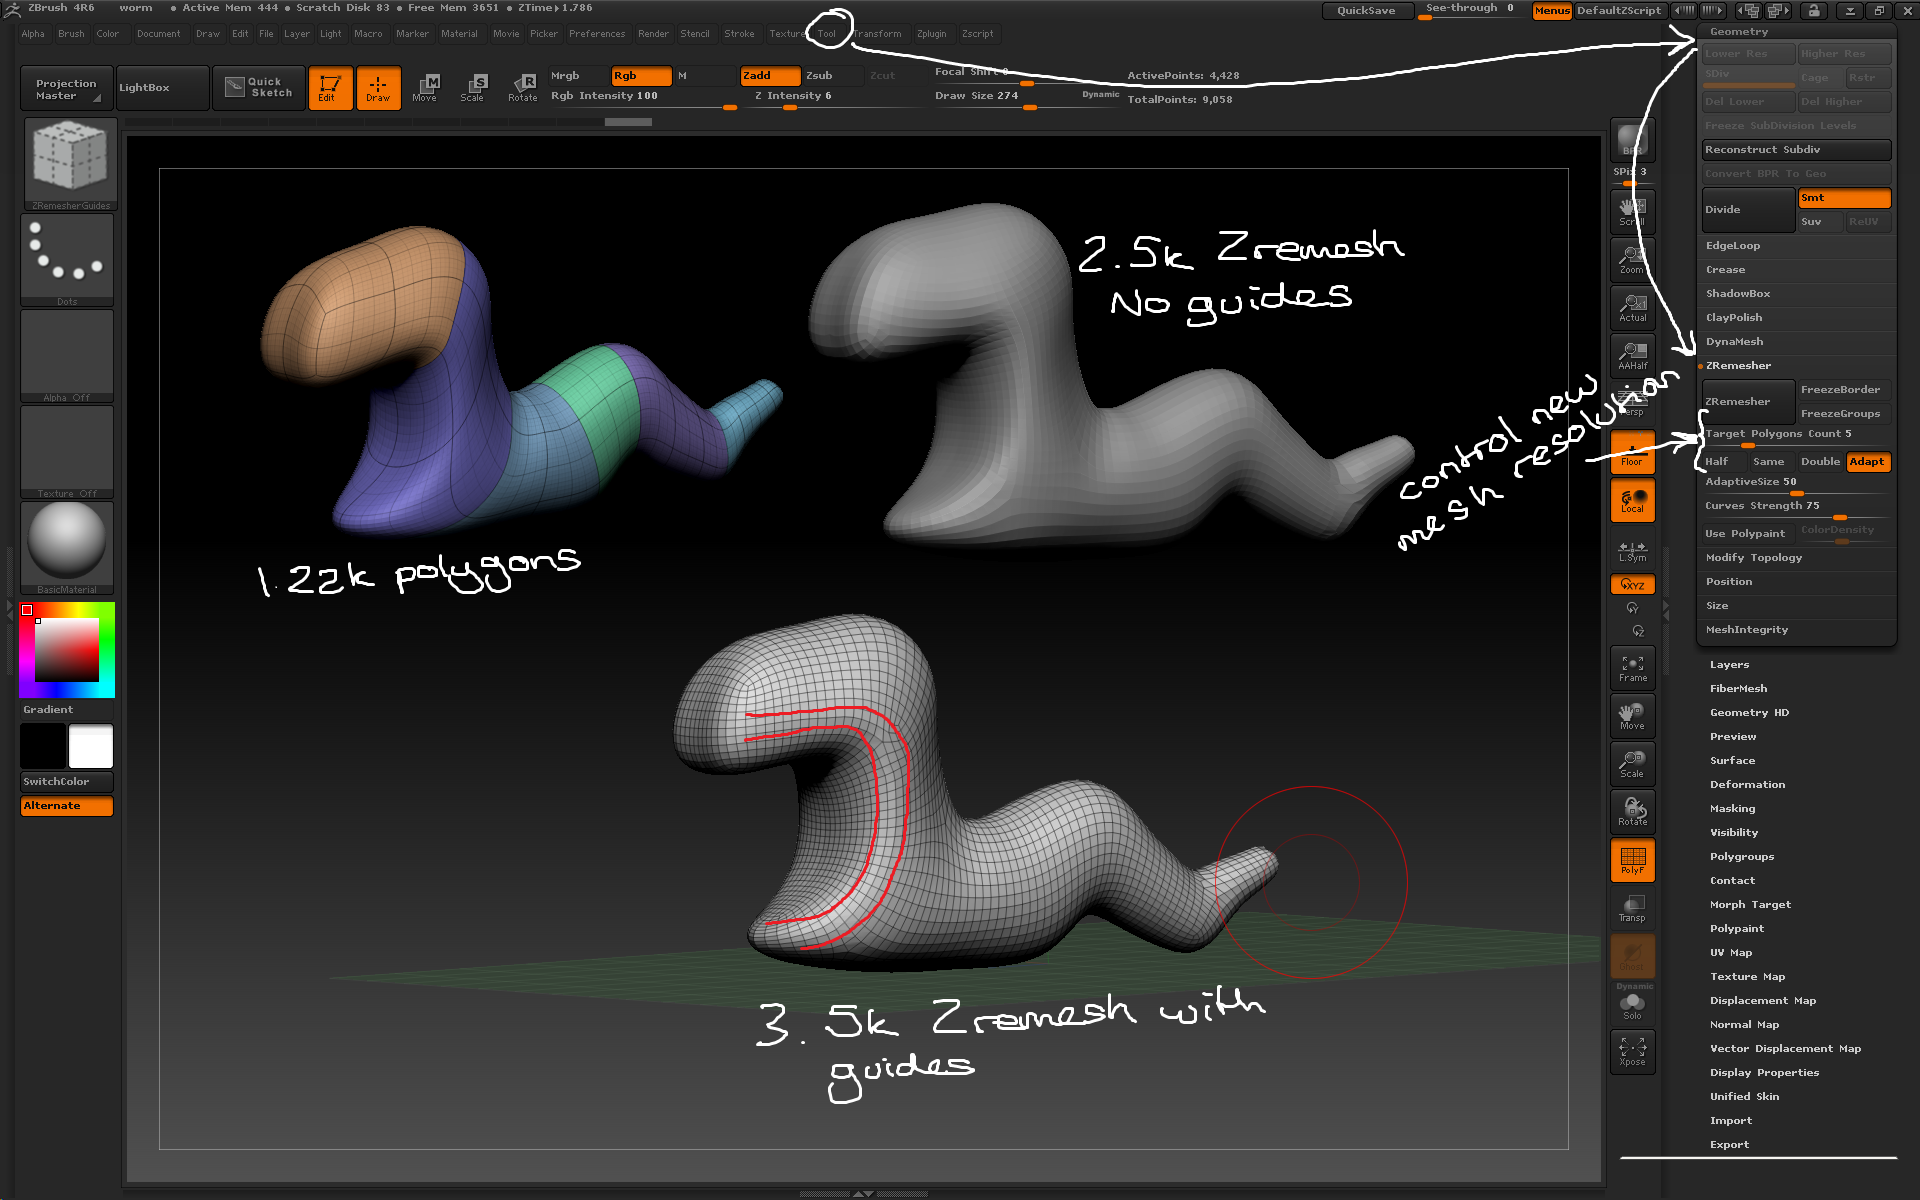
Zremesher can be used to change the resolution and polygon flow of a mesh.