Introduction to Zbrush Digital Tutors
Mesh Creation Dynamesh
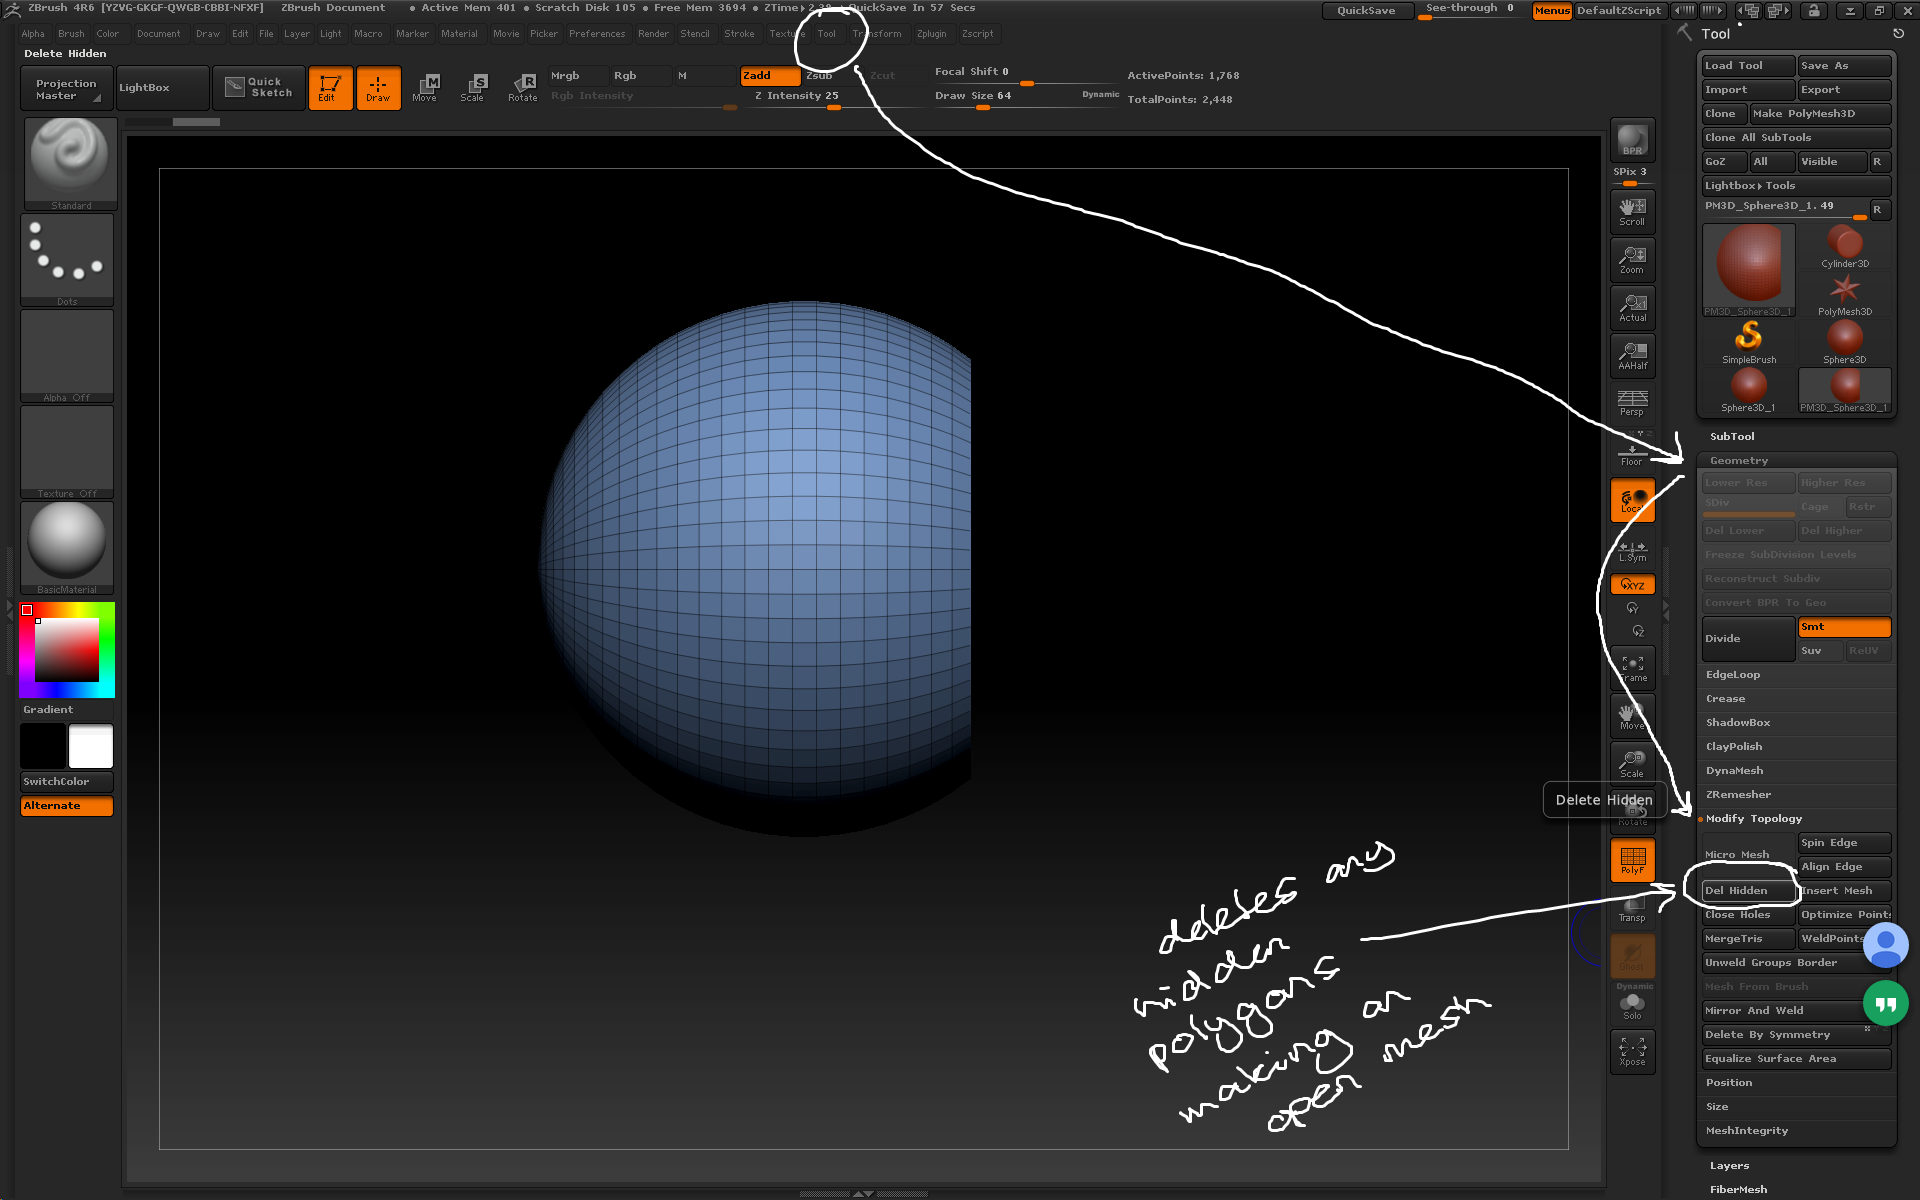
– Dynamesh is a way of modelling that protects the geometry from the stretching effect making large scale changes to a model can have.
– To enable dynamesh have an active tool and go to Tool > Geometry > Dynamesh.
– When dynamesh is enabled, at any time during sculpting Ctrl + Drag off the model and the geometry will be recalculated to give an optimal mesh.
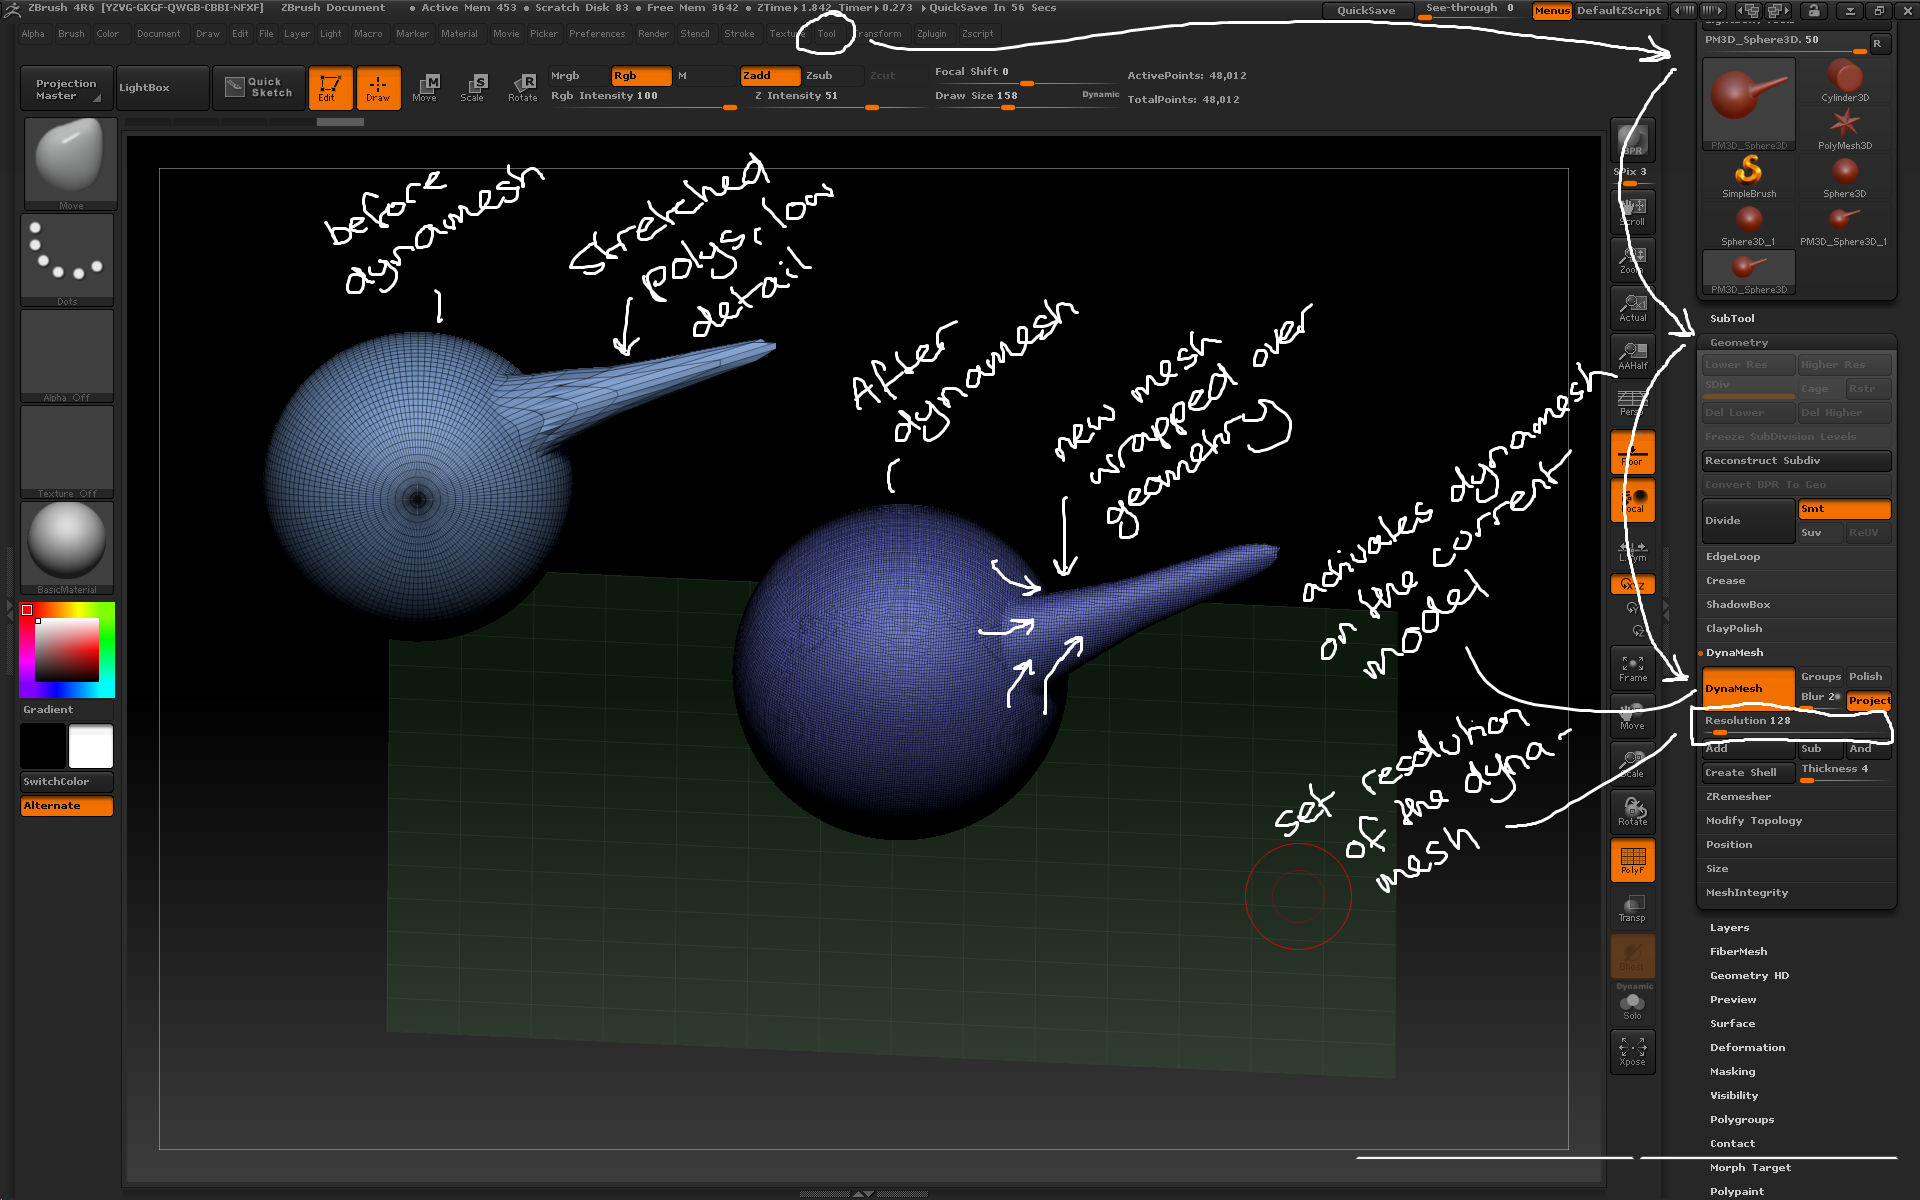
Dynamesh allows for re-skinning a model with a new, optimised mesh at any time using Ctrl + drag.
– depending on the severity of the distorted polygons, the model may need smoothing after dynameshing.
– dynamesh can be used in conjunction with InsertMesh brushes by creating a single unified skin after the new mesh is inserted.
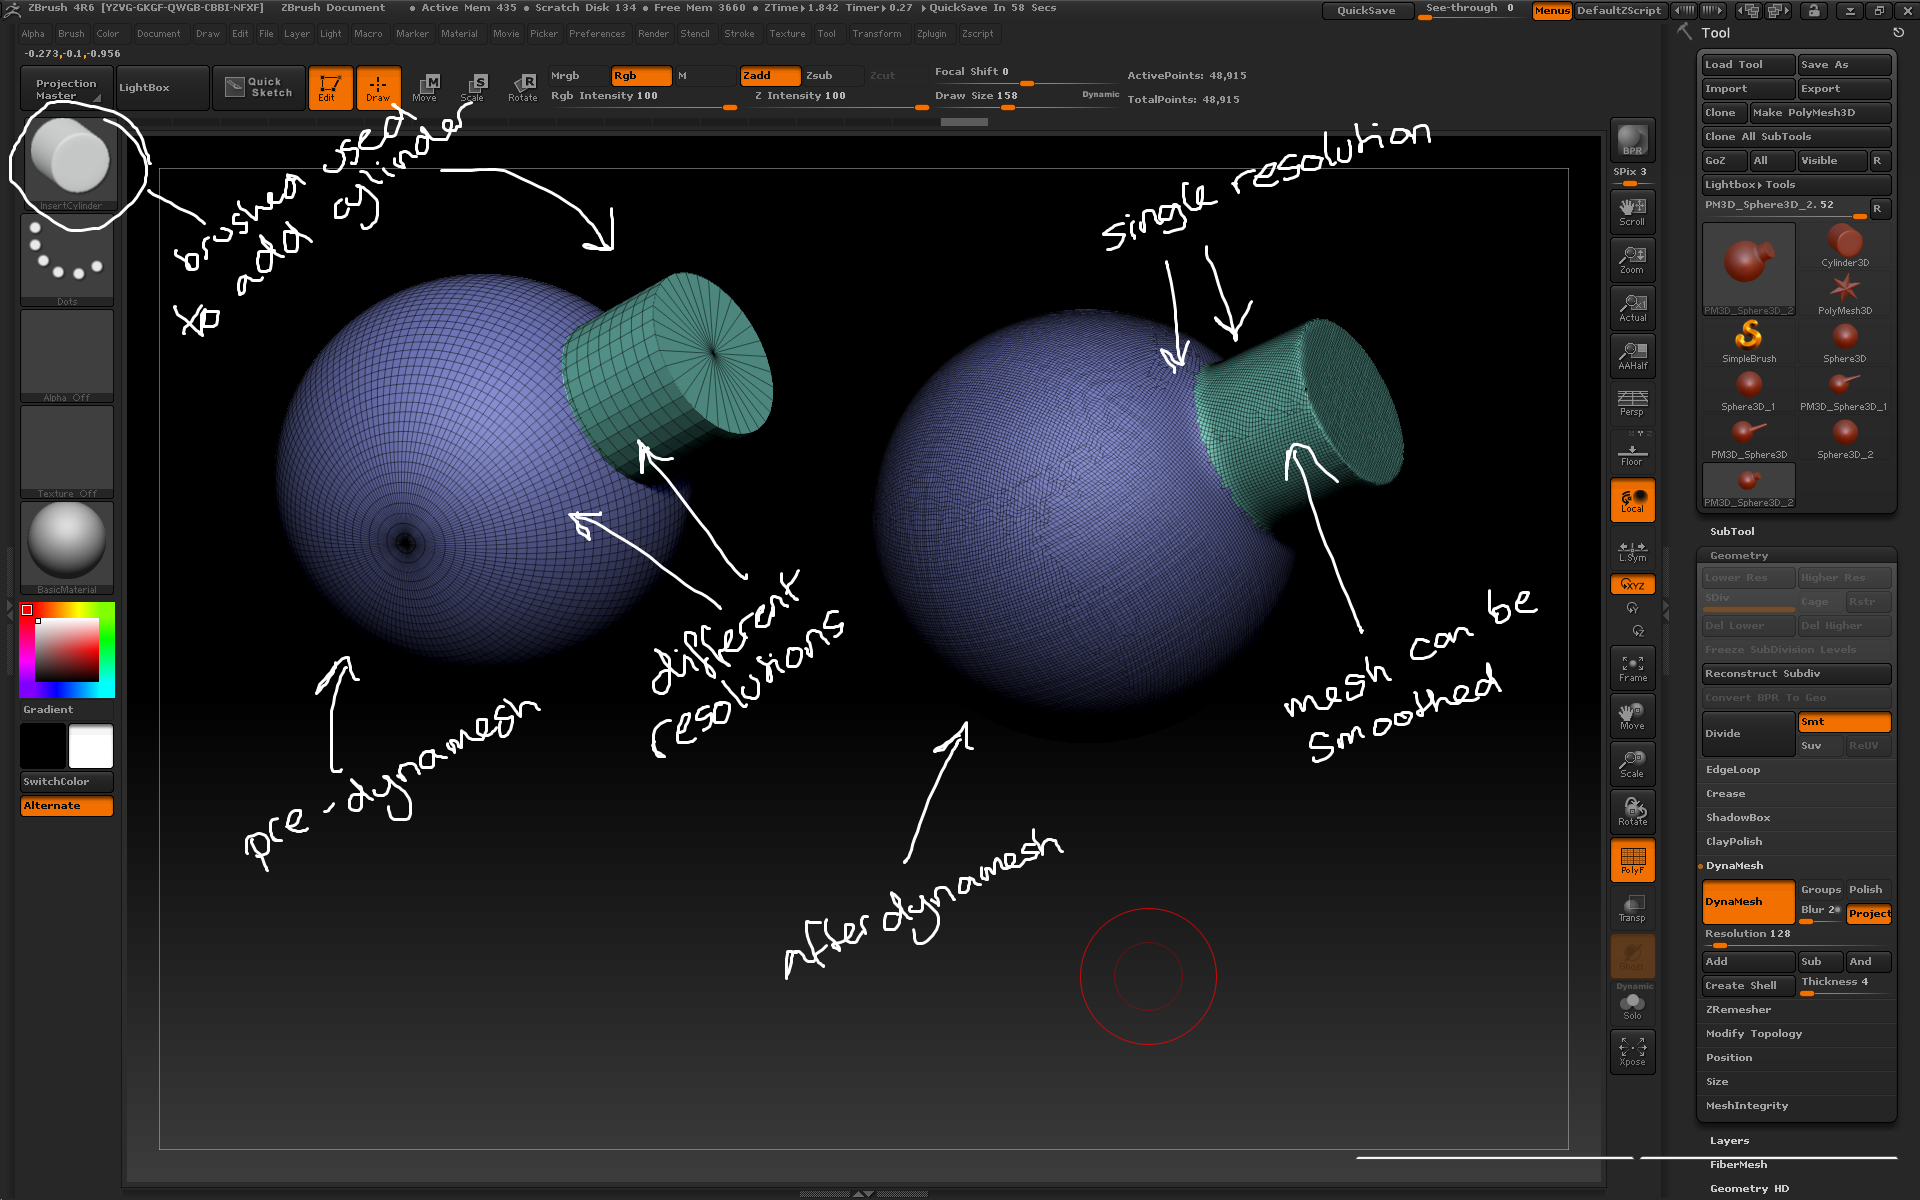
Dynamesh can be used with the InsertMesh brushes to unify a model.
– Tool > Geometry >Dynamesh > Groups makes the dynamesh tool work by polygroups. If a mesh is split into separate polygroups then dynameshed each group can be moved and manipulated separately, before dynameshing the whole model once more.
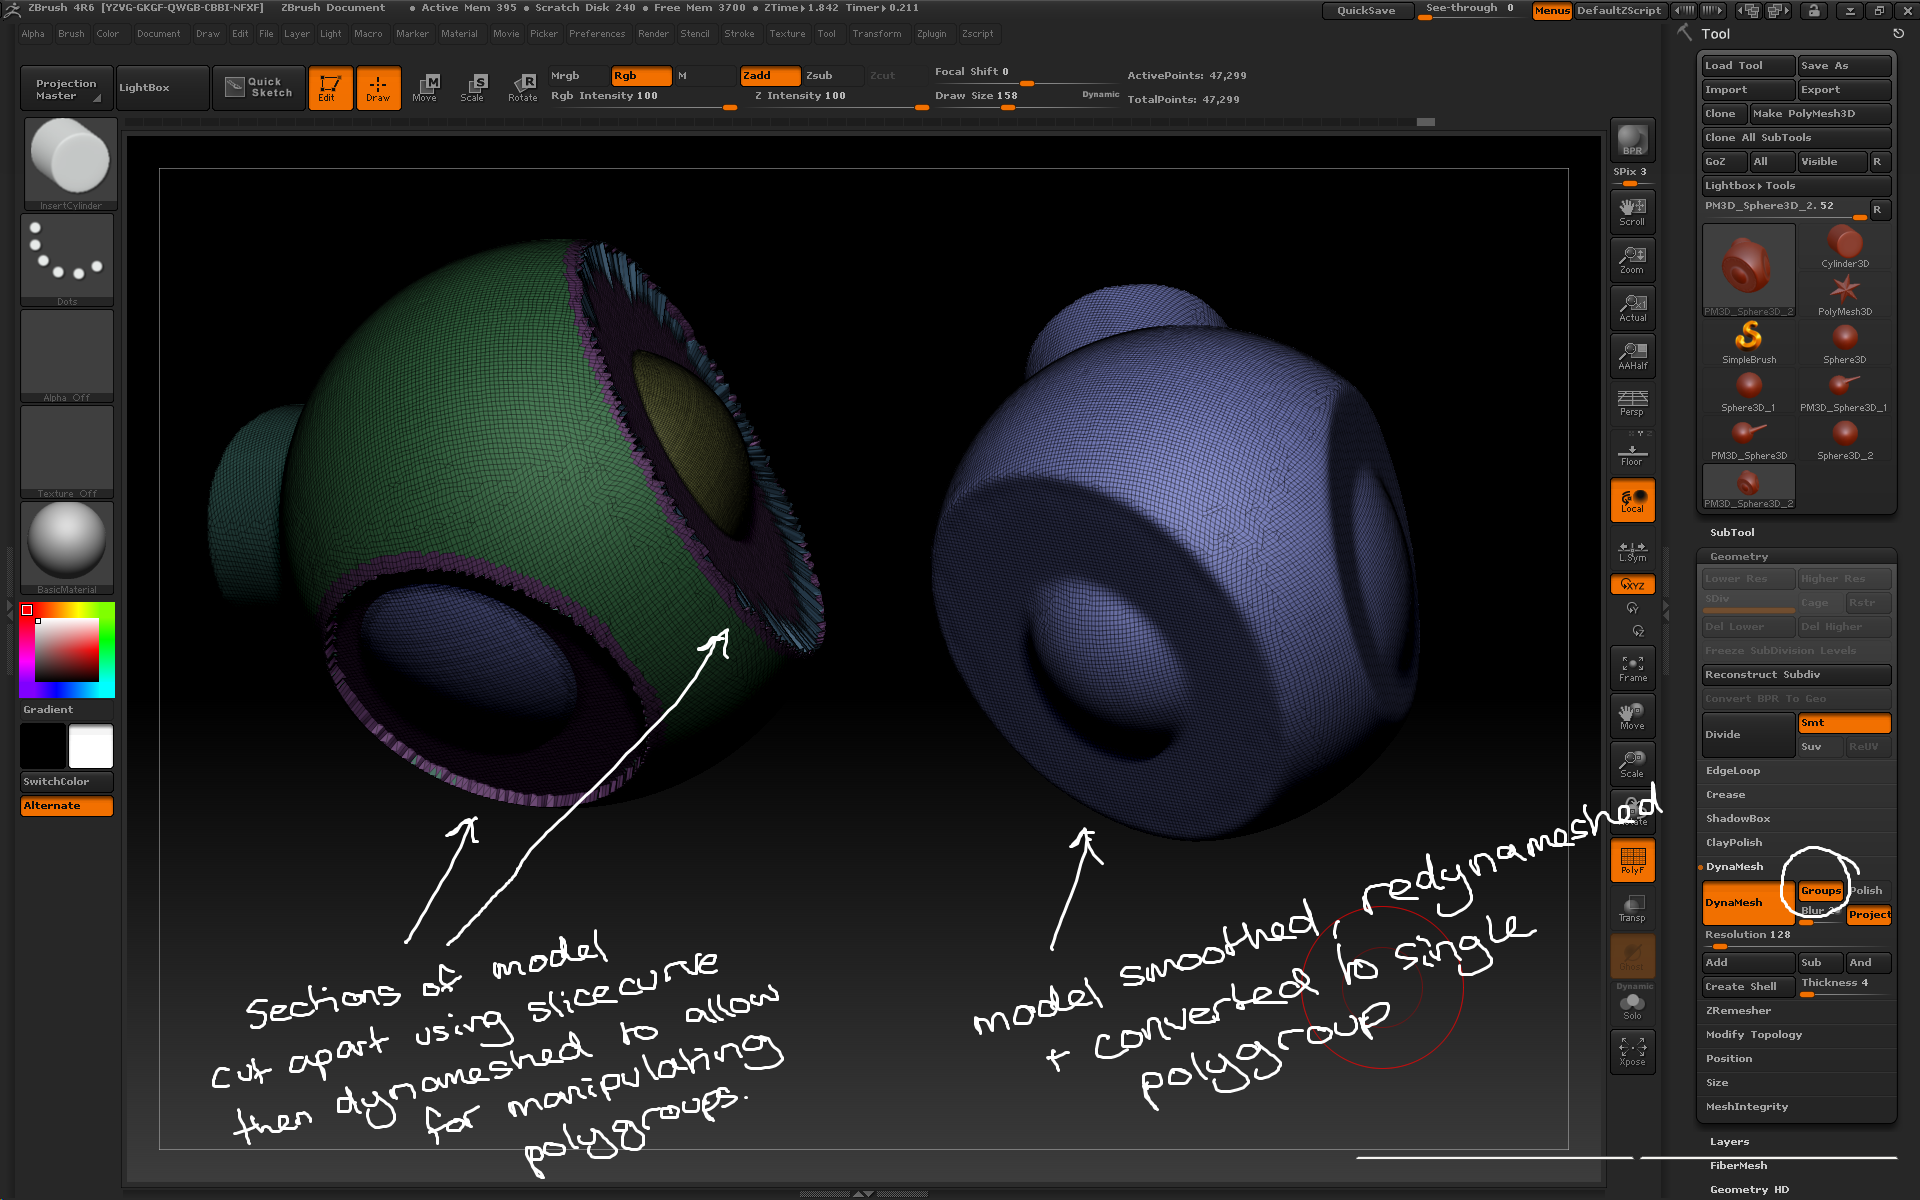
Dynamesh used with groups active splits the model by polygroup when dynameshed, allowing for chunks of model to be manipulated before skinning the whole model once more.
– Tool > Geometry > Dynamesh > Create Shell can be used with a subtractive mesh to create a shell with an opening based on the inserted mesh. To activate it, hold Alt while drawing (or enable ZAdd) the InsertMesh, then click Create Shell. The model will be hollowed out with a thickness determined by the Thickness slider, with the opening cut by the inserted mesh.
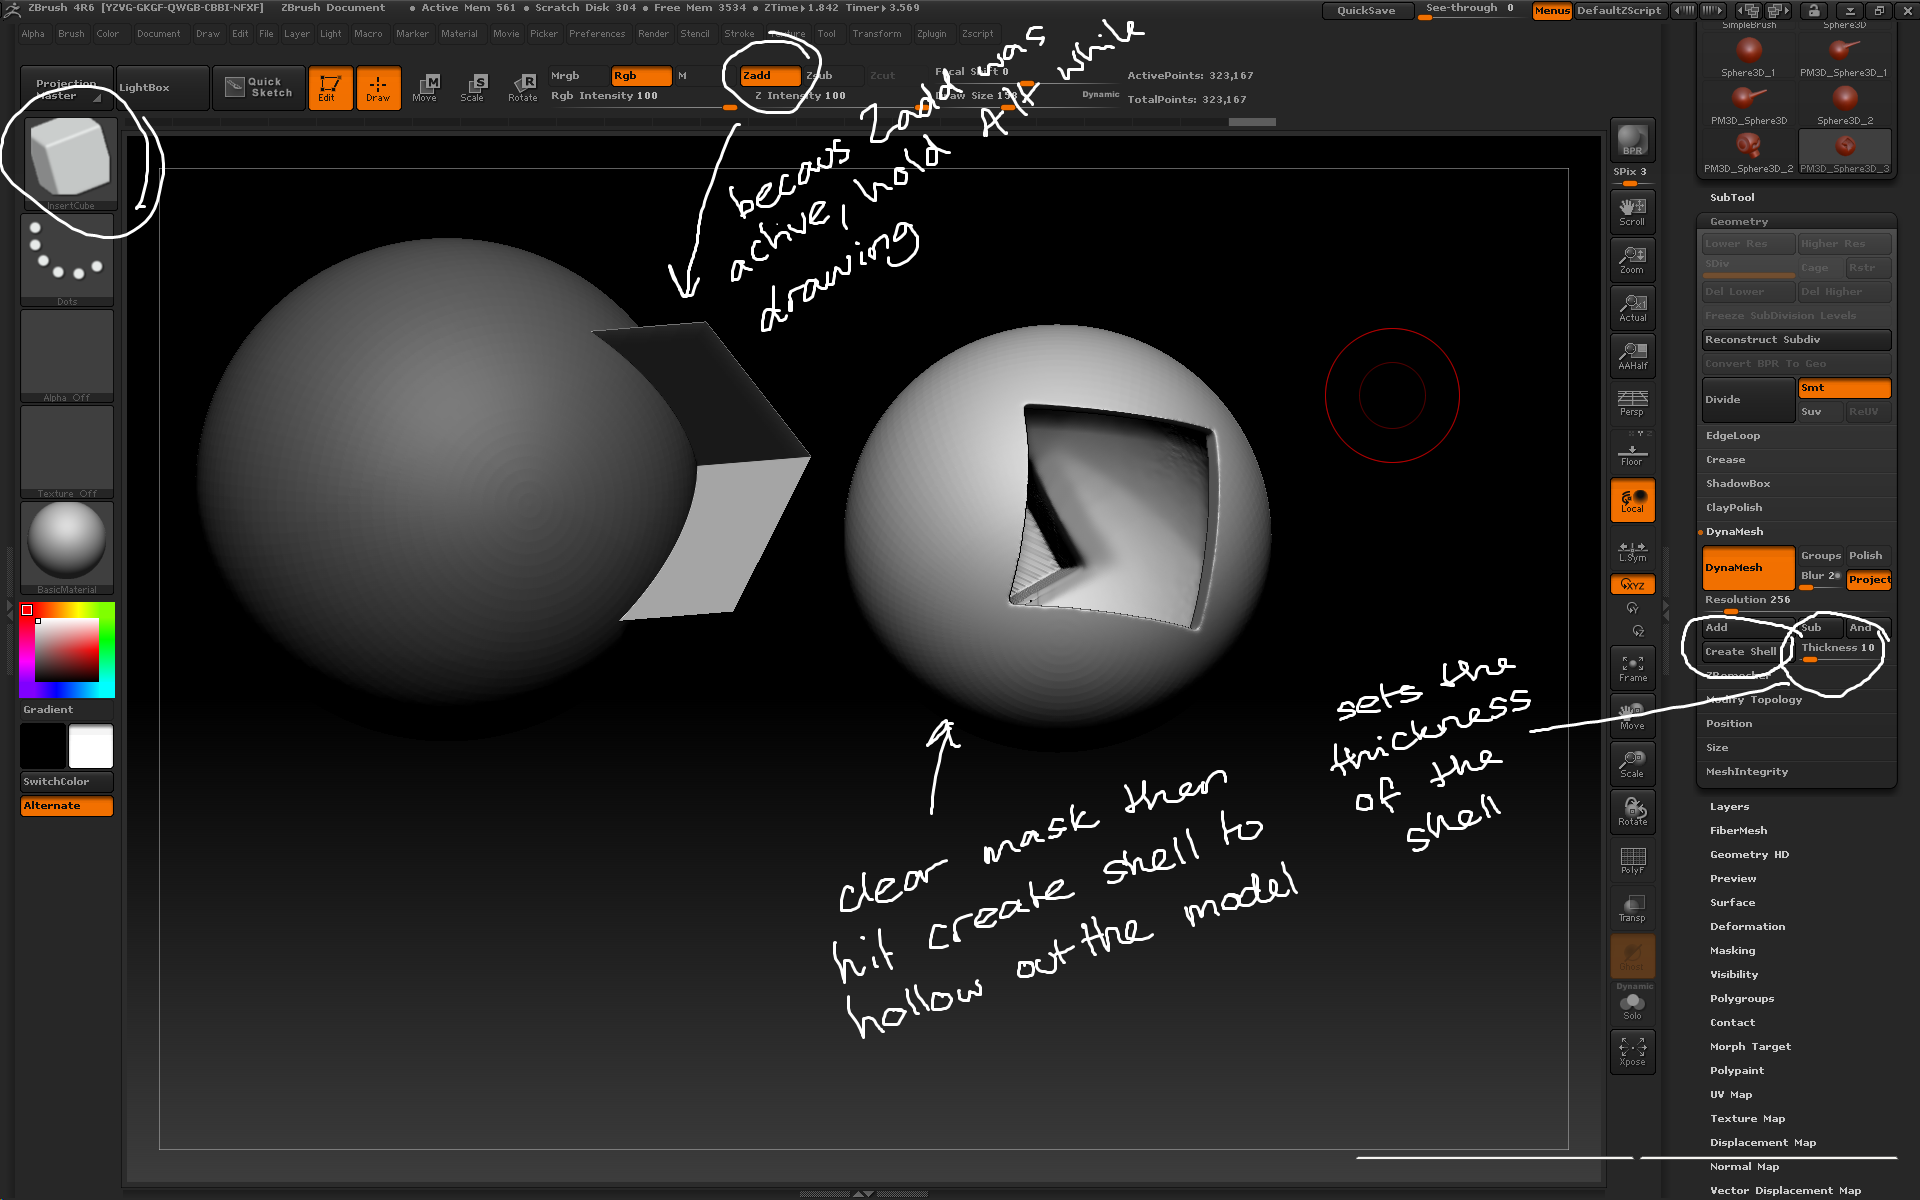
Dynamesh can be used in conjunction with subtractive meshes to create hollow shells.