Introduction to Zbrush Digital Tutors
Using Textures
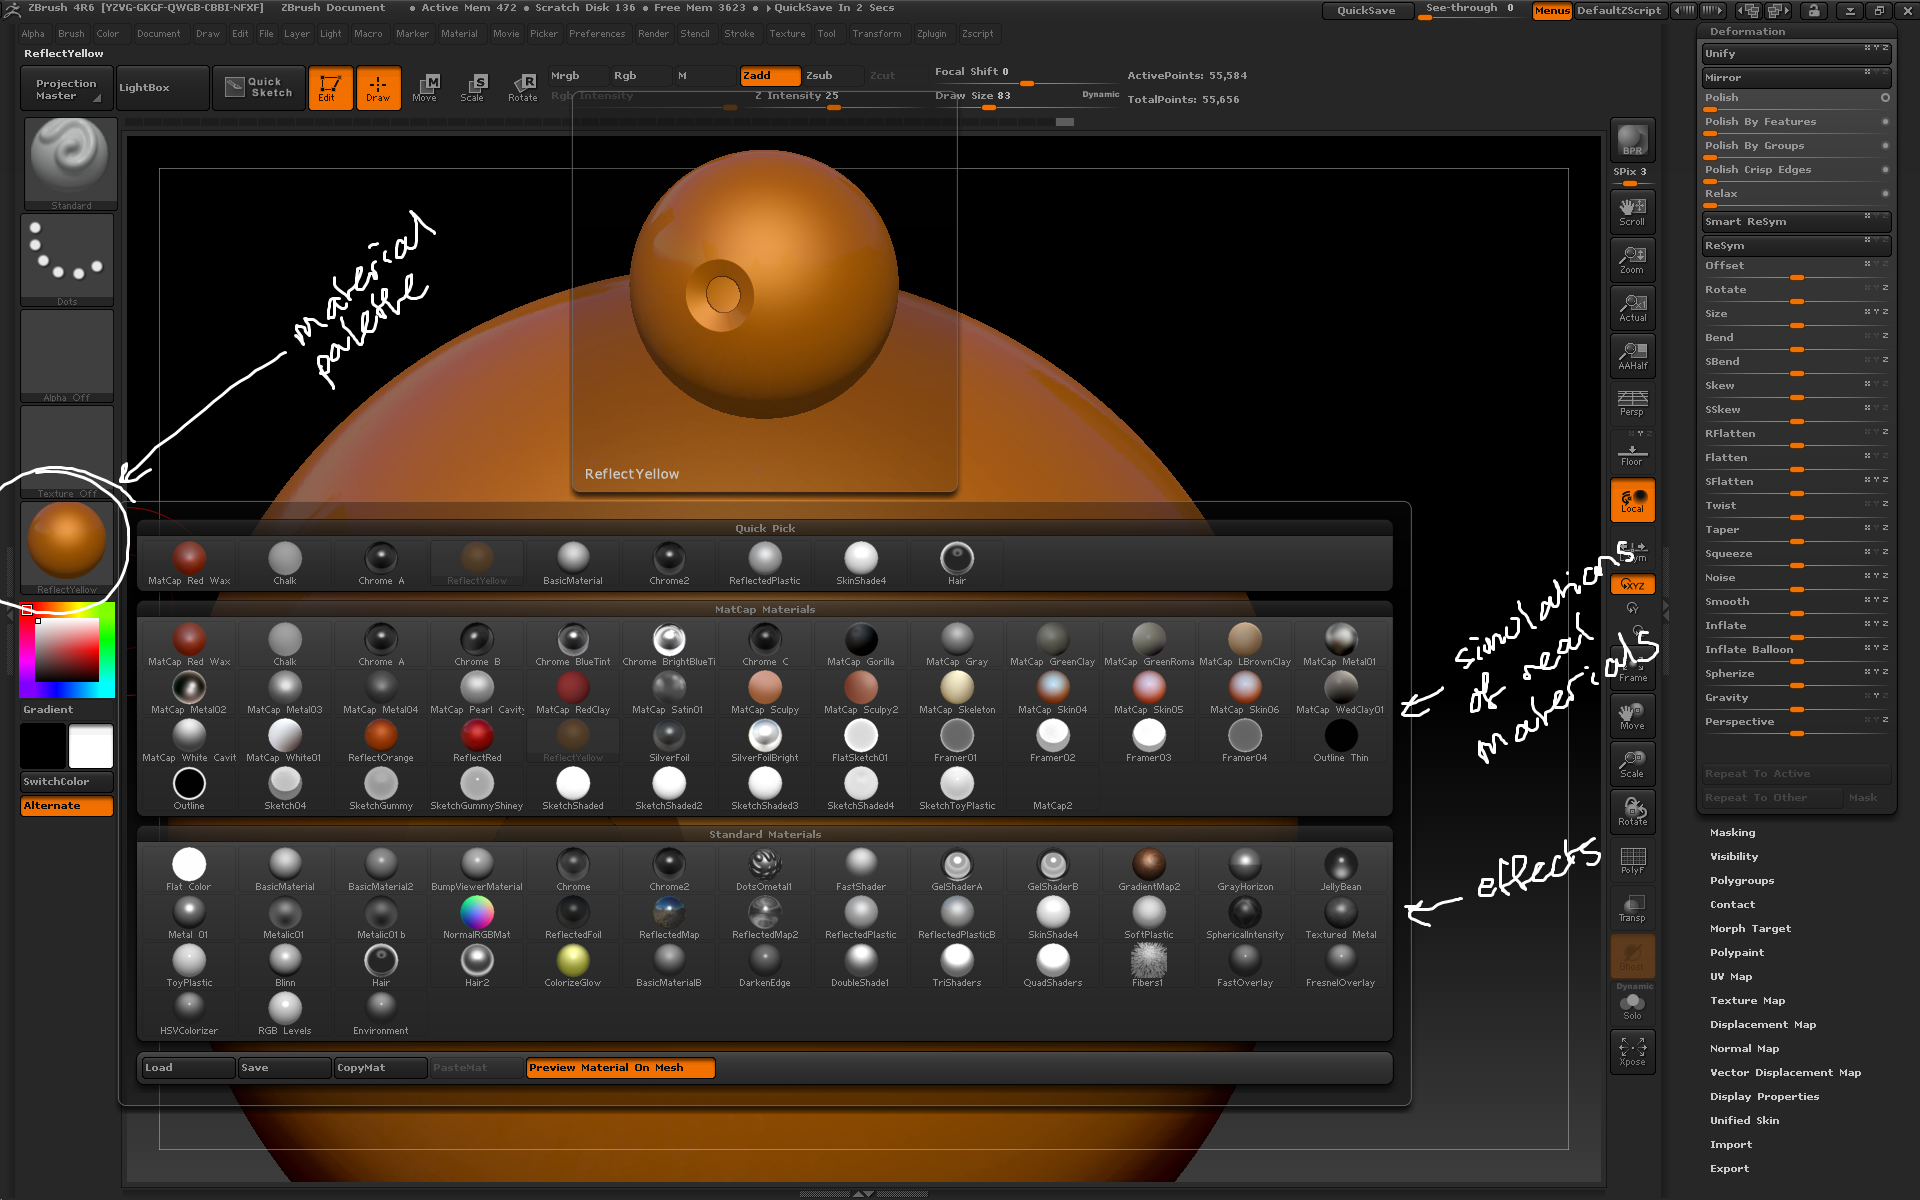
– the Texture menu contains ways to bring new textures into the project; Import allows you to load textures from the computer while Lightbox > Texture lets you pick textures that are already in Lightbox: Double-click to make a texture the active one.
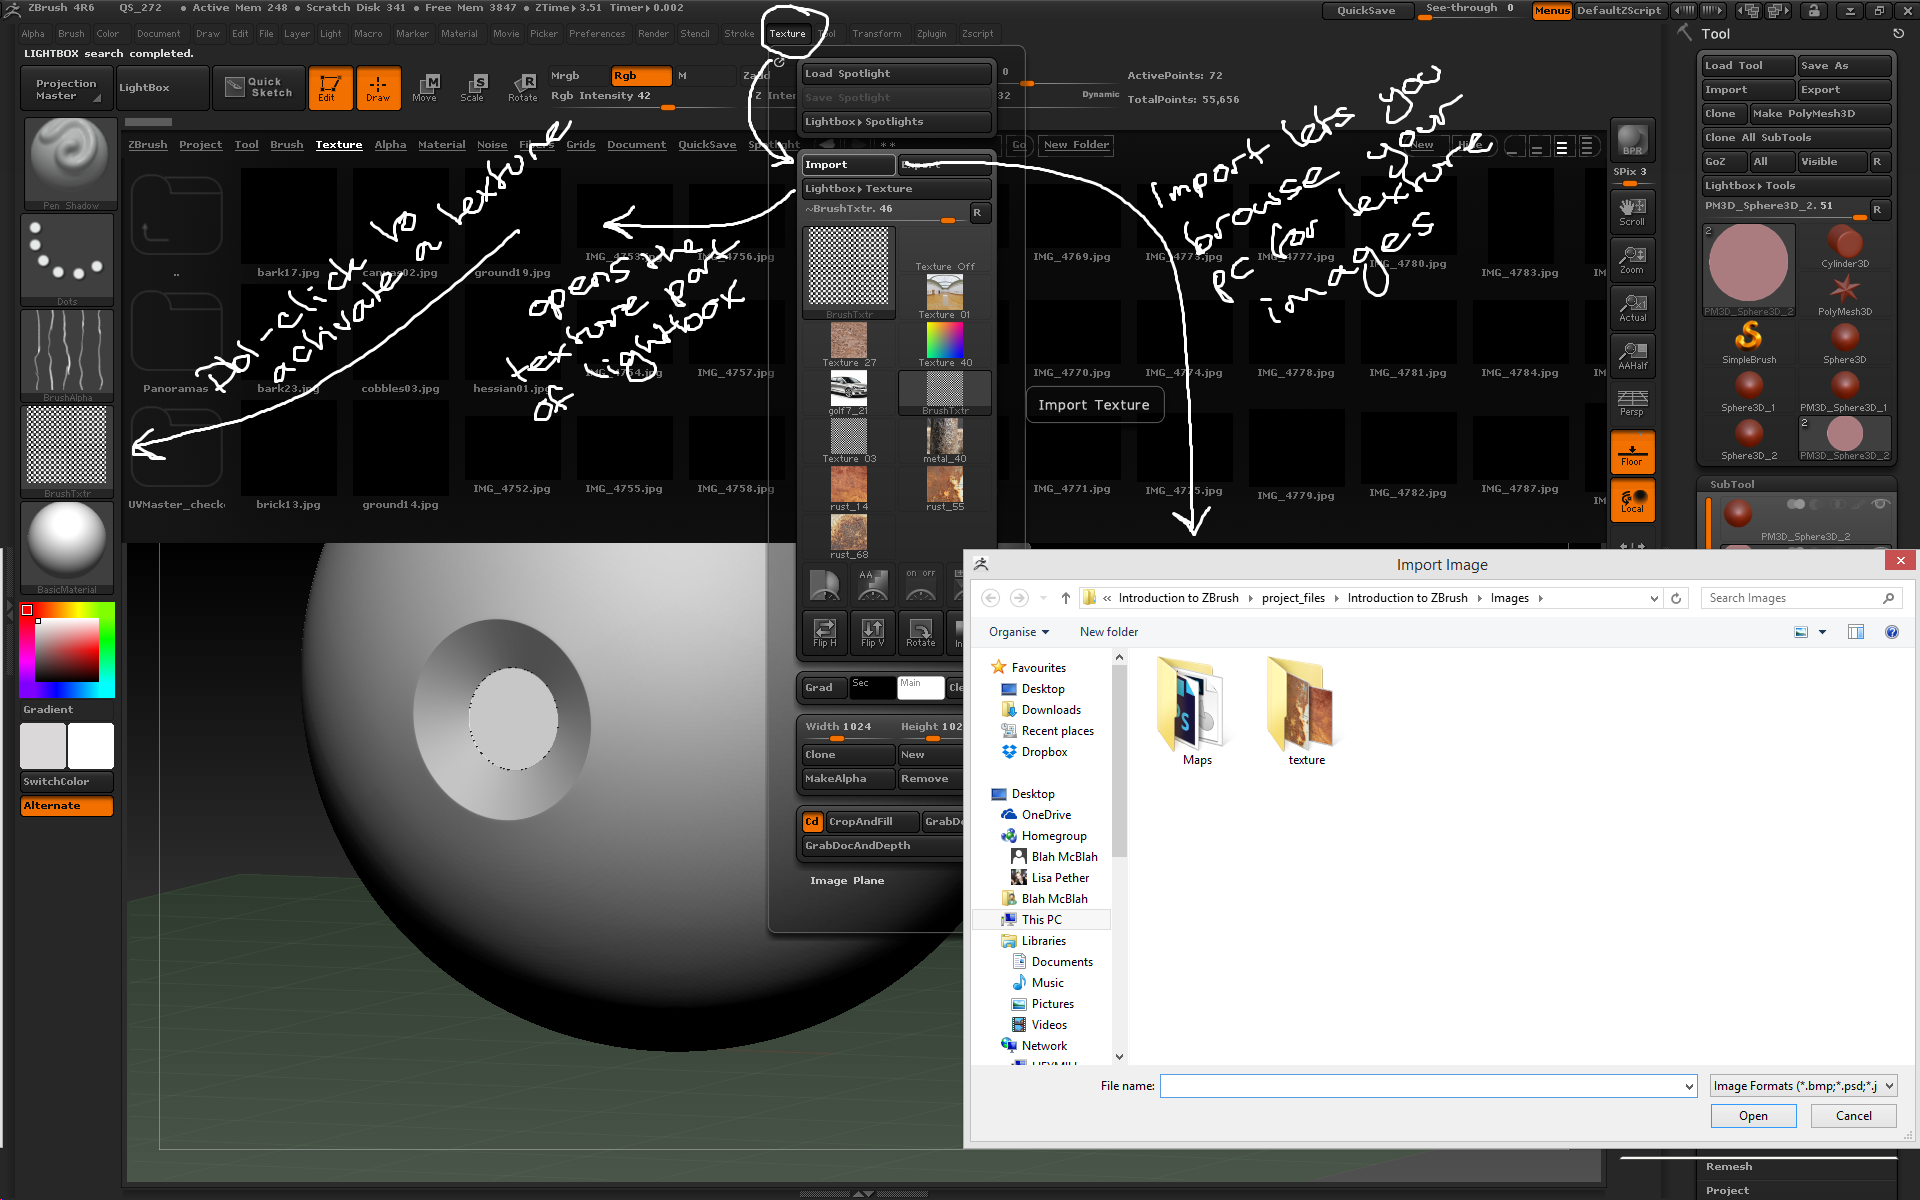
Use the texture menu to import texture files from your pc or lightbox.
– To apply a texture to a model a texture map must be created, and there are several ways to do that using the Tool and Texture menus:
– Texture has settings to define the resolution of a new texture map.
– Tool > Texture Map allows you to create a new texture map for each subtool. Texture maps can be created from polypainting, masking or UV groups.

The tool and texture menus contain several ways to create new texture maps.
– Tool > Polypaint > Polypaint from Texture applies polypainting to the model based on the texture map. The higher the subdivision level the more accurately the polypainting will be applied.

a model can be polypainted from an applied texture map.
– once polypainted the texture can be cleaned up on the model, hiding any seams or modifying to create a new texture map that is better suited to the 3D model.
– If you now try to recreate a texture map from the new polypainting it won’t work if the model doesn’t have a UV map applied. To create a UV map go to the lowest subdivision level then go to Tool > UV Map where you can set the size of the new UV map and choose how it’s created. PUVTiles is the most accurate method.
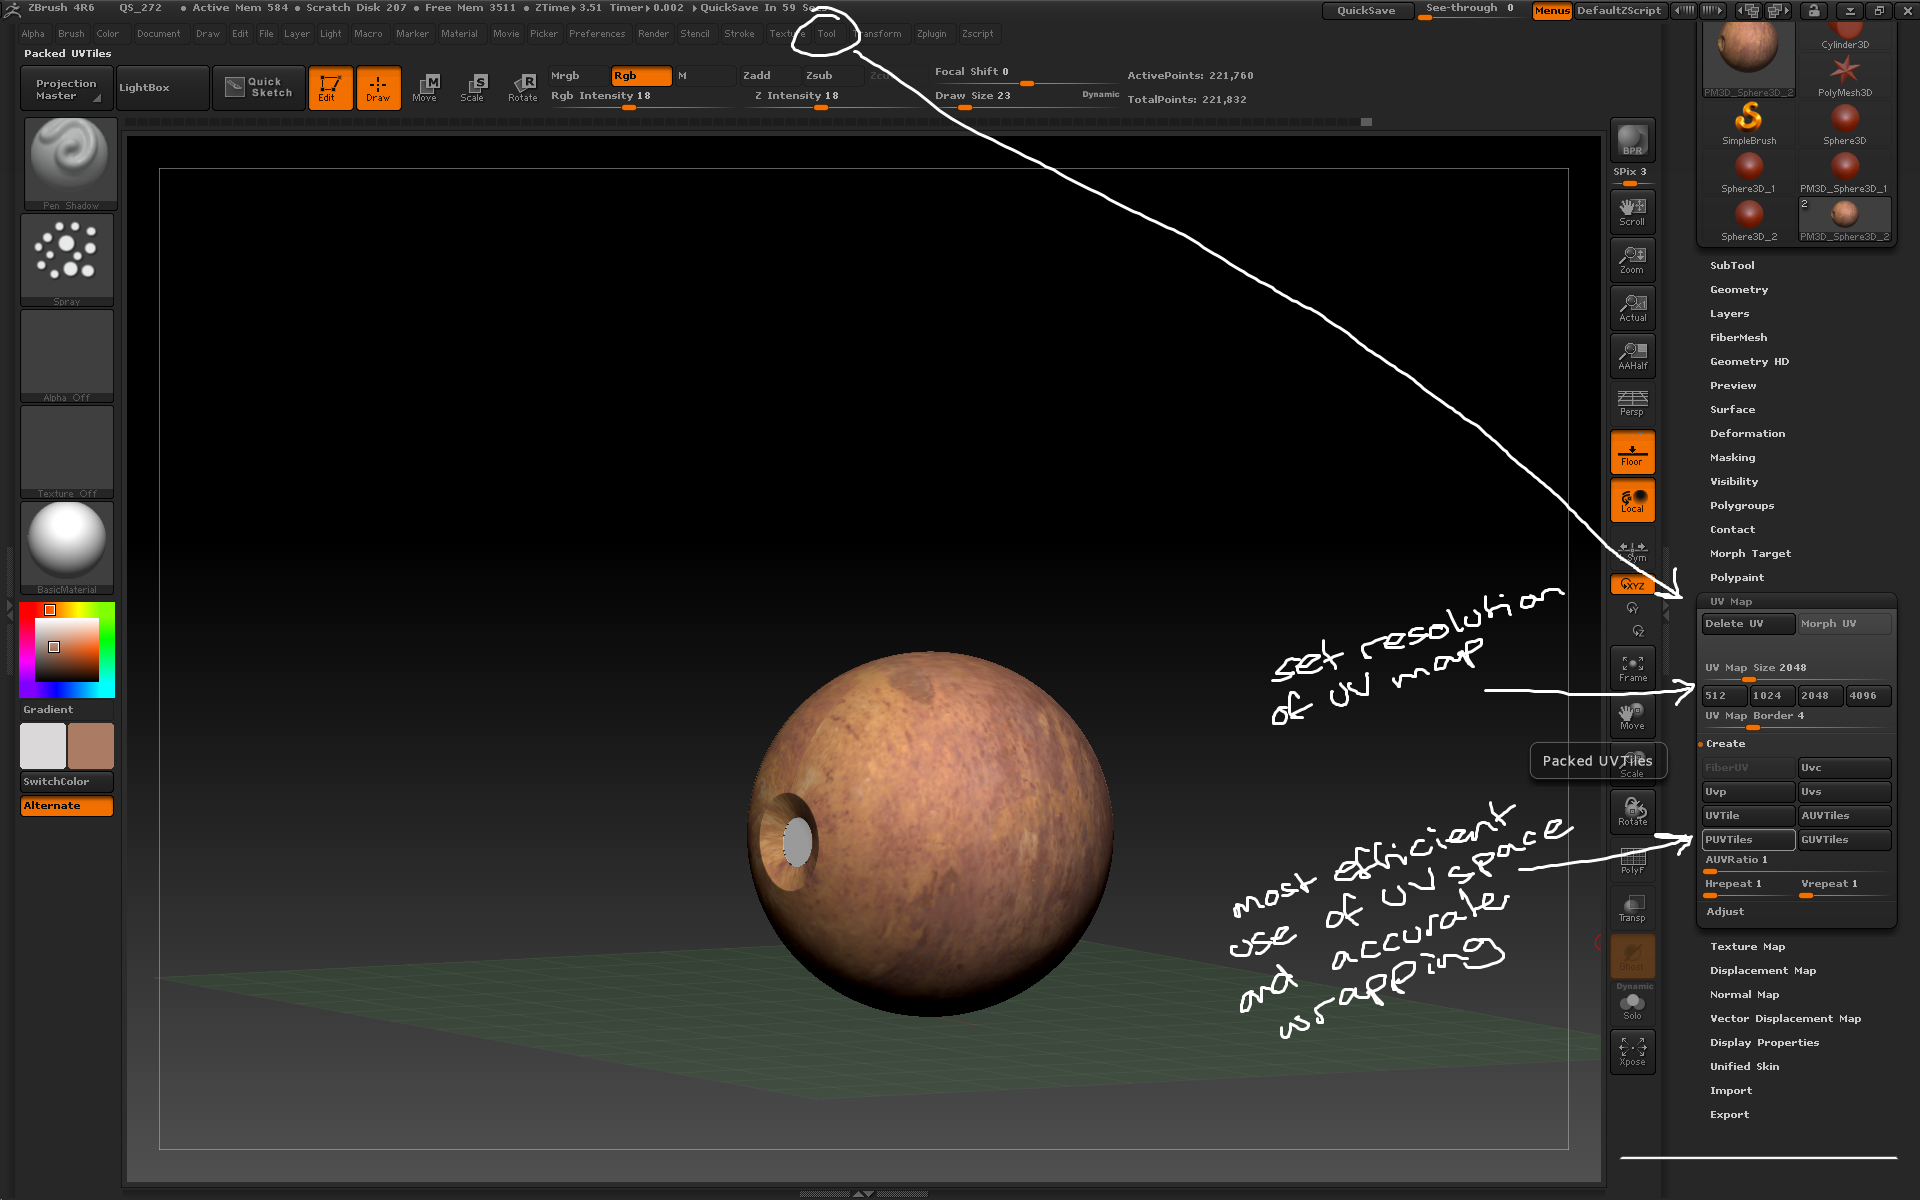
To create a texture map form polypainting the model needs a UV map.
– Tool > Texture Map > Clone Txtr copies the texture map to the texture palette where it can be painted with or exported using Texture > Export.

Texture maps can be exported as PSDs for editing in photoshop.
– Dragrect brush with a texture can be used for eg adding stickers and decals to a model.