Introduction to Zbrush Digital Tutors
Adding Materials
– The material palette is found on the left shelf and contains 2 types of material: Standard materials which apply an effect to the model and MatCap materials which simulate specific real-world materials.
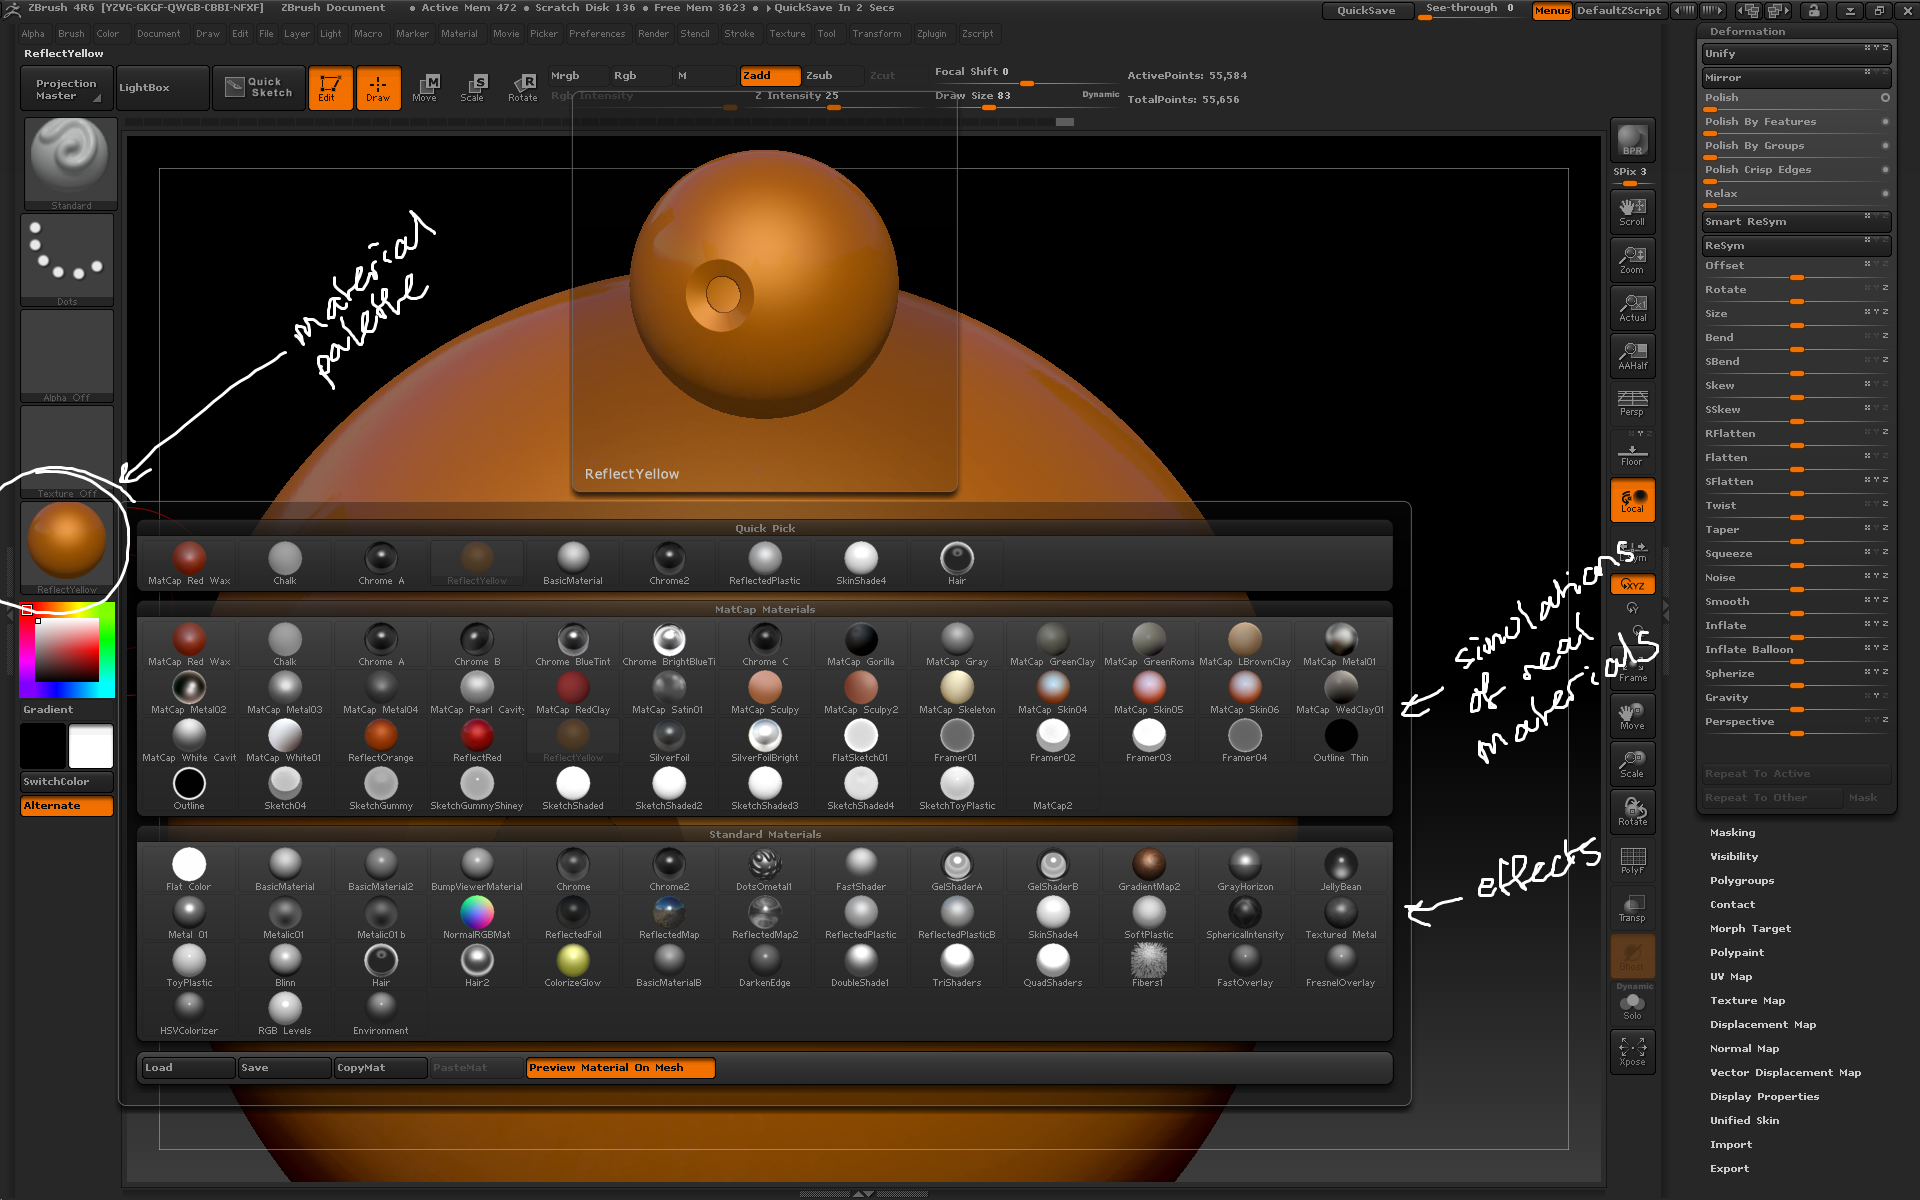
the materials palette conatains 2 types of material that can be applied to models to change the appearance.
– materials can be polypainted onto a mesh: apply a material then use the M channel to paint on the mesh; when the main material is changed the painted material will remain. Because this is polypainting the border between the materials will be sharp.
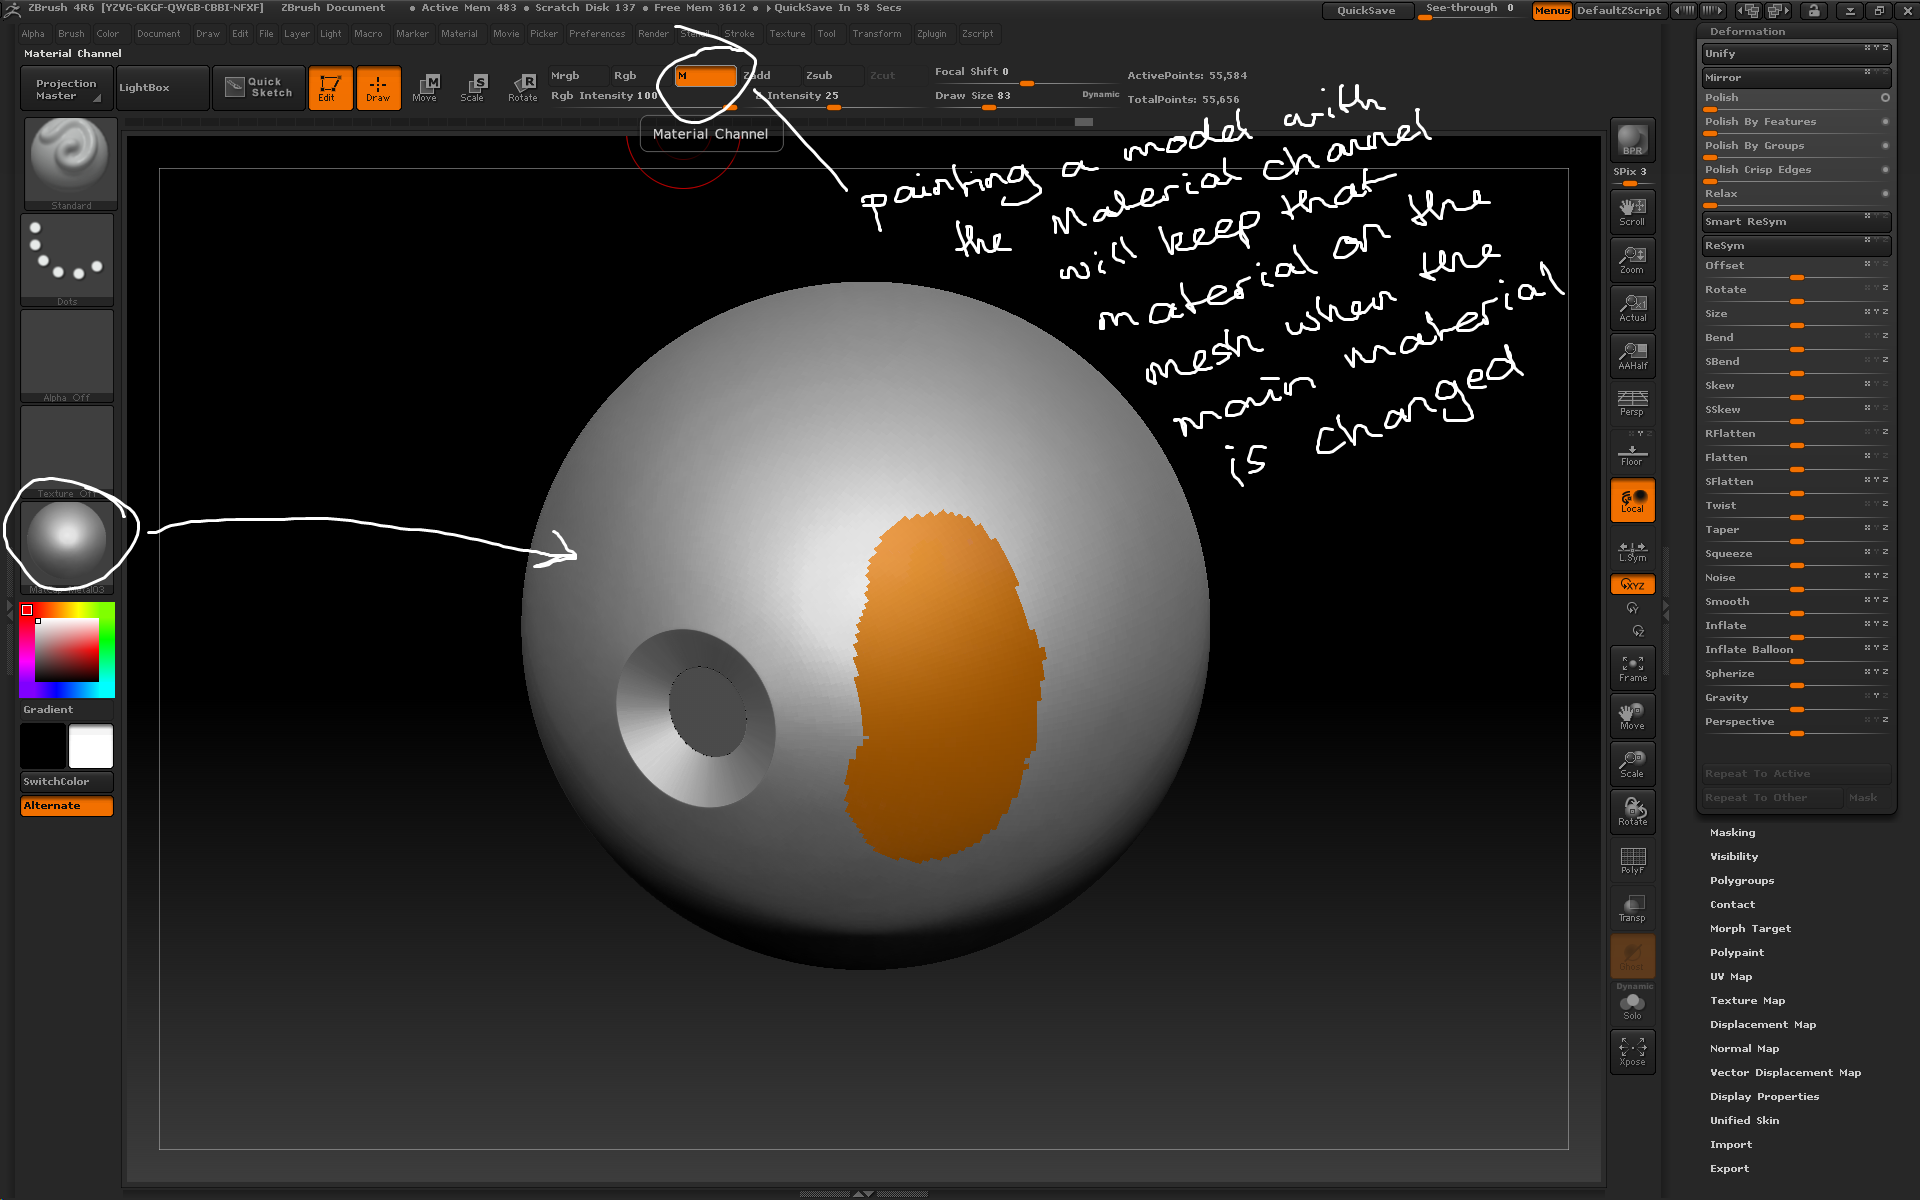
materials can be polypainted onto a model using the M channel.
– To apply a material to the model use the Colour > Fill Object command; the model will keep its material even when a new one is selected in the material palette.
– The Material palette contains ways to modify materials. Common options include Ambient which produces a glowing appearance and Diffuse which affects the brightness of the diffuse colour.
– Material > Modifiers > Diffuse Curve can be used to modify the way the colour reacts to the direction of the light, eg have the colour darker on the light-facing side of the model.
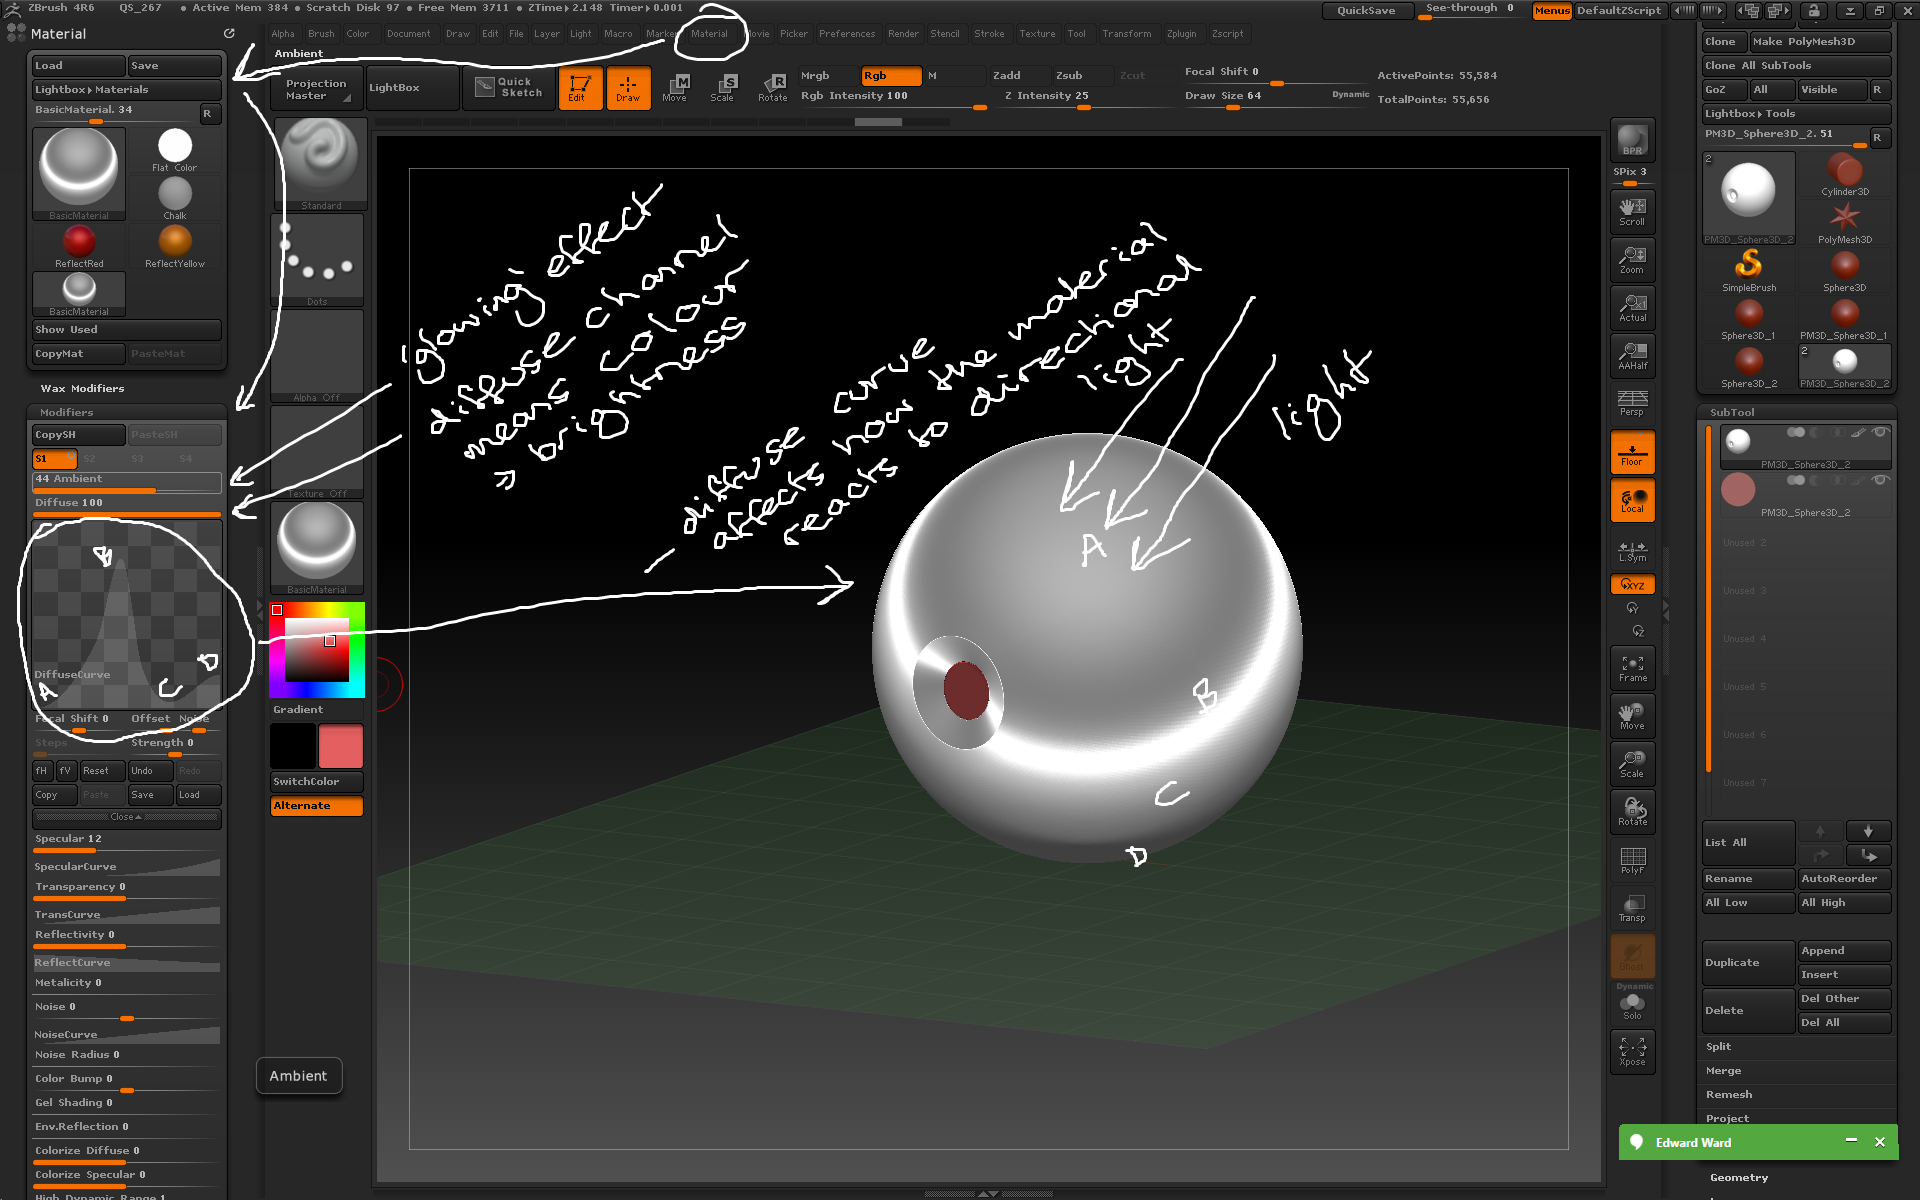
The modifiers subpalette contains many options for changing how the material reacts to light
– Material > Modifiers > Specular affects how shiny the material is. Specular Curve can be altered to affect where the material reflects light.
– Once a material has been modified, open the Material Palette to save or copy the material. You can also load new materials.
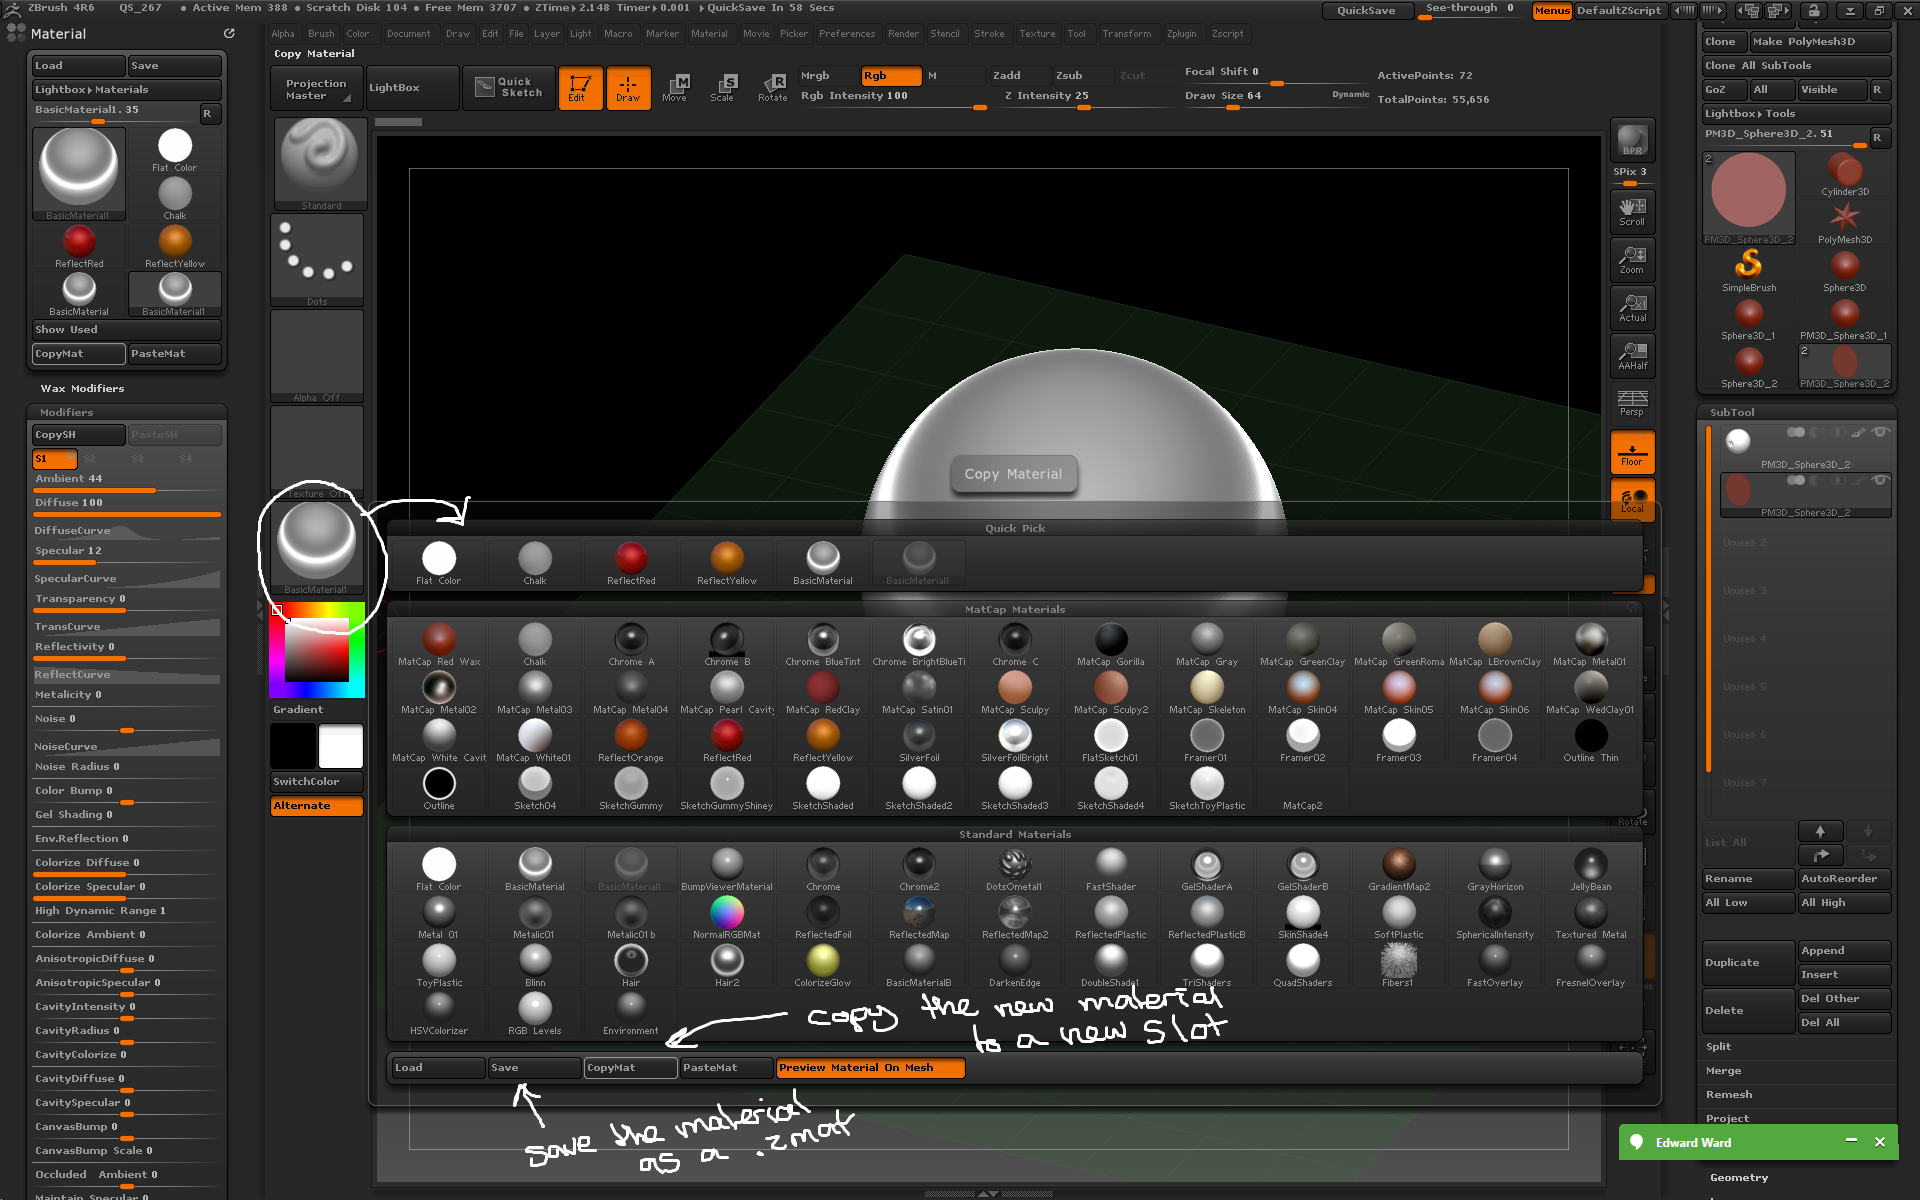
Modified materials can be saved and copied through the material palette
– MatCap materials have different options from standard materials in the Modifiers subpalette.
– Material > Wax Modifier creates a subsurface effect on the material. Use the Wax Modifier > Strength to increase the appearance of the effect.
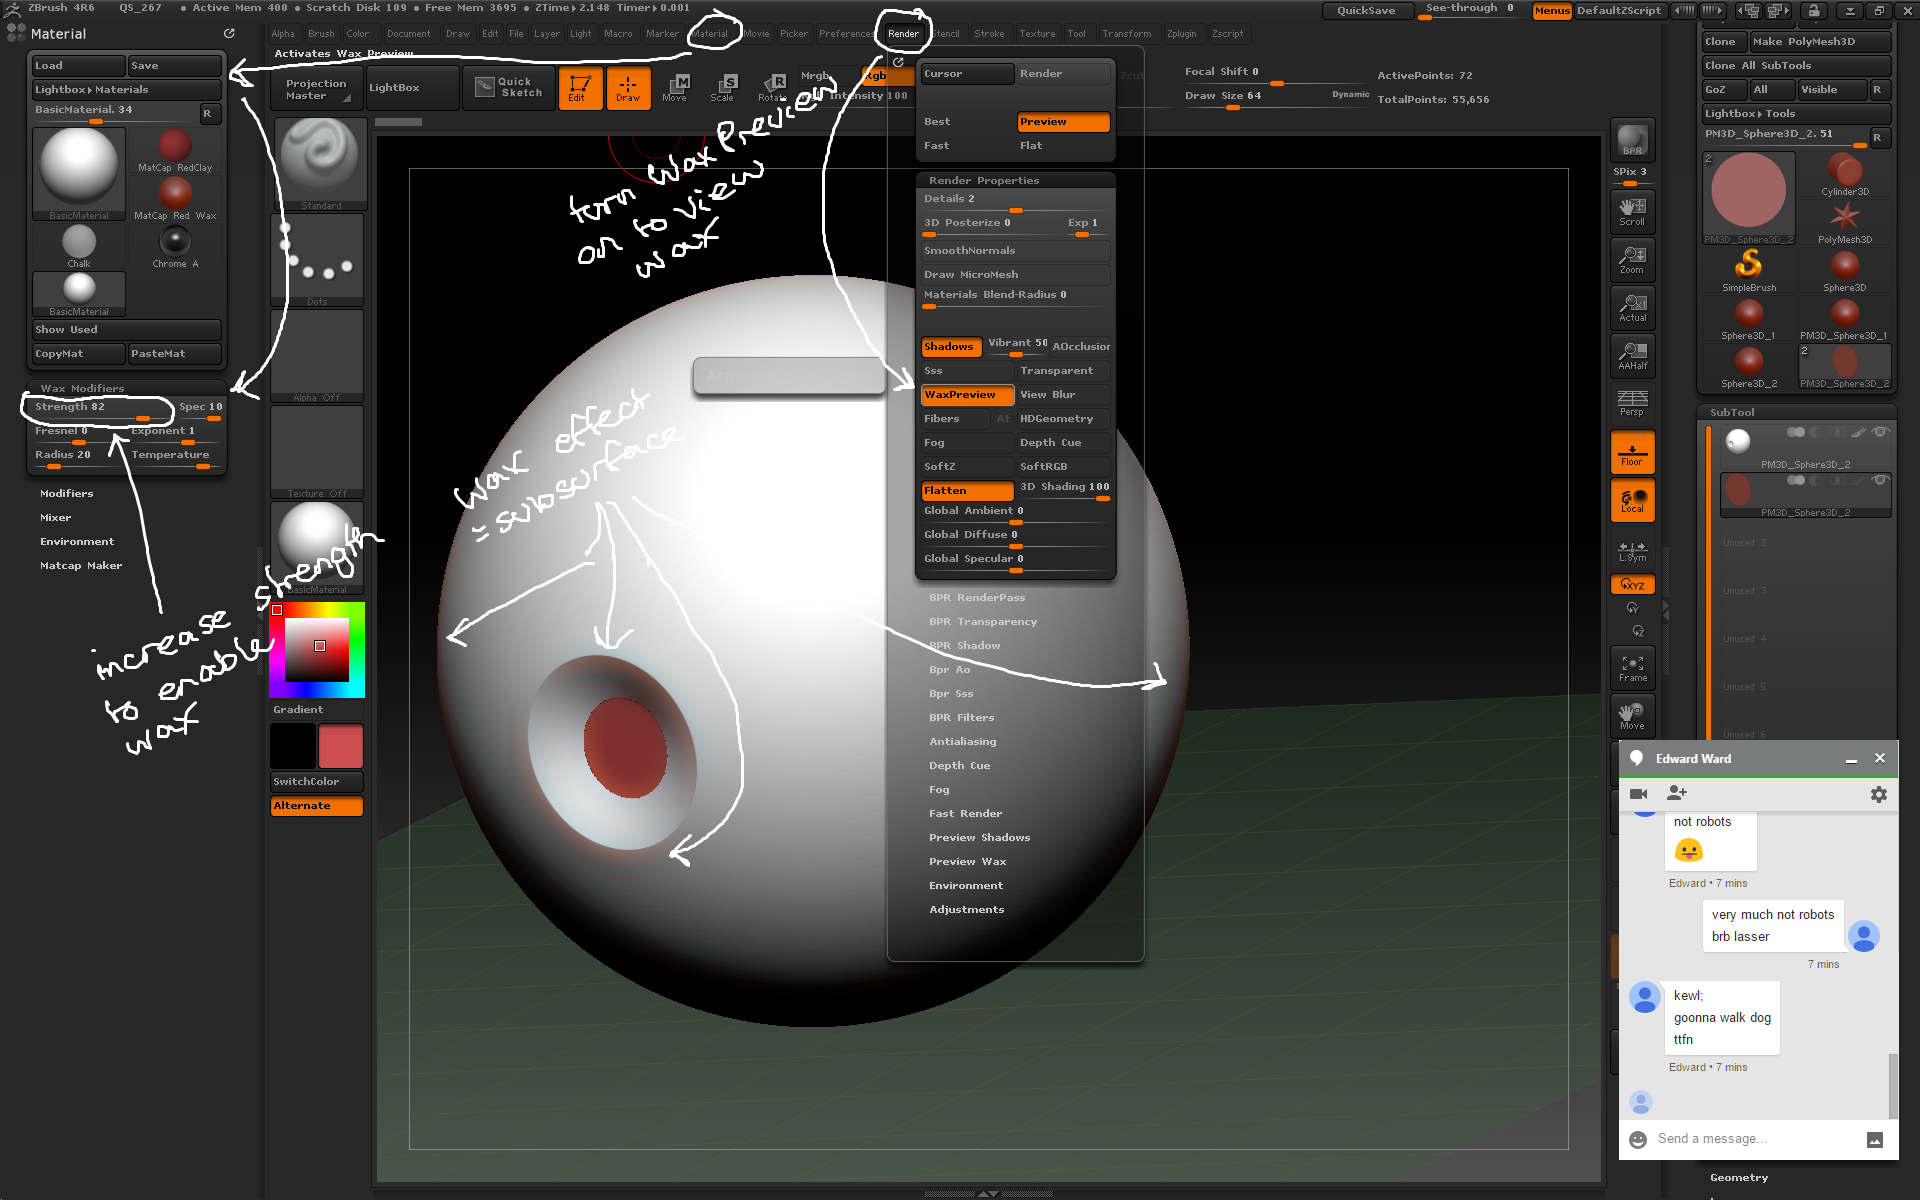
Wax Modifier contains options for creating a subsurface effect on the material.
– If you wish to reset the material on the model you can either do a new FillObject or use the Zplugin Subtool Master; select then reselect colour and material and it will totally reset the model, allowing for quick switching between materials without needing to use FillObject.
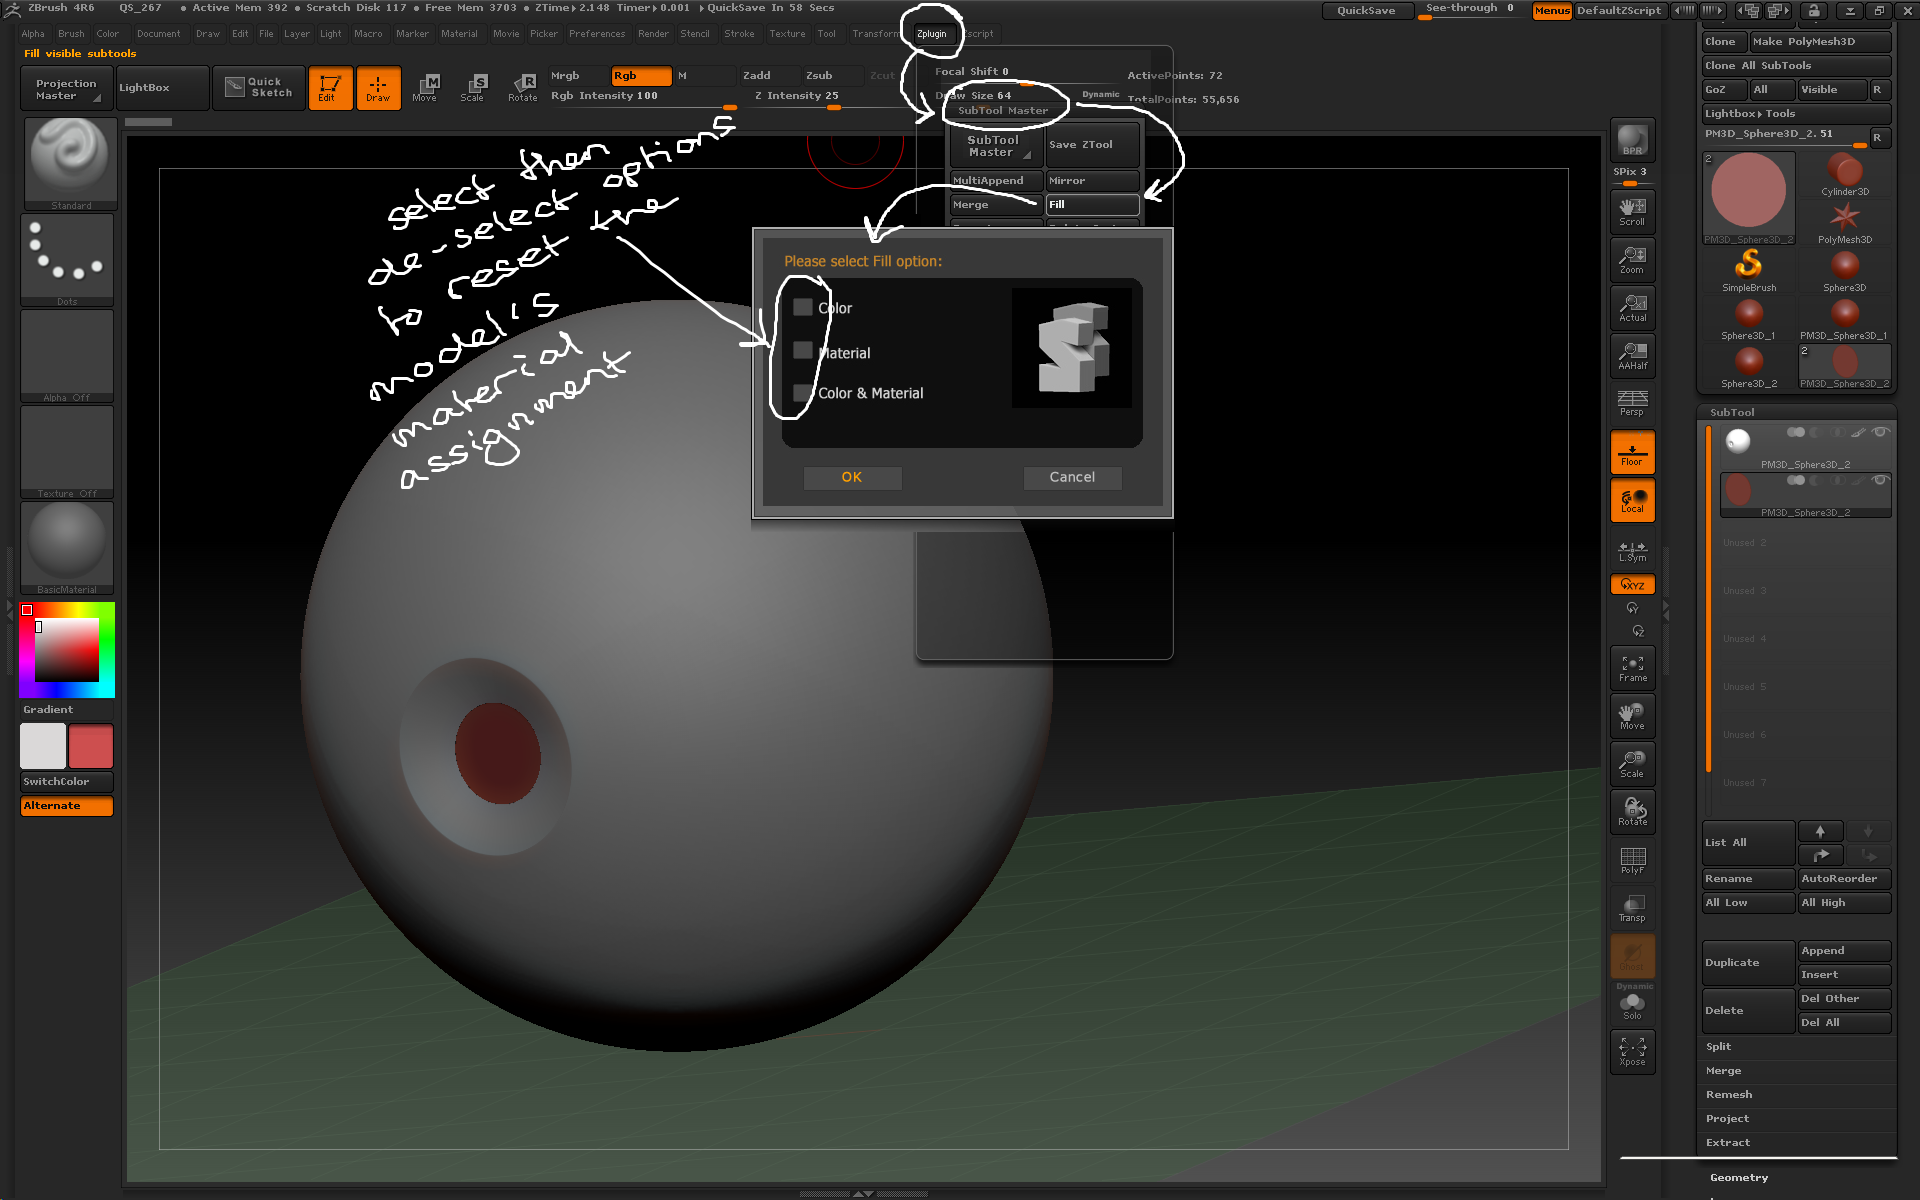
Use the Zplugin Subtool master’s Fill option to reset the material assignments on the model.


