Introduction to Zbrush Digital Tutors
Projecting Detail onto Meshes
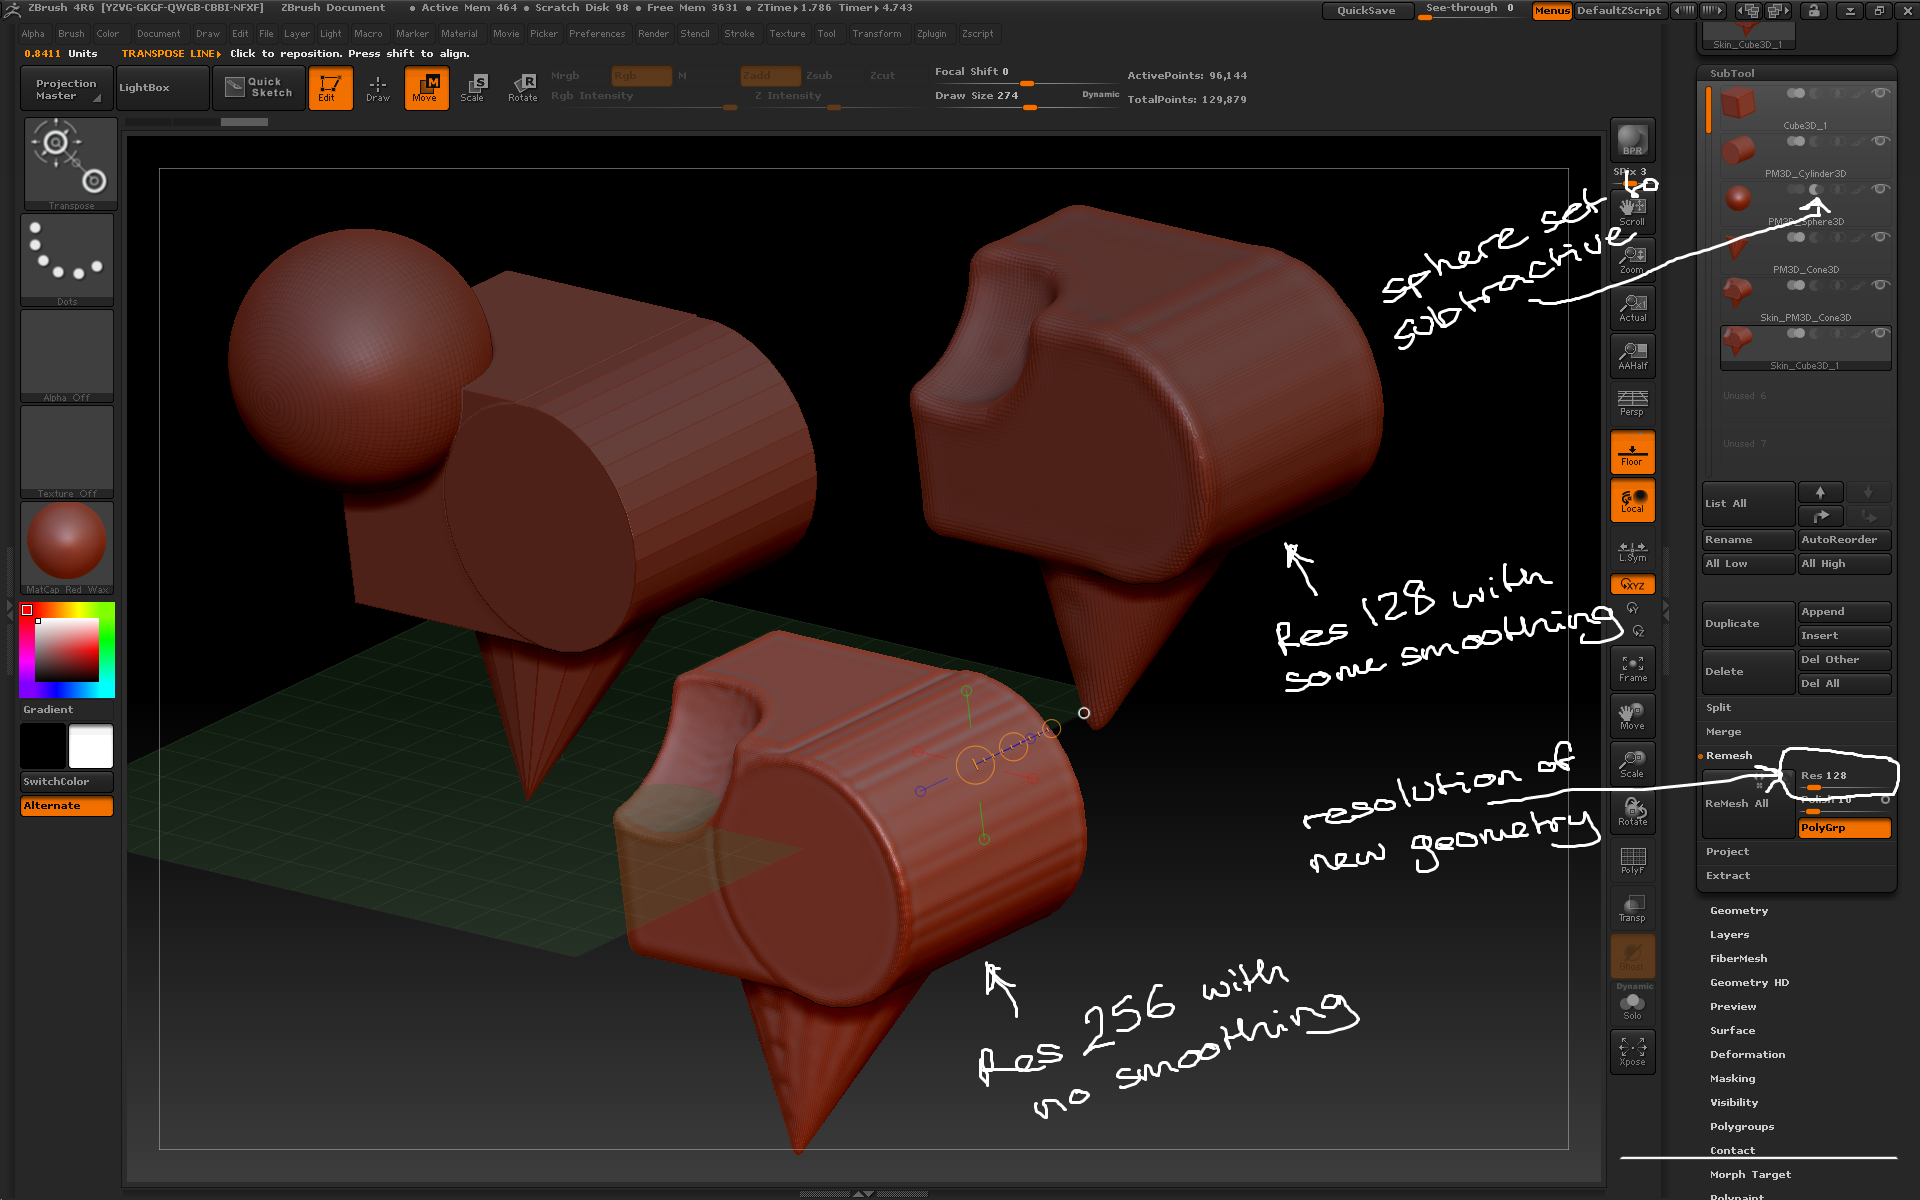
– Zbrush can project the sculpted detail from one mesh to another. This can be useful for transferring the detail from a multi-subtool model to a single-skin model for eg 3D printing. It is also useful for transferring detail that has been previously sculpted on another model to a new model.
– Tool > Subtool > Project > ProjectAll transfers the details from any visible subtools onto the active subtool. Before projecting make sure the target mesh has enough resolution for the projected detail.
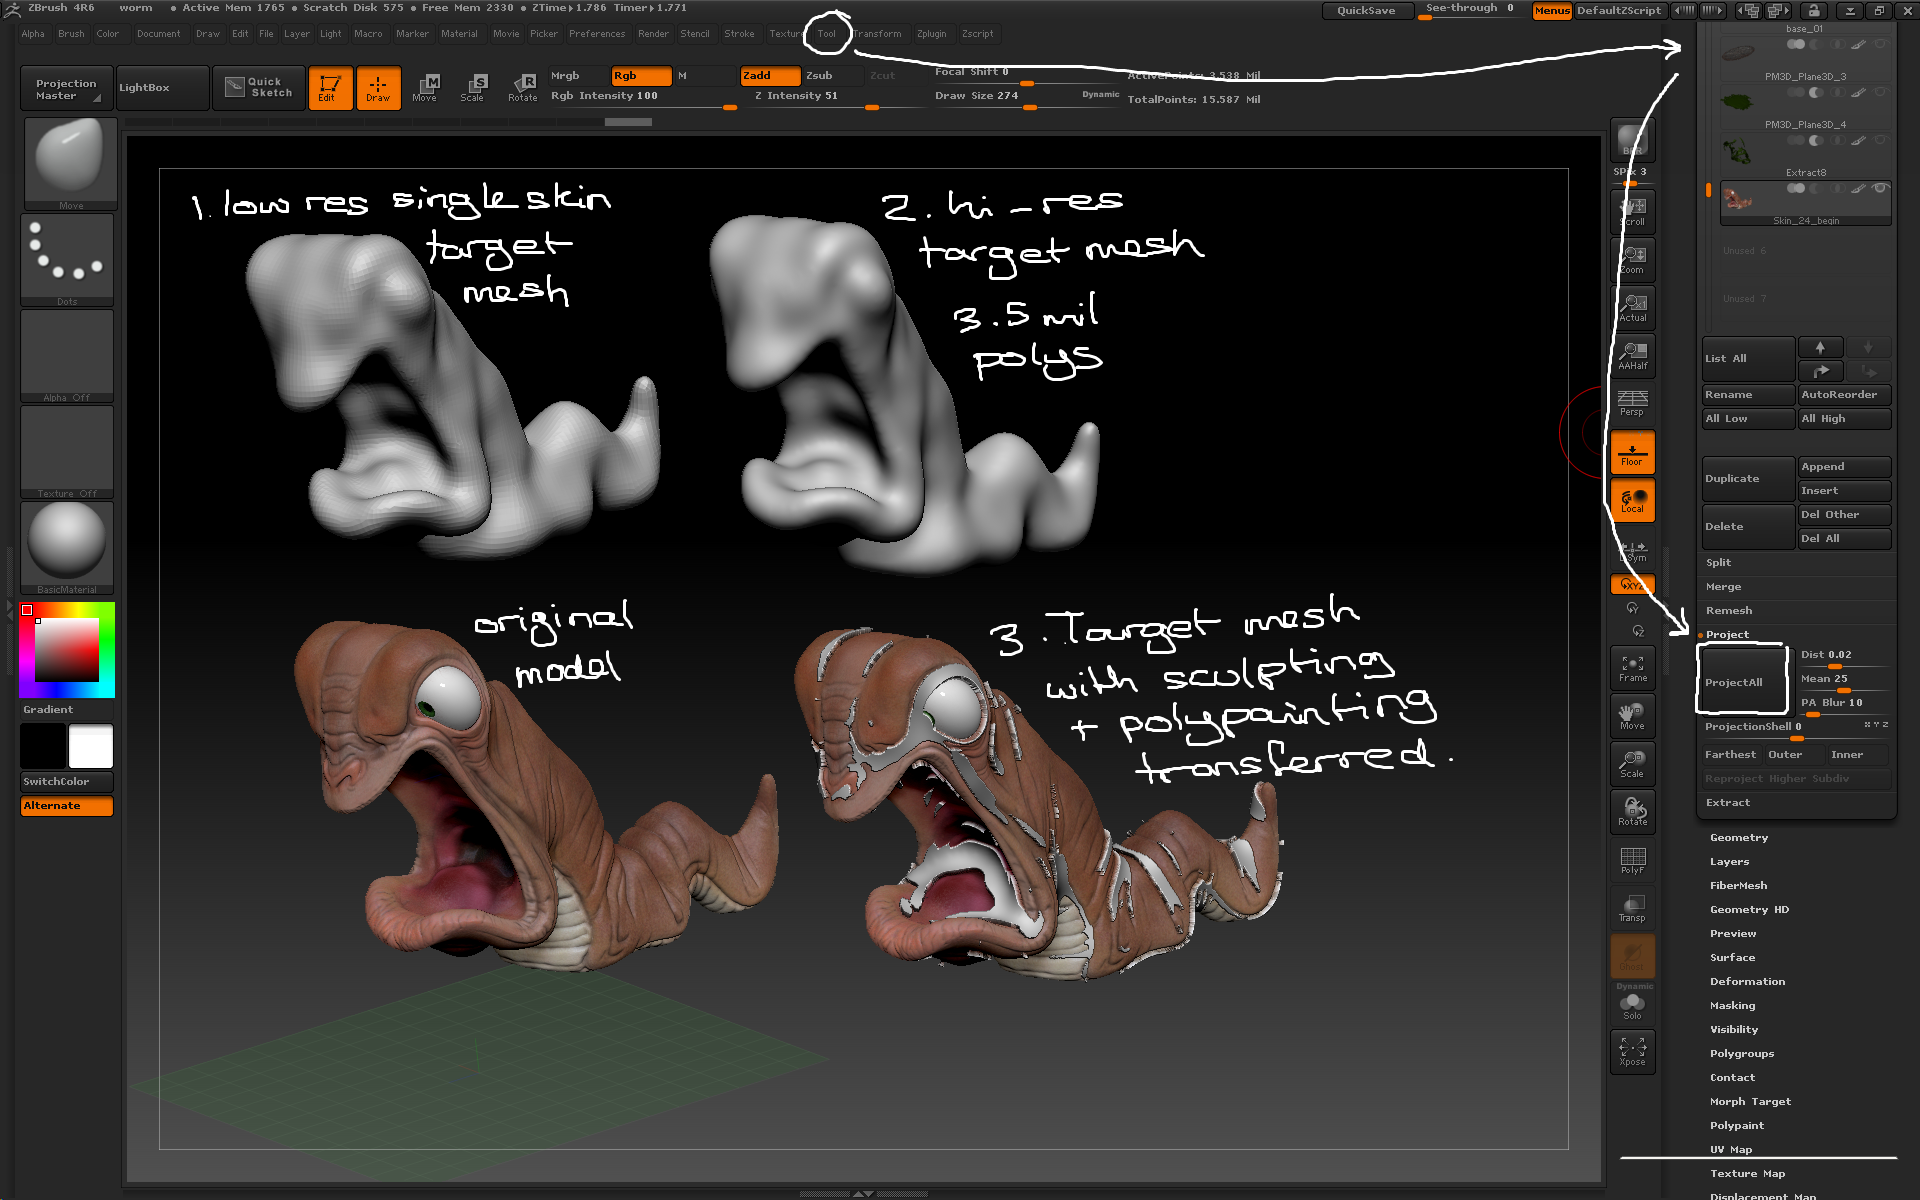
Sculpting and polypainting can be transferred from one model to another using the project tools.
– Project > Dist Slider determines how deep below the surface of the target mesh Zbrush can look for sculpted detail to project. If there are artefacts on the target model increase the distance.
– The projected detail is applied throughout the subdivision levels of the target mesh.
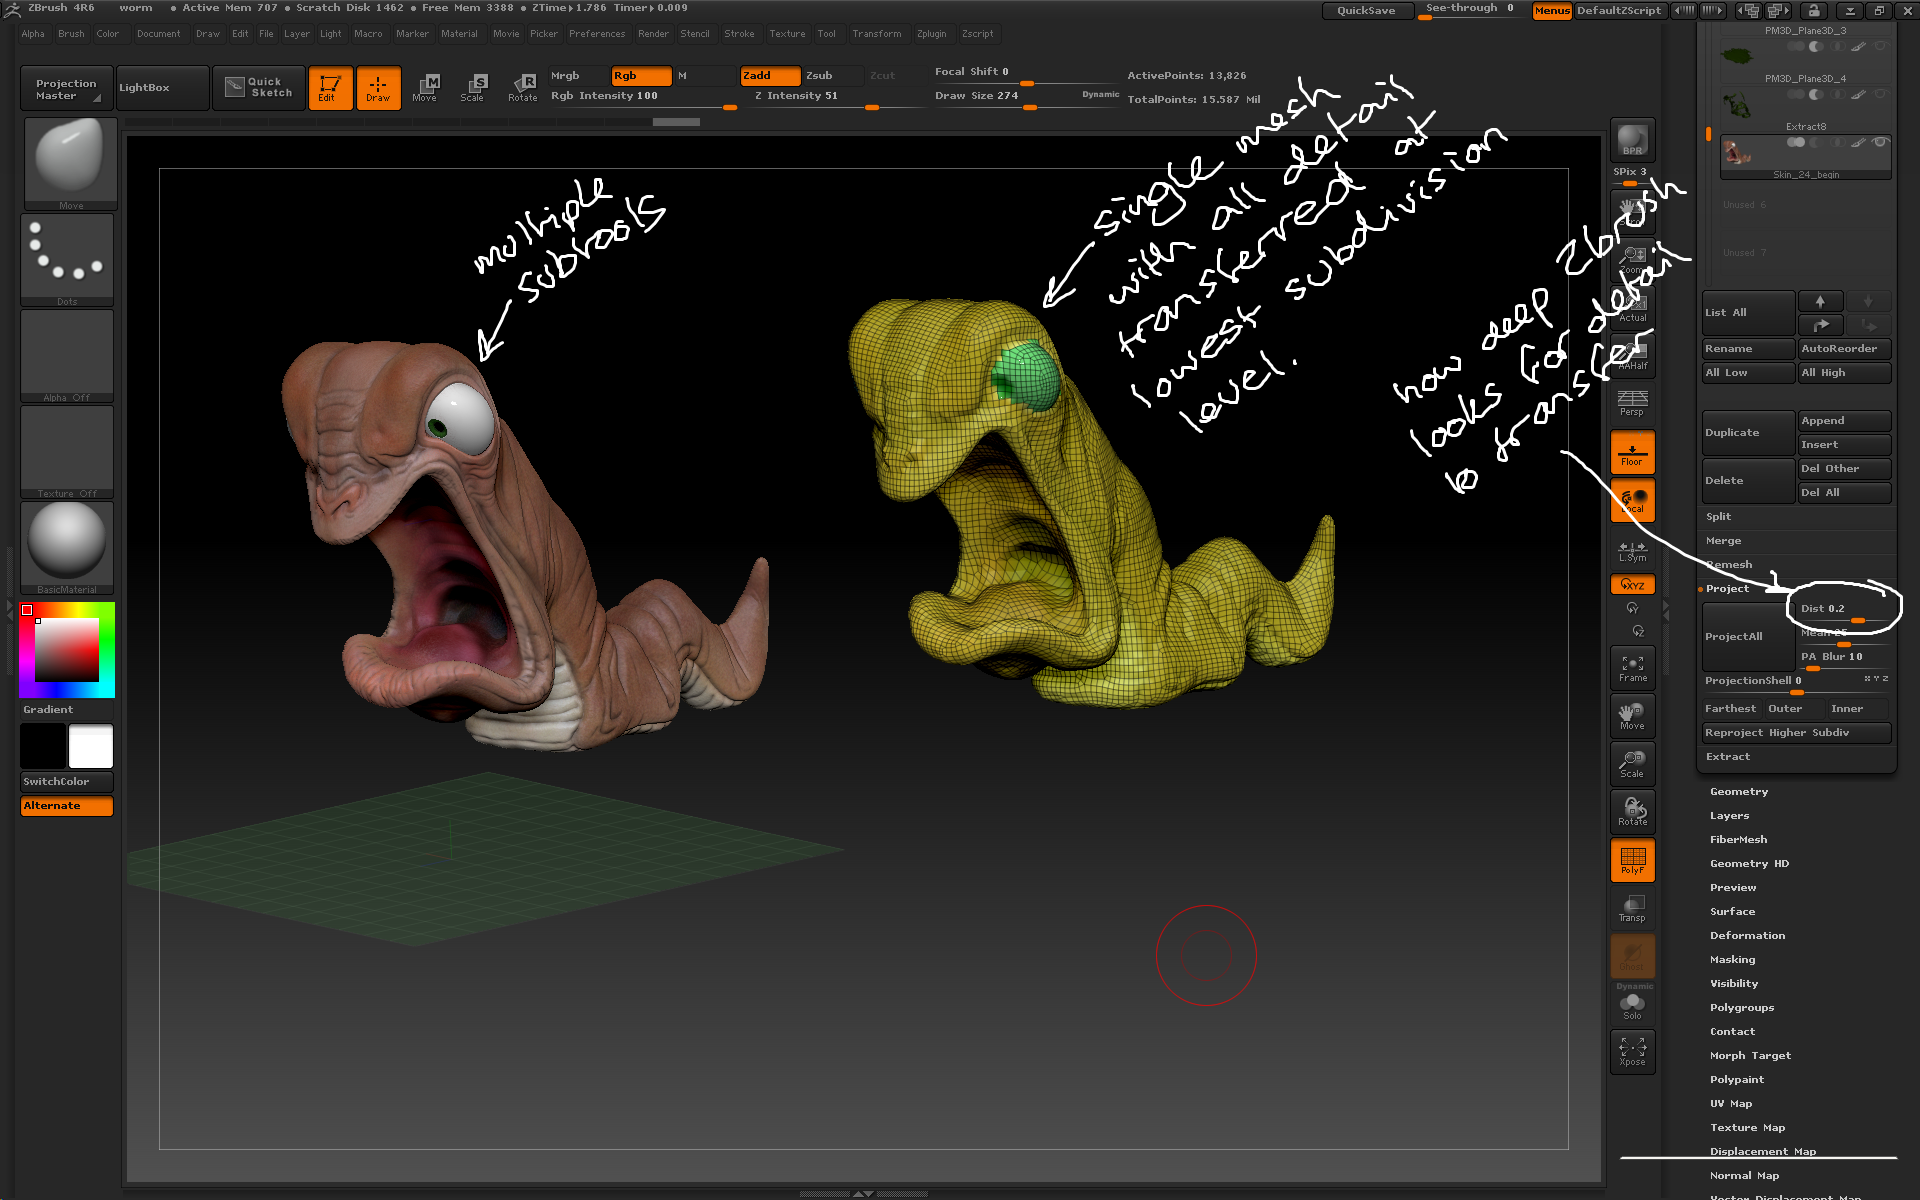
If the detail isn’t properly transferred try increasing the distance Zbrush looks for detail.