Introduction to Zbrush Digital Tutors
Working with Subtools
– The Subtool sub-palette is found under the Tool Menu.
– Subtools can be selected from the menu, or navigated through using the selection arrows. Subtools can be re-ordered using the order arrows.
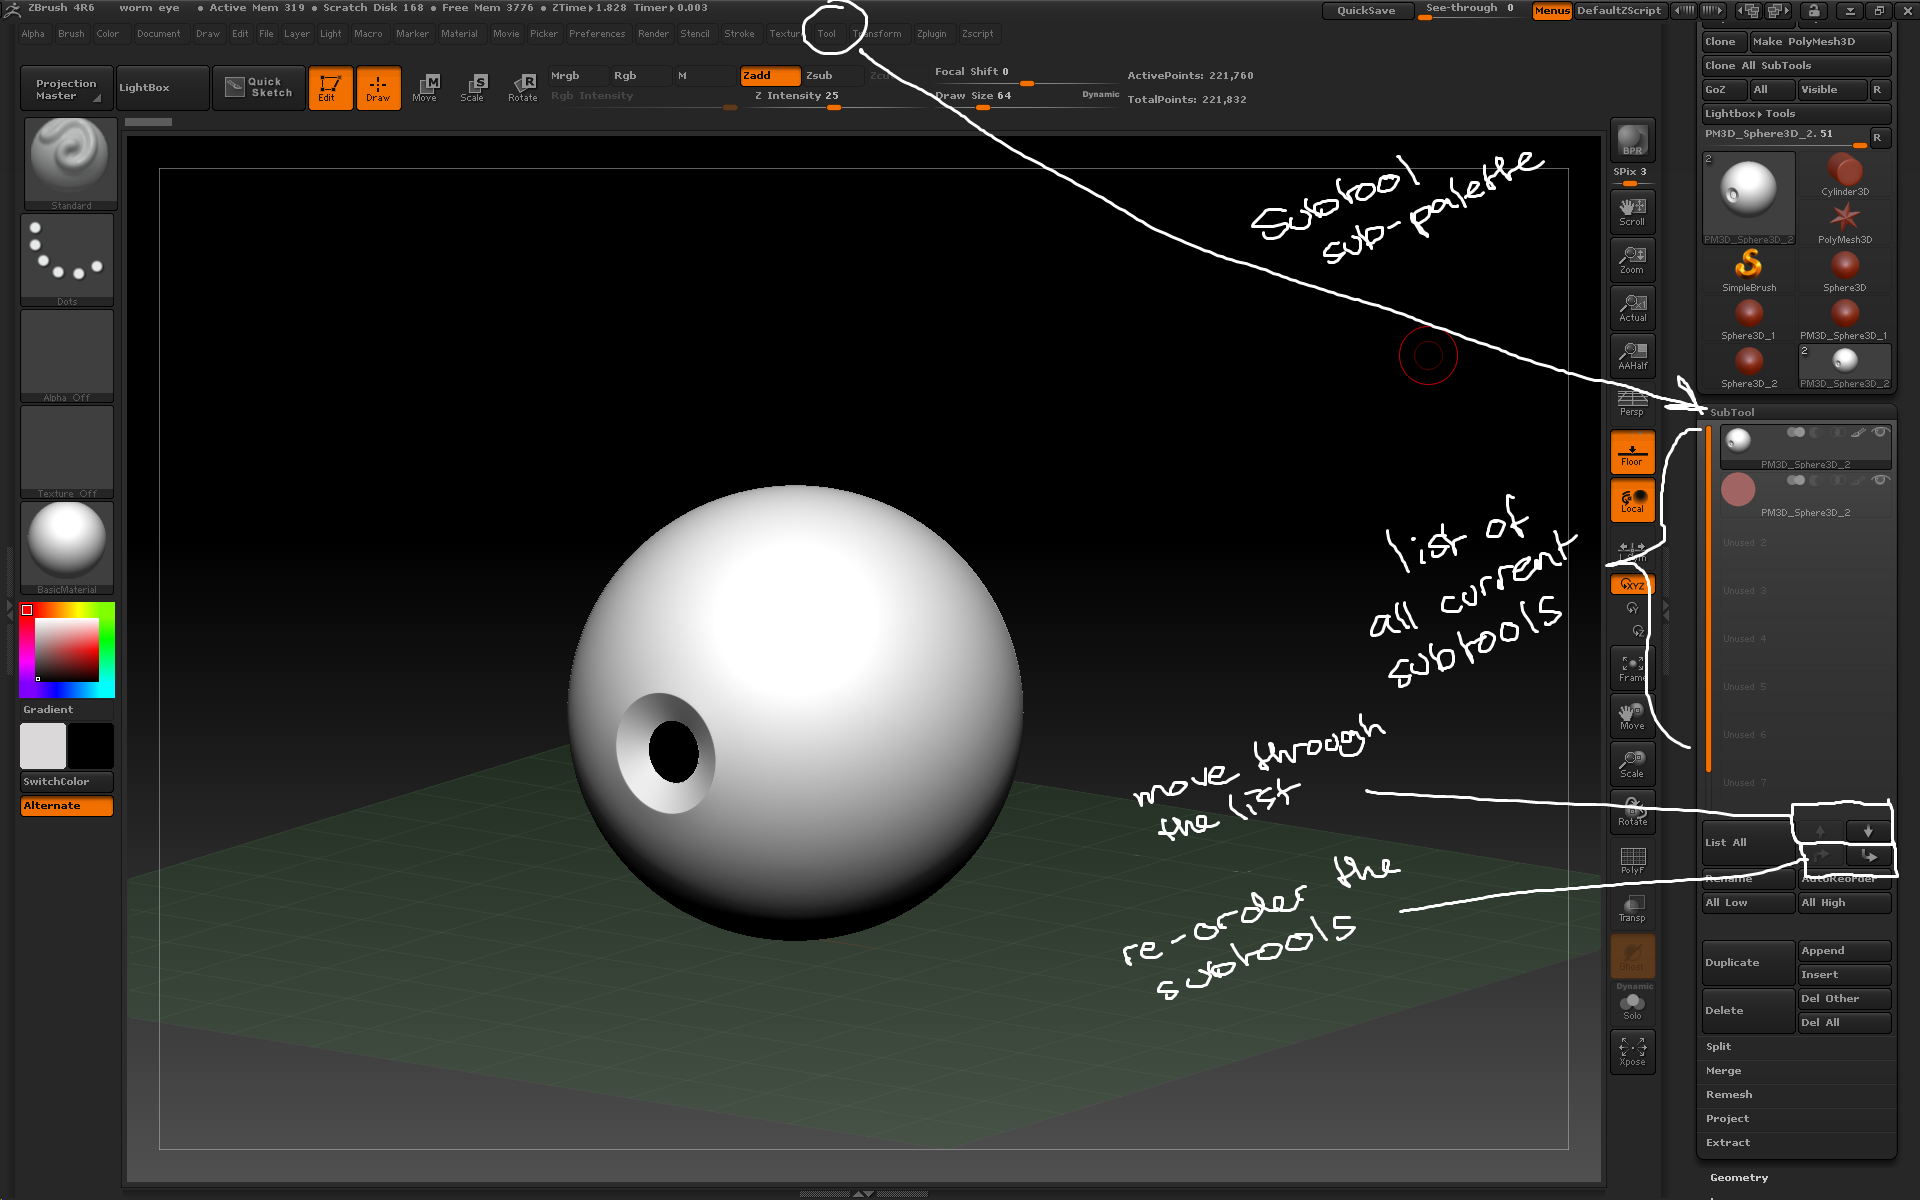
Subtools can be found in the tool palette, and can be navigated and ordered.
– Subtools can be named using the Rename button; make sure to organise subtools in complex models with good names.
– Tool > Subtool > All Low / All High allows you to view all the subtools at their highest or lowest subdivision levels.
– Tool > Subtool > Duplicate creates a new copy of the active subtool in the same position.
– Subtools can be deleted, either with the Delete button which deletes the active subtool or the Del Other which deletes all subtools apart form the active subtool. Neither of these operations can be undone.
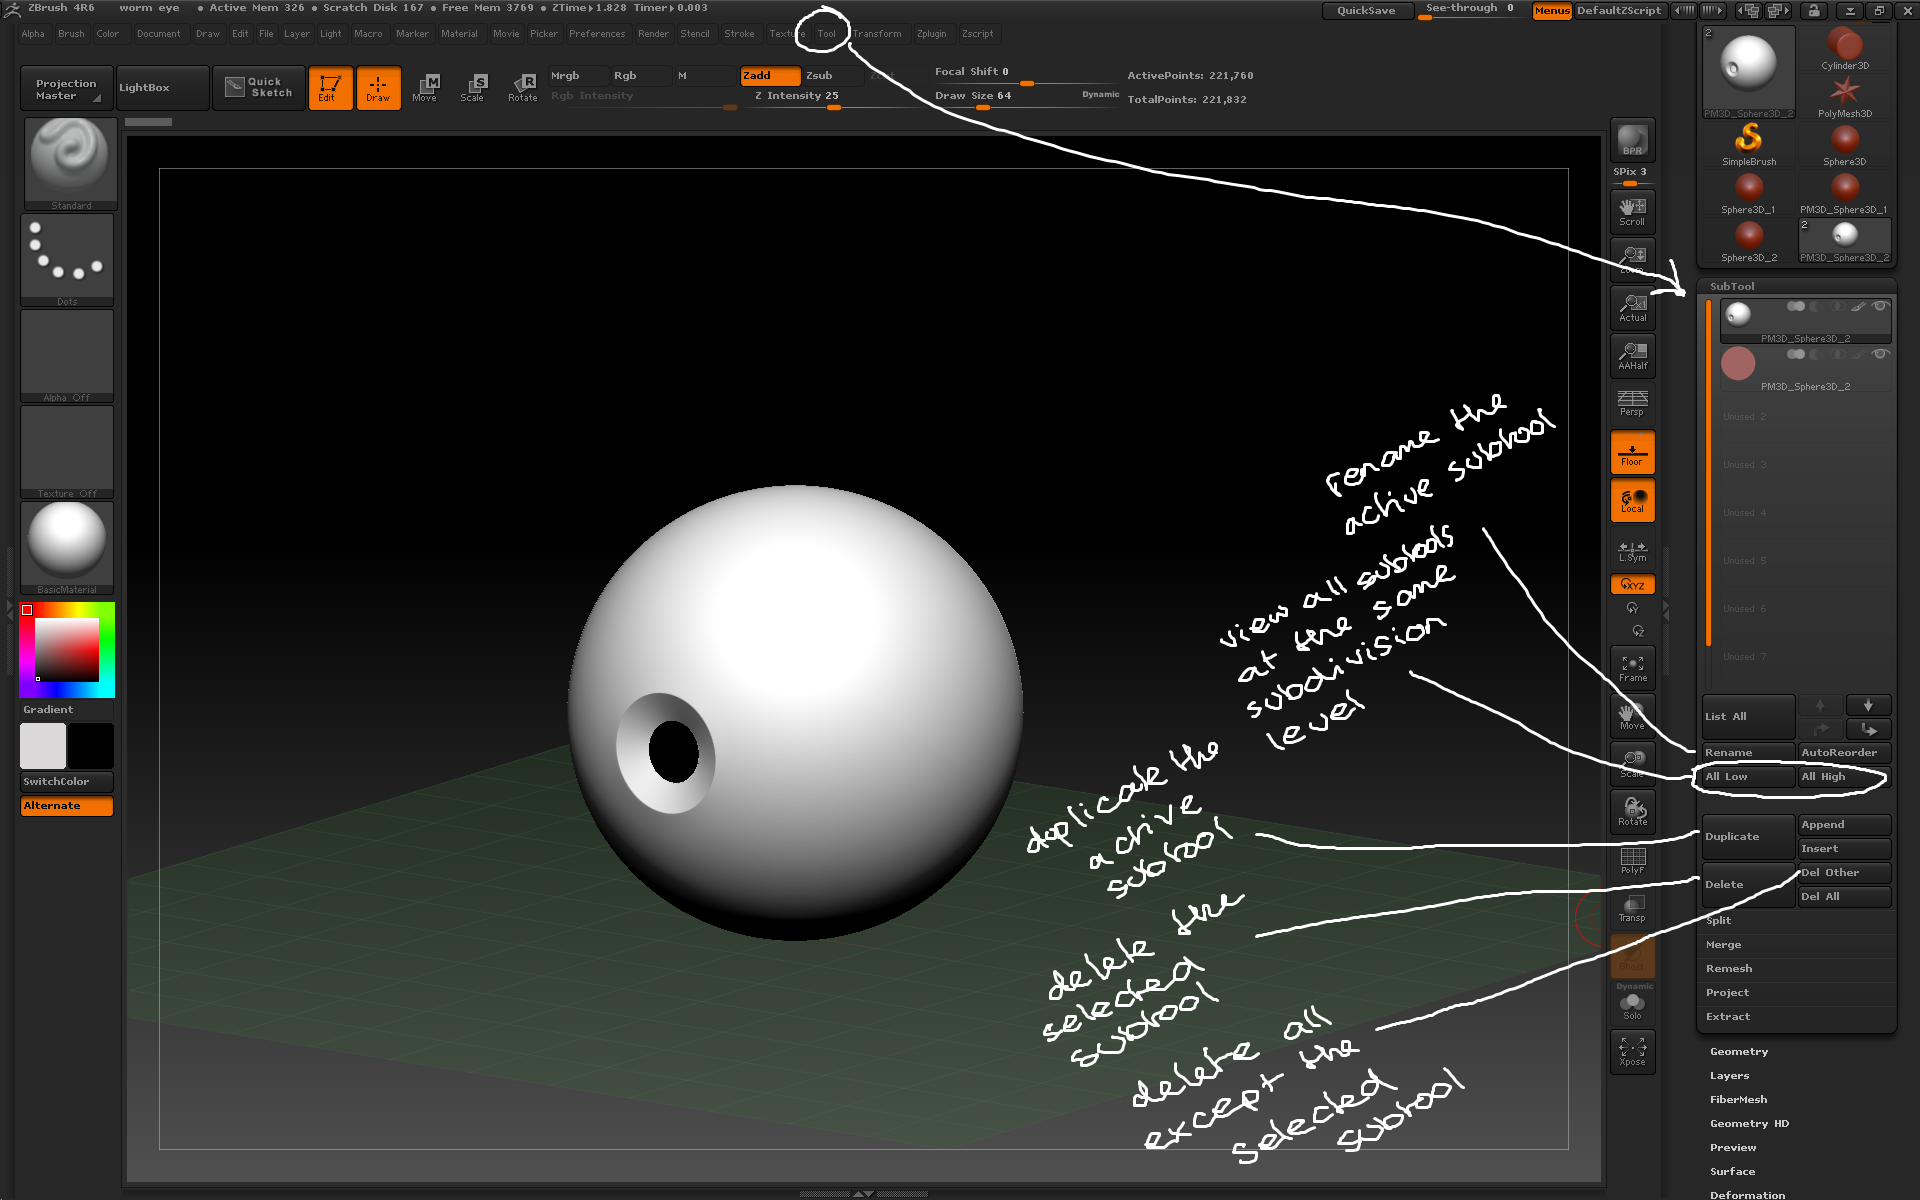
The subtool palette contains options for organising, naming and deleting subtools.
– The Tool > Subtool > Split sub-menu contains options to make new subtools from existing geometry:
– Split to similar parts turns any similar geometry into a new subtool. This is useful when using the InsertMesh brush for example adding lots of bolts to a model.
– Split to parts turns and similar geometry into individual subtools. This is useful for individually modifying instances of a common mesh eg teeth.
– Splitting a model into multiple subtools allows you to get a much higher polygon count on the overall model as each subtool has its own subdivision levels.
– Subtools can also be merged using the Tool > Subtool > Merge sub-menu. This operation cannot be undone so use with caution!
– Tools can be added in as new subtools on an existing model using Tool > Subtool > Append. 3D models can be imported in first using Tool > Import.

Other tools can be added to a model as subtools using the append button.
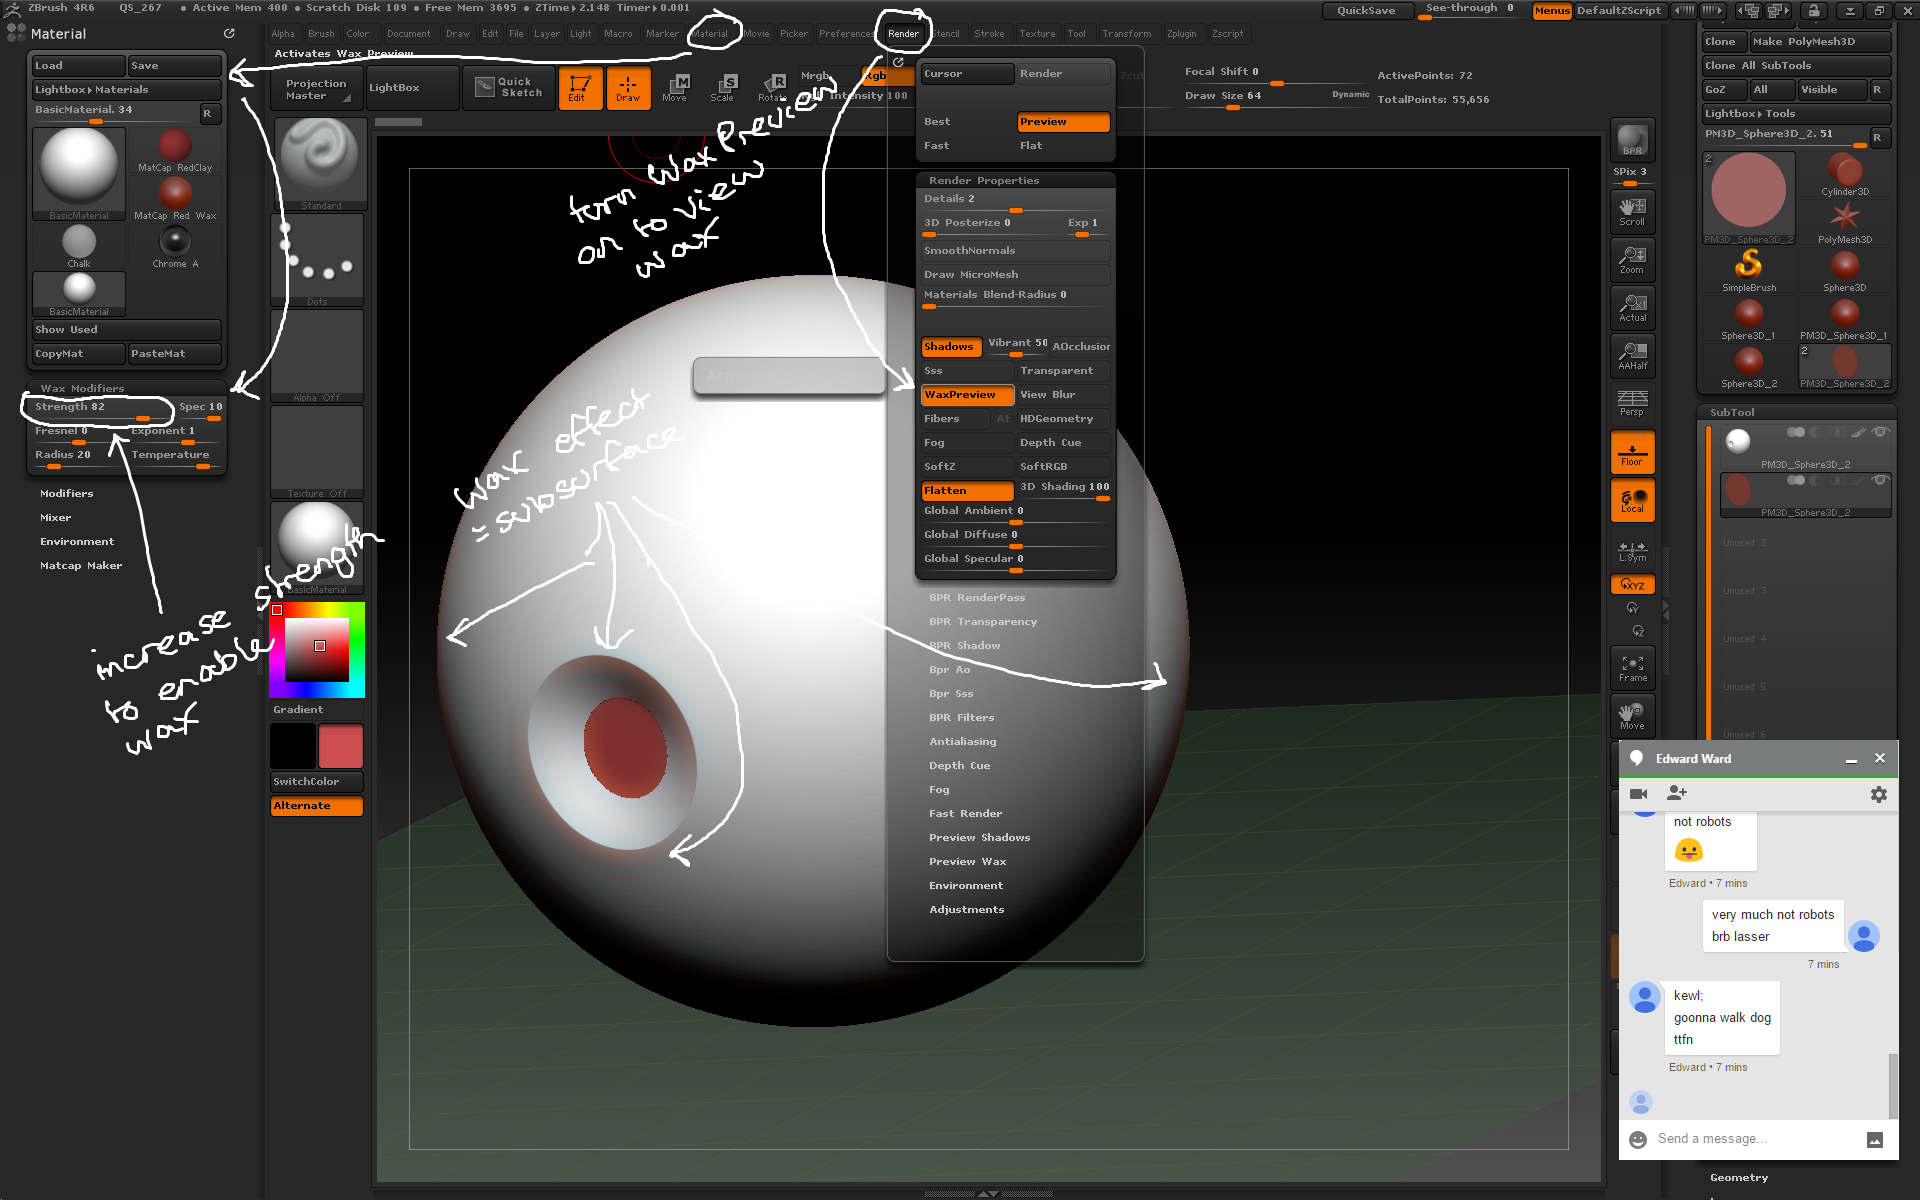
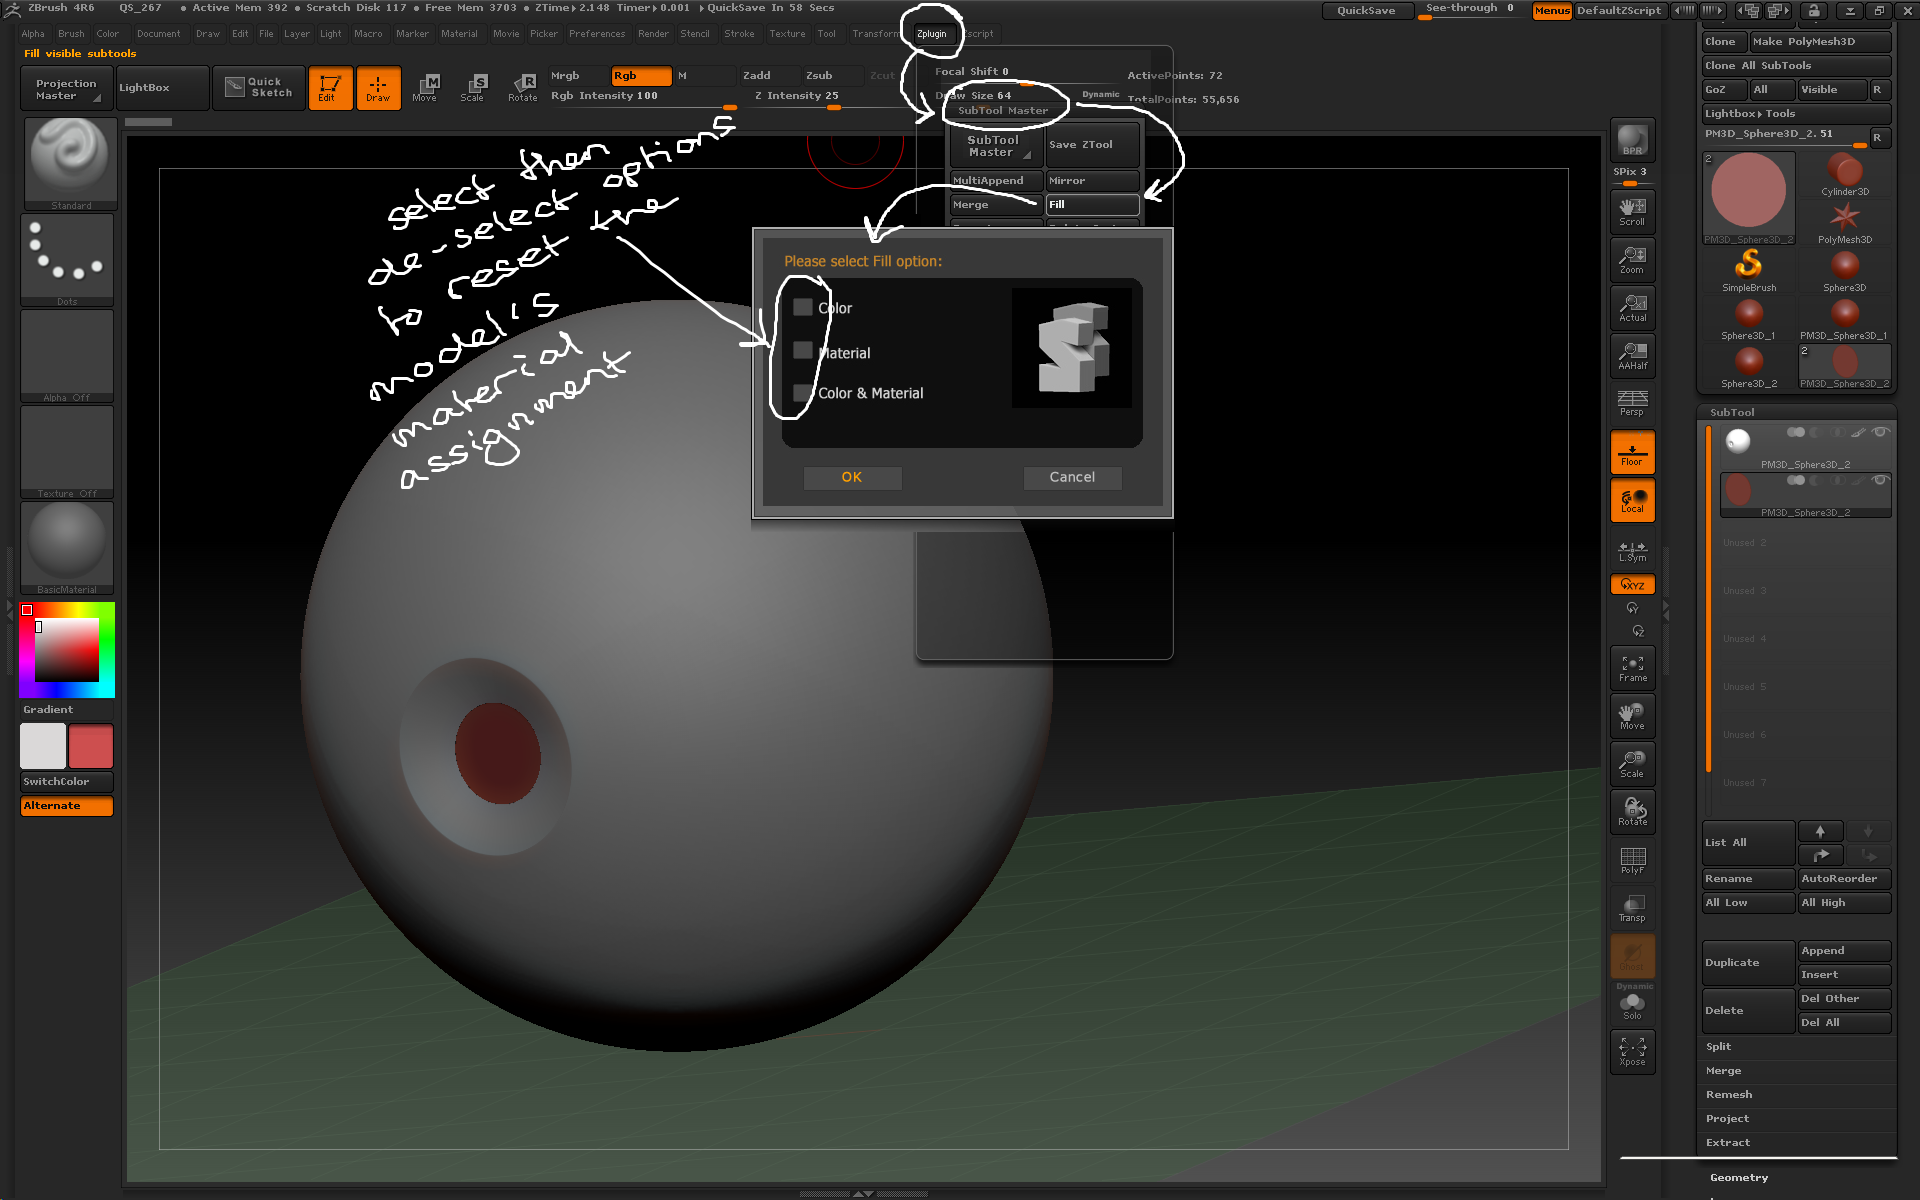
– the Zplugin Subtool Master features many options for manipulating subtools. Mirror allows for mirroring and duplicating a subtool over the X, Y or Z axis. SUbtools may be appended as new subtools or part of an existing subtool.
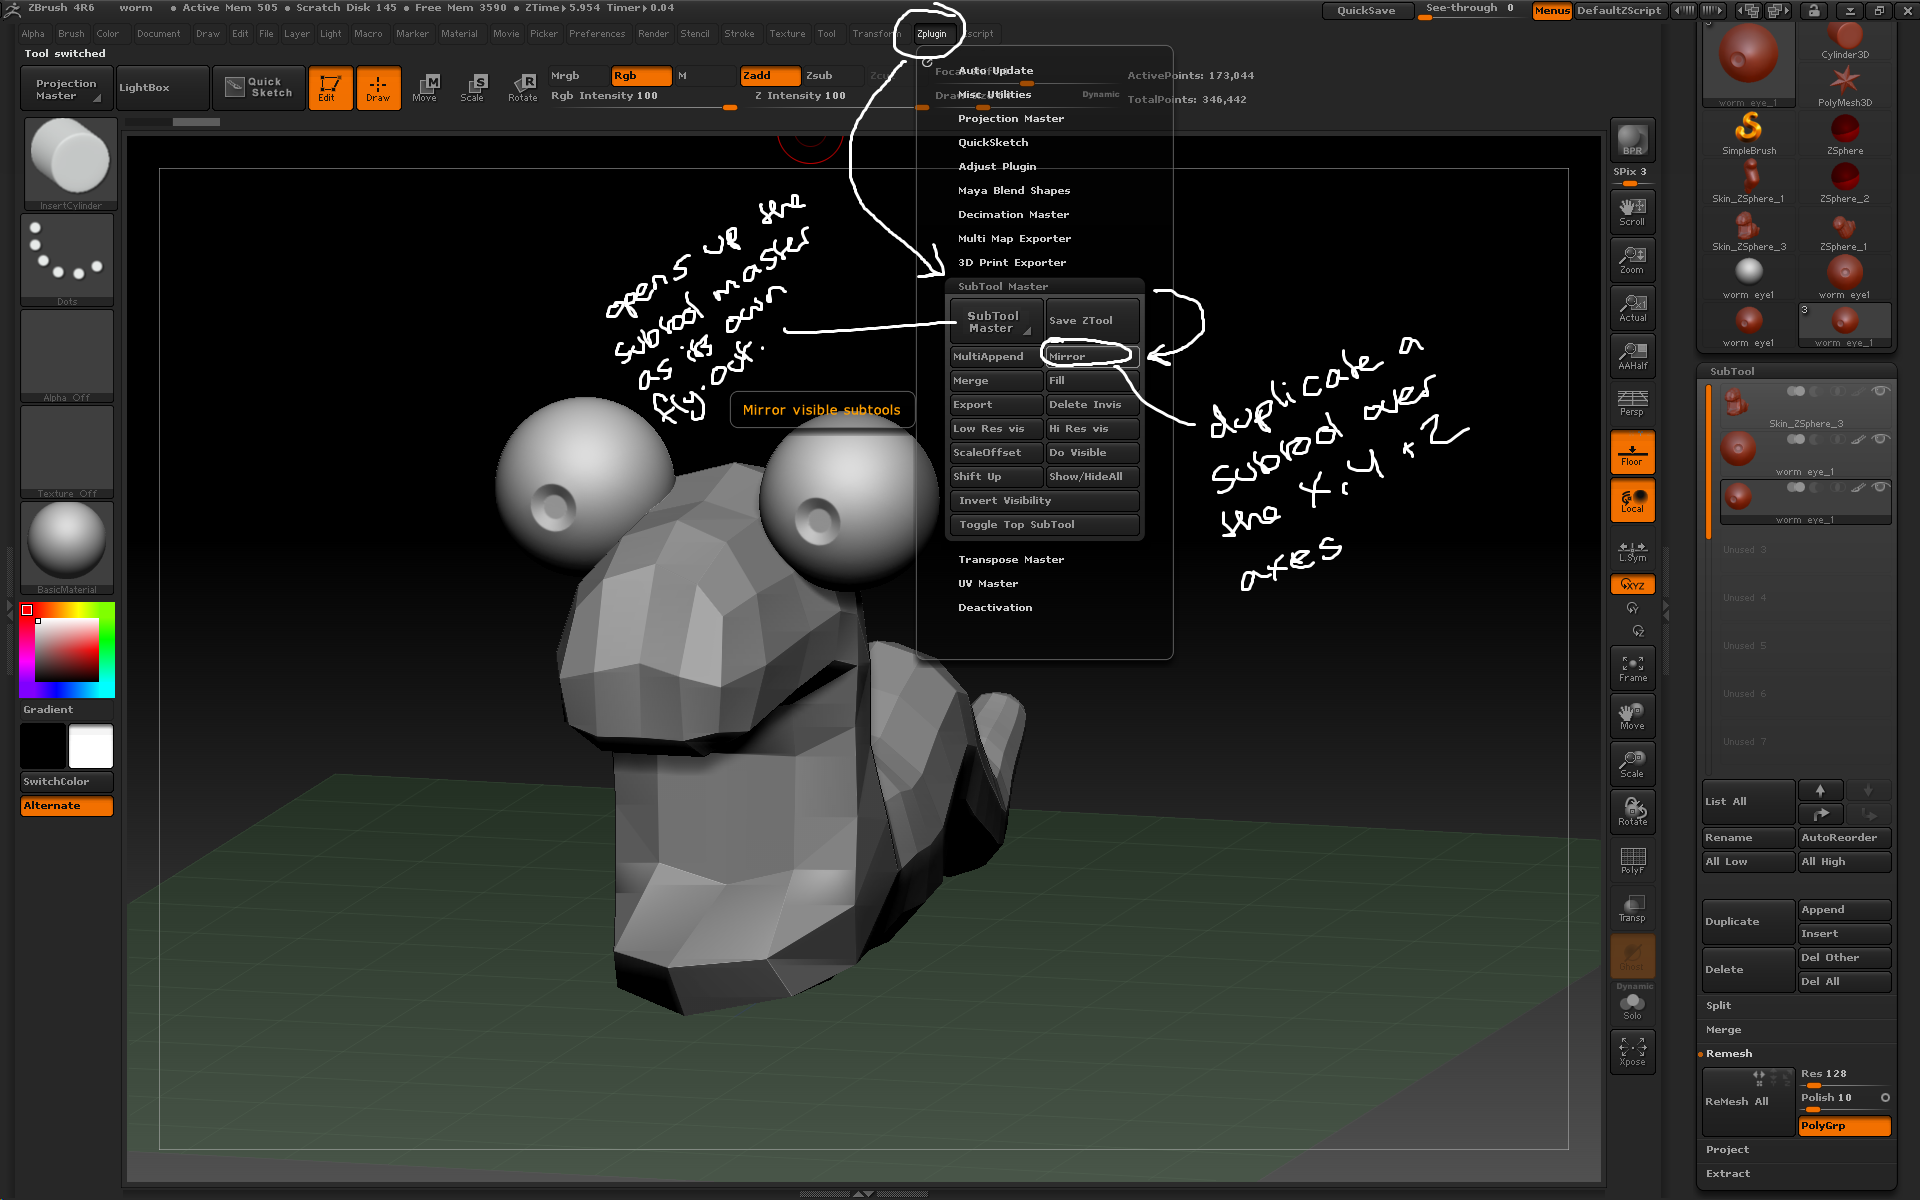
Subtools can be mirrored using the subtool master, which also contains other options for manipulating subtools.
–Subtool visibility can be manipulated using the eye icon in the subtool menu; turning the eye off means only the active subtool will be visible. Other subtools can then be switched on and off using the eye on that subtool. Alternatively, Transform > Solo also achieves this function.

Subtool visibility can be modified in the subtool menu pr by using the solo mode
– Alt + LMB on a subtool on the canvas to instantly switch to that subtool.