Day 9

Introduction to Zbrush Digital Tutors

Using Panel Loops

– Panel Loops can be used in conjunction with Planes to create structured 3D geometry easily, eg teeth, capes, walls. A 2D plane is used to create the form with limited geometry then converted to a 3D solid.

– eg to create teeth: draw a plane3D then use the Initialize sliders to create the amount of geometry required for the model to be made.
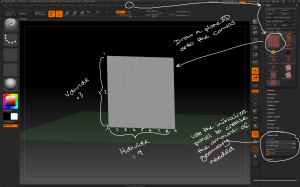
Use the plane3D tool and initialize sliders  to create the base geometry for creating structured objects.

Use the plane3D tool and initialize sliders to create the base geometry for creating structured objects.

Make PolyMesh3D then append the plane to the model it will be part of. Use the move brush to adjust the position of the geometry. Using as few polygons as possible will make the process easier.

Append the plane3D to the model and use the sculpting tools to create the form.

Append the plane3D to the model and use the sculpting tools to create the form.

– Once the geometry is positioned convert each polygon to a separate object; use the Tool > Polygroups > Group By Normals button with the MaxAngle slider set low then convert each polygon to a separate polygroup.
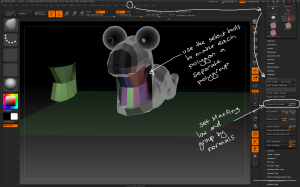
Use the group by normals button and the selection tools to separate each polygon into its own polygroup ready for separating.

Use the group by normals button and the selection tools to separate each polygon into its own polygroup ready for separating.

– Use the Tool > Geometry > EdgeLoop > Panel Loops button to extrude 3D geometry from the plane with the following considerations:

– the Thickness slider determines how thick the 3D geometry is created

– the Polish slider determines how crisp the 3D geometry is

– the Double button extrudes the geometry in both directions

– the Loops slider determines how many loops of polygons there are in the new geometry

– the Bevel slider determines how bevelled the edges of the top and bottom of the new geometry are

– the Elevation slider determines where the origin of the extruded geometry starts, eg elevation = 0 extrudes the geometry equally from either side of the source polygon.
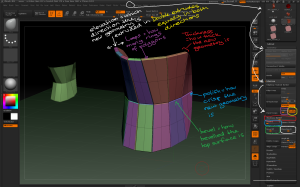
Use the different panel loop settings to vary how the new geometry is created from the source polygons.

Use the different panel loop settings to vary how the new geometry is created from the source polygons.

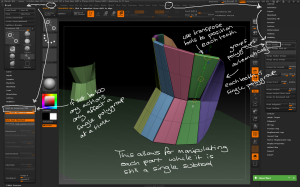
– To modify each tooth individually, use the Tool > Polygroups > Auto Groups button to make each tooth a single polygroup, then use the Brush > Auto Masking > Mask By Polygroups slider set to 100 to ensure any actions only affect a single polygroup. This allows for individual sculpting while the teeth remain a single subtool.
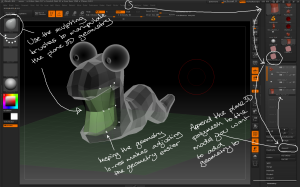
By grouping polygroups and using the auto masking slider you can manipulate individual parts of a model quickly without needing to mask parts.

By grouping polygroups and using the auto masking slider you can manipulate individual parts of a model quickly without needing to mask parts.

Day 8

Introduction to Zbrush Digital Tutors

Remeshing Geometry

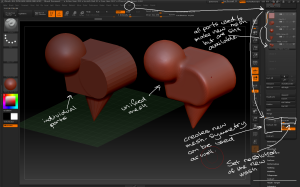
– Zbrush contains tools for creating a new unified mesh from individual parts. Tool > Subtool > Remesh > Remesh all creates a new mesh from everything in the current subtool. Symmetry options can be used to make symmetrical models from asymmetrical subtools.

Subtool > Remesh all can be used to create a single  mesh form a group of objects.

Subtool > Remesh all can be used to create a single mesh form a group of objects.

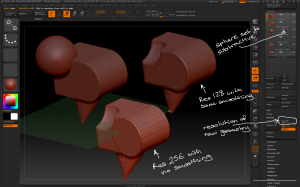
– Objects within the subtool can be set as additive or subtractive objects for boolean operations.

– The Res slider under Remesh determines the resolution of the new geometry.

Subtools can be used to add or subtract from the new mesh.

Subtools can be used to add or subtract from the new mesh.

– Tool > Geometry > ZRemesher contains tools for changing the resolution of a mesh or improving the flow of polygons in the geometry, for example making sure the polygon flow on a face follows muscle groups.

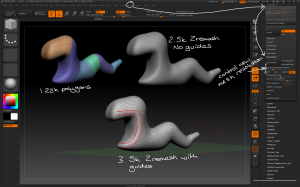
– ZRemesher > Target Polygons Count determines how many thousand polygons are in the new mesh. Press ZRemesher to complete the action.

– Use the ZRemesherGuides Brush from the brush palette to lay guidelines for the new mesh. Use the Zremesher > Curve Strength slider to determine how closely the guidelines are followed.

Zremesher can be used to change the resolution and polygon flow of a mesh.

Zremesher can be used to change the resolution and polygon flow of a mesh.

Day 7

Introduction to Zbrush Digital Tutors

Mesh Creation Dynamesh

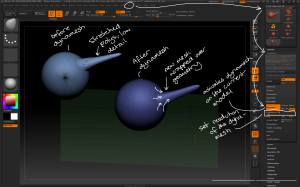
– Dynamesh is a way of modelling that protects the geometry from the stretching effect making large scale changes to a model can have.

– To enable dynamesh have an active tool and go to Tool > Geometry > Dynamesh.

– When dynamesh is enabled, at any time during sculpting Ctrl + Drag off the model and the geometry will be recalculated to give an optimal mesh.

Dynamesh allows for re-skinning a model with a new, optimised mesh at any time using Ctrl + drag.

Dynamesh allows for re-skinning a model with a new, optimised mesh at any time using Ctrl + drag.

– depending on the severity of the distorted polygons, the model may need smoothing after dynameshing.

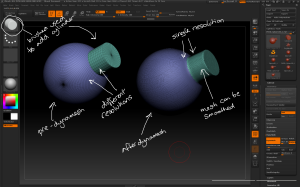
– dynamesh can be used in conjunction with InsertMesh brushes by creating a single unified skin after the new mesh is inserted.

Dynamesh can be used with the InsertMesh brushes to unify a model.

Dynamesh can be used with the InsertMesh brushes to unify a model.

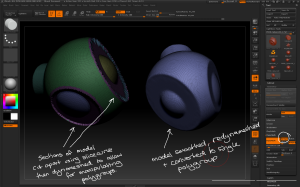
– Tool > Geometry >Dynamesh > Groups makes the dynamesh tool work by polygroups. If a mesh is split into separate polygroups then dynameshed each group can be moved and manipulated separately, before dynameshing the whole model once more.

Dynamesh used with groups active splits the model by polygroup when dynameshed, allowing for chunks of model to be manipulated before skinning the whole model once more.

Dynamesh used with groups active splits the model by polygroup when dynameshed, allowing for chunks of model to be manipulated before skinning the whole model once more.

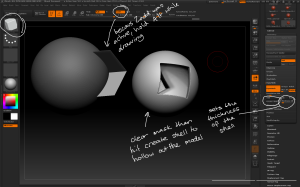
– Tool > Geometry > Dynamesh > Create Shell can be used with a subtractive mesh to create a shell with an opening based on the inserted mesh. To activate it, hold Alt while drawing (or enable ZAdd) the InsertMesh, then click Create Shell. The model will be hollowed out with a thickness determined by the Thickness slider, with the opening cut by the inserted mesh.

Dynamesh can be used in conjunction with subtractive meshes to create hollow shells.

Dynamesh can be used in conjunction with subtractive meshes to create hollow shells.

Day 6 part 2

Introduction to Zbrush Digital Tutors

Working with Subtools

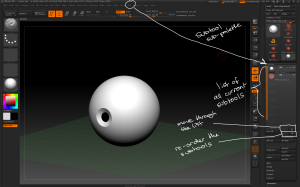
– The Subtool sub-palette is found under the Tool Menu.

– Subtools can be selected from the menu, or navigated through using the selection arrowsSubtools can be re-ordered using the order arrows.

Subtools can be found in the tool palette, and can be navigated and ordered.

Subtools can be found in the tool palette, and can be navigated and ordered.

– Subtools can be named using the Rename button; make sure to organise subtools in complex models with good names.

– Tool > Subtool > All Low / All High allows you to view all the subtools at their highest or lowest subdivision levels.

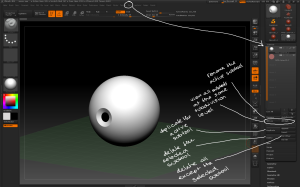
Tool > Subtool > Duplicate creates a new copy of the active subtool in the same position.

– Subtools can be deleted, either with the Delete button which deletes the active subtool or the Del Other which deletes all subtools apart form the active subtool. Neither of these operations can be undone.

The subtool palette contains options for organising, naming and deleting subtools.

The subtool palette contains options for organising, naming and deleting subtools.

– The Tool > Subtool > Split sub-menu contains options to make new subtools from existing geometry:

– Split to similar parts turns any similar geometry into a new subtool. This is useful when using the InsertMesh brush for example adding lots of bolts to a model.

– Split to parts turns and similar geometry into individual subtools. This is useful for individually modifying instances of a common mesh eg teeth.

– Splitting a model into multiple subtools allows you to get a much higher polygon count on the overall model as each subtool has its own subdivision levels.

Subtools can also be merged using the Tool > Subtool > Merge sub-menu. This operation cannot be undone so use with caution!

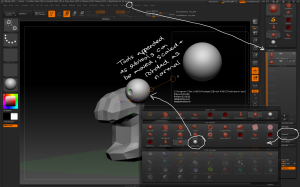
– Tools can be added in as new subtools on an existing model using Tool > Subtool > Append. 3D models can be imported in first using Tool > Import.

Other tools can be added to a model as subtools using the append button.

Other tools can be added to a model as subtools using the append button.

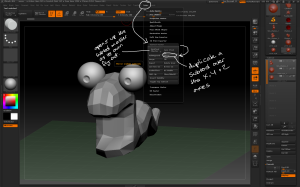
– the Zplugin Subtool Master features many options for manipulating subtools. Mirror allows for mirroring and duplicatingsubtool over the X, Y or Z axis. SUbtools may be appended as new subtools or part of an existing subtool.

Subtools can be mirrored using the subtool master, which also contains other options for manipulating subtools.

Subtools can be mirrored using the subtool master, which also contains other options for manipulating subtools.

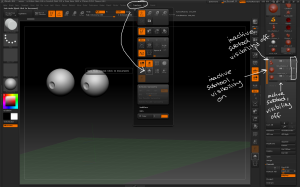
Subtool visibility can be manipulated using the eye icon in the subtool menu; turning the eye off means only the active subtool will be visible. Other subtools can then be switched on and off using the eye on that subtool.  Alternatively, Transform > Solo also achieves this function.

Subtool visibility can be modified in the subtool menu pr by using the solo mode

Subtool visibility can be modified in the subtool menu pr by using the solo mode

– Alt + LMB on a subtool on the canvas to instantly switch to that subtool.

Day 5 part 3

Introduction to Zbrush Digital Tutors

Using Textures

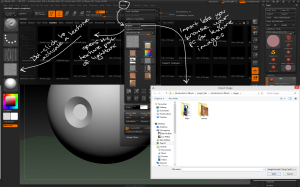
– the Texture menu contains ways to bring new textures into the project; Import allows you to load textures from the computer while Lightbox > Texture lets you pick textures that are already in LightboxDouble-click to make a texture the active one.

Importing textures

Use the texture menu to import texture files from your pc or lightbox.

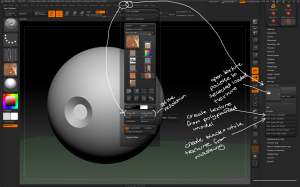
– To apply a texture to a model a texture map must be created, and there are several ways to do that using the Tool and Texture menus:

– Texture has settings to define the resolution of a new texture map.

– Tool > Texture Map allows you to create a new texture map for each subtoolTexture maps can be created from polypainting, masking or UV groups.

The tool and texture menus contain several ways to create new texture maps.

The tool and texture menus contain several ways to create new texture maps.

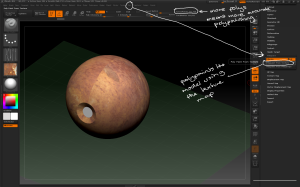
– Tool > Polypaint > Polypaint from Texture applies polypainting to the model based on the texture map. The higher the subdivision level the more accurately the polypainting will be applied.

a model can be polypainted from an applied texture map.

a model can be polypainted from an applied texture map.

– once polypainted the texture can be cleaned up on the model, hiding any seams or modifying to create a new texture map that is better suited to the 3D model.

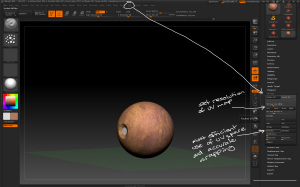
– If you now try to recreate a texture map from the new polypainting it won’t work if the model doesn’t have a UV map applied. To create a UV map go to the lowest subdivision level then go to Tool > UV Map where you can set the size of the new UV map and choose how it’s created. PUVTiles is the most accurate method.

To create a texture map form polypainting the model needs a UV map.

To create a texture map form polypainting the model needs a UV map.

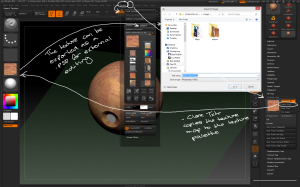
– Tool > Texture Map > Clone Txtr copies the texture map to the texture palette where it can be painted with or exported using Texture > Export.

Texture maps can be exported as PSDs for editing in photoshop.

Texture maps can be exported as PSDs for editing in photoshop.

– Dragrect brush with a texture can be used for eg adding stickers and decals to a model.